
Um… February, still dark mornings/evenings. I’m not up for attempting a large project quite yet. So, I’m working on using up some scraps.

I’m thinking scrappy strips.
A quick delve in my scrap bag for some greens. I’m thinking my little project will look good if I keep to one colour family.

I’m cutting strips 2″ wide by at least 10″ long.
Six strips should be enough me thinks.
Arrange them in a pleasing order. And stitch together.

Press all seams in one direction.
Cut approximate 10″ Square of one of the strip fabrics for the backing.
And
A 10″ Square of heat resistant wadding.

I’m using Freezer paper to make an iron-on template.

I draw a circle approximately 8″ onto a piece of Freezer paper.
I used my sewing bin – not exactly 8″but near enough.

Folding freezer paper circle in half and resting my wrist on the freezer paper about 1″ down, I draw a little arc.
Cut out on drawn line.
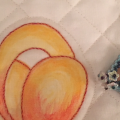
This will give me an Apple(ish) template.

For a more Cherry or Heart (ish) template. I would start drawing arc about 2″ down on the folded circle.
I Iron freezer paper template onto WRONG SIDE OF BACKING FABRIC .
Then draw around this shape.

I don’t draw a solid line – the pen/pencil will drag the fabric. It is far better to draw a dashed line. I mark a place to start and stop stitching leaving a 2-3″ gap for turning through.
Next I layer it up.

On the bottom wadding, then my stripey top placed RIGHT SIDE UP.
And finally my backing fabric WRONG SIDE UP.
I’m putting a little hanging loop in at this point.
A little piece of ribbon is ideal for this.
I simply cut a 6″ piece of ribbon. Fold in half lengthways and insert inbetween the top and backing.

And pin in place.

Next I stitch on drawn line. Remembering to leave a gap for turning through.


I cut a scant quarter inch from stitching all around except by the opening. Cutting the wadding there quite close to stitching but cutting the fabric a generous quarter inch.
This makes it easier for me to tuck the fabric back into the opening once i have turned my work through to the right side.

My favourite weapon for turning through and smoothing out the edges is a chop-stick.

Next I press it.


With my quarter inch foot I topstitch along edge, top stitching the opening closed as I go.
Now it just needs a little Quilting.

This a a chance for me to play with a few fancy stitches on my sewing machine.
It’s best if I use cotton threads due to the heat.
Now the un-initiated may call this a Pot Holder but I prefer Funky Kitchen Aid.

Enjoy the journey and have fun.
Joy x


What a cute pattern, well done!