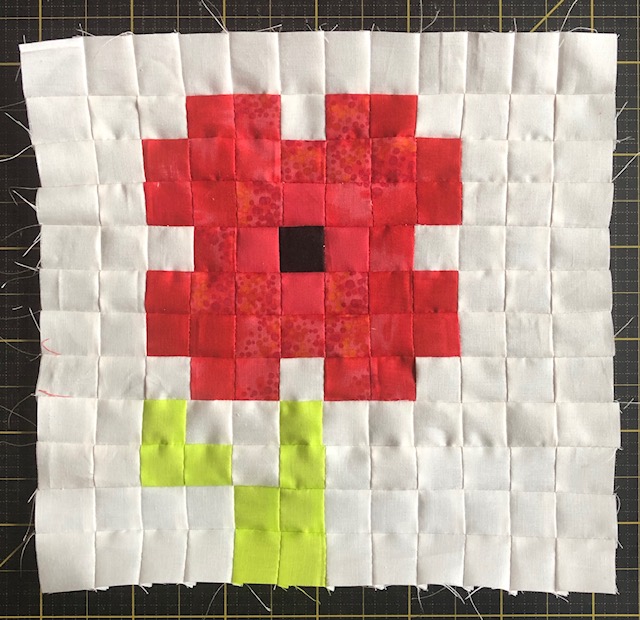
The Poppy has been a symbol of remembrance, to those who served and lost their lives fighting for their countries, since 1920 and it is particularly important to me as my Great-Granddad Bill was one of those soldiers. Thankfully I had many years with him, but others were not so lucky and so I chose the Poppy for this special reason.
I used a variety of scraps for my block, but you can find more specific fabric requirements in my pattern. The first thing I did was to cut all the squares and lay them out on my cutting board next to my sewing machine, in their specific rows so I could see exactly what was going where – I’m a very visual person and I found this helped me a great deal when making sure everything was in the right place.
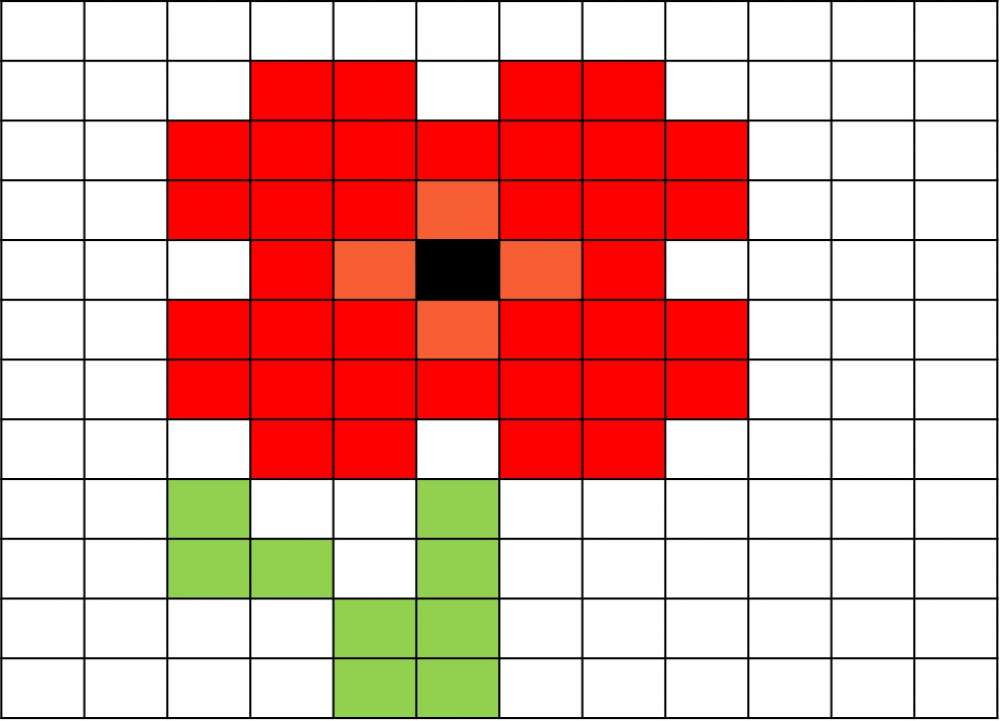
The grid below will help you to do this:
My favourite types of quilt blocks are those that come together quickly, or at least have sections that do so I can start to see results as soon as possible, with that in mind I made this block ‘chain piece’ friendly – my favourite way to put blocks together.
Chain Piecing – a sewing technique that basically works like an assembly line for your quilt/quilt block sections, sewing piece after piece or block after block without cutting your thread in between each set saving both time and thread
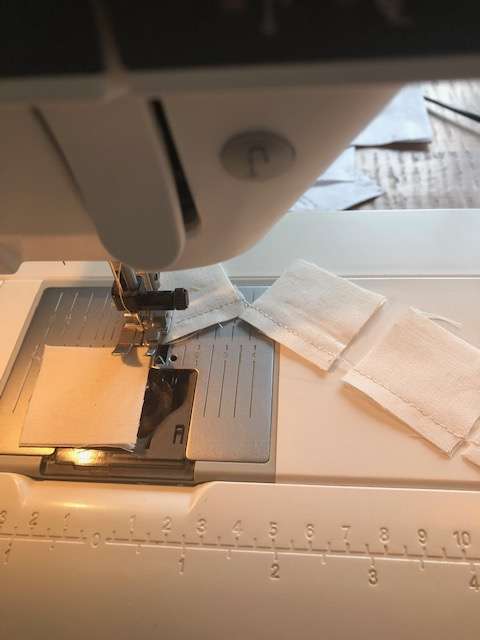
Although I had laid out all my squares for the block, I still only sewed 1 row at a time, this was to make sure I didn’t lose my place within the design. I chain pieced the squares for row 1 into pairs, as there are 12 squares per row I made 6 pairs, cut those apart and carried on chain piecing until the first row was complete. Put that to one side and make row 2 in the same way.
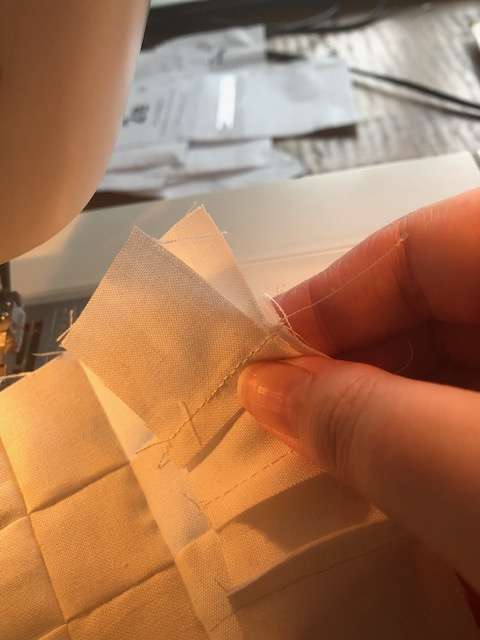
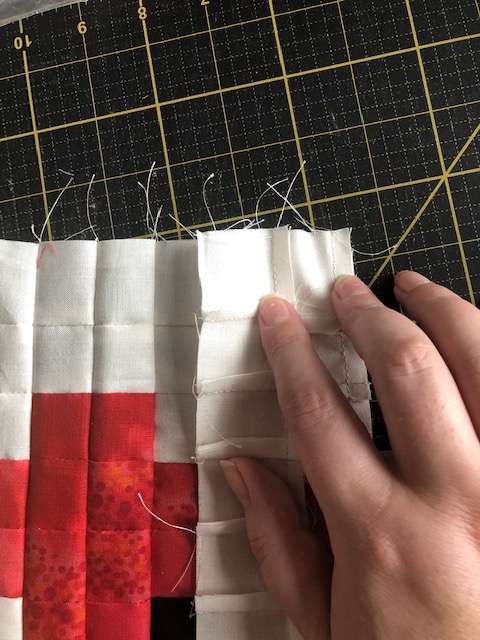
Personally I hate ironing, even if it is for something I love like making quilts, so I just finger press my seams as I go but if you are a ‘presser’ feel free to iron as you go or make all 12 rows and press them at the end. The fun part is putting all the rows together so that you can start to see your own Pixel Poppy emerging, take row 1 and 2 placing them right sides together and sew together. For the best results and perfectly matched points – nest your seams!
Nesting Seams – lay two blocks/sections/rows right sides together, matching up one seam so that it literally ‘nests’ inside the other seam. You will be able to feel the two seams ‘lock’ inside of each other.
I went on to make the remaining 10 rows in the same way, each time adding the row sewn onto the bottom of the block as it grew by making sure the bulk of the block was to my left. Chain piecing certainly made this one come together quickly – including cutting fabric I think it took me around 3 hours but I must confess I didn’t time myself accurately.
Patchwork and Quilting is such a social past time, I have greatly enjoyed being apart of this great group creating unique flower blocks for you all to make and I am really looking forward to making some of the others that have been designed.
You can see more of my quilting adventures on Instagram as @thatssewkerry or on my blog www.thatssewkerry.blogspot.co.uk I would love to see your versions of Pixel Poppy, I hope you enjoy making it.
The pixel poppy block looks fab Kerry. I love the ‘tips’ – learnt something new too about nesting seams. Definitely going to try that.
Thanks so much Carol, I’m really pleased you found it useful!
Such tiny squares, so beautifully stitched!
Thank you very much Maggie
Thank you grat way to this poppy x
Thanks so much Sandra, I’m really pleased you liked it.