The idea of a FIDGET QUILT is to give the hands and fingers something to do. They can also help to stimulate the senses and aid memory recall. Although a fidget quilt is meant for someone living with dementia or Alzheimer’s they can be equally appealing to teenagers, young children and adults alike. Lots of people ‘fiddle’ with their hands or objects unconsciously when they are feeling stressed or anxious about something so these can be a therapeutic, non-medication alternative for anyone.
This blog is intended for anyone thinking of making fidget quilts for personal or charitable use – if you do choose to make and sell these then please check and respect any trading laws that apply.
What do you need to make a Fidget Quilt?
You don’t have to be an expert at sewing and it doesn’t have to be costly to make one. You can use up fabric scraps and left over bit and bobs from your sewing and accessories stash too.
Texture is important so don’t be afraid to mix different fabrics. As long as they hold up to a reasonably hot wash, any fabric will do.
Fabric can include cotton, silk, faux fur, brocade, velvet, fleece, towelling, denim, corduroy, linen, mesh, etc.
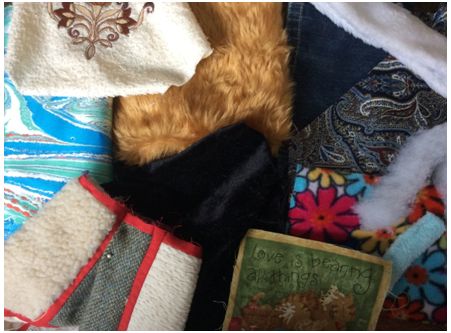
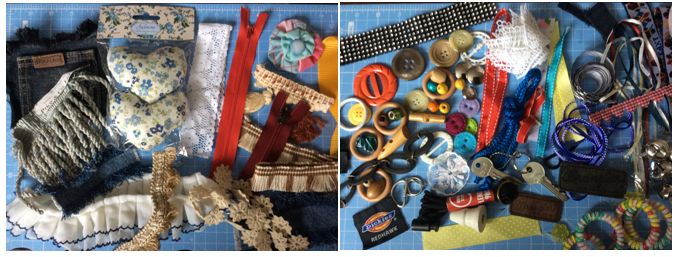
Apart from an assortment of fabrics you can use a wide range of ‘fiddle’ attachments to create your quilt. So before you throw out those old jeans, coats, handbags, sports plastic bags with cord handles, ties, bows and ribbons from chocolate boxes etc. just think about how they can be reused.
You can use buttons, beads, toggles, old keys, lace, fringing, tassels, ribbon, cord, braid, bows, Velcro, zips, pockets and labels (from jeans and other clothes) curtain rings, washers, bells, squeakers, D-rings, clips, buckles, plastic bracelets, bracelet charms, old ties, small stuffed toys … the list is endless.
Planning and Design
Any size or shape is okay but I would suggest that it is no bigger than 12” x 18”. Choose your fabrics and colours. You don’t have to follow any colour scheme – or theme, just try what suits you. The only thing you may want to consider is whether you are making a quilt for a male or female as this might influence your fabric pattern choice and fiddle attachments. Even better if you know something about the recipient as you can personalise it with fiddle attachments and fabric that have meaning for that person.
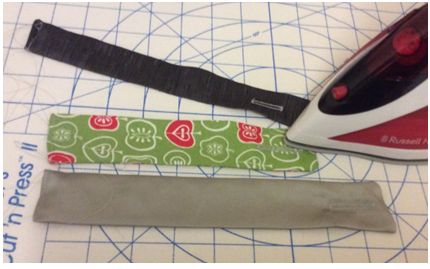
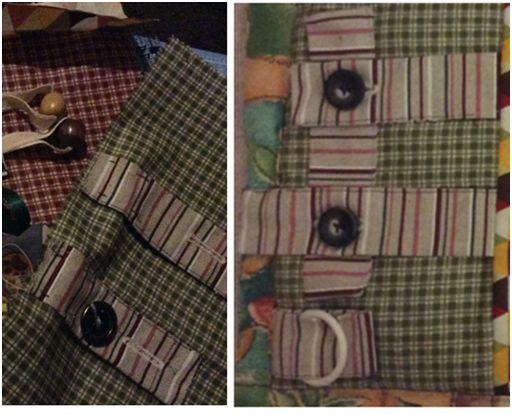
I like to think about the ‘fiddles’ I’m going to include before I actually start constructing the quilt. Sometimes I make some before I start to sew anything else. For this Fidget Quilt I cut several strips of fabric approx 2” wide, folded them in half, ¼ inch machine seam, turned inside out, pressed, made a button hole and pressed again. I usually use big buttons as they are easier to manipulate with the fingers. You can either sew the button to the quilt top or use another strip of the same fabric underneath.
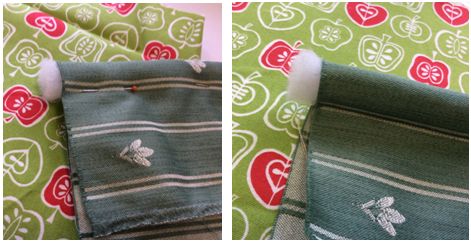
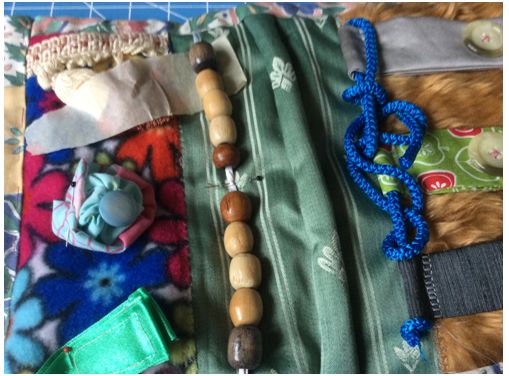
I also made these padded tubes using off-cut pieces of wadding, pinning the fabric around the tube then sewing along the length of the fabric strip (reminds me of stuffed crust on a pizza!)
Gather all your chosen pieces of fabric and fiddles and ‘design’ the layout of your quilt top.
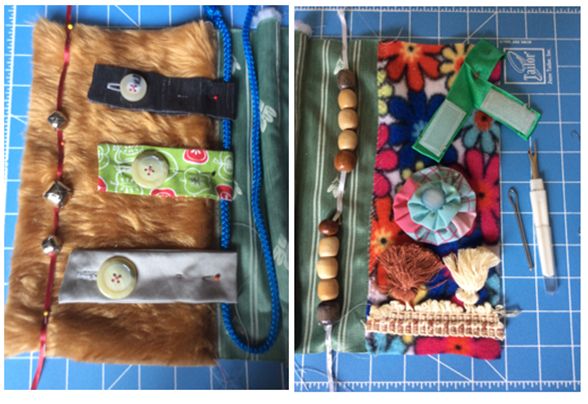
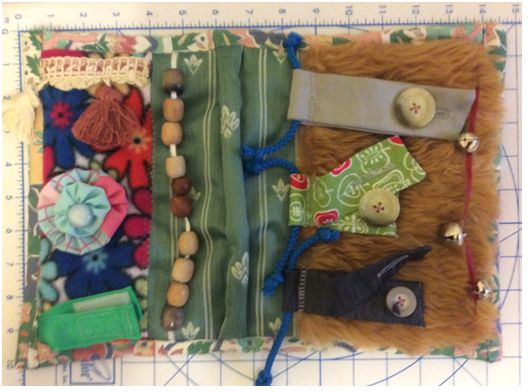
Before you sew each piece of fabric together decide if you want to sew some of your fiddle attachments along the seam edges for a neater finish. In the picture below I pinned the button ‘flaps’ to the edge of the material sandwiching them between another piece of fabric before stitching.
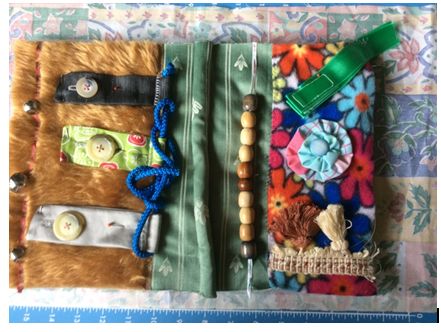
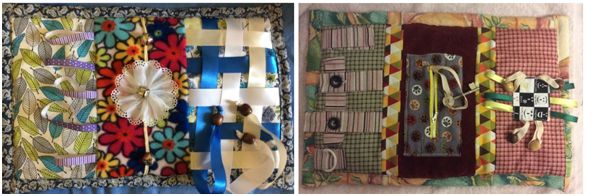
When you are happy with your design start constructing your quilt top by sewing the fabric and fiddles together. Here are some examples of fiddle attachments you can try.
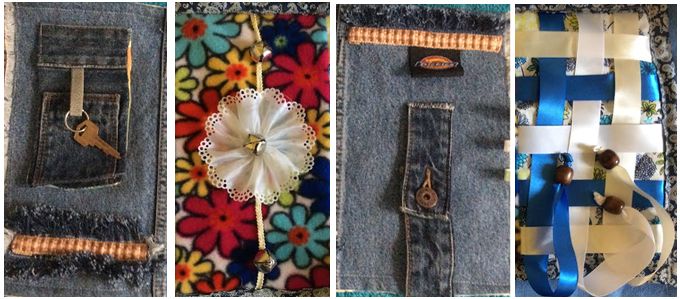
I have used pockets from old pairs of jeans, jeans waist band with the button and buttonhole, strips of frayed denim with braid sewn across, a flower made out lace (gathered into a circle with a jingle bell in the middle and ribbon weave. Zips that form a pocket with a key on the end of a ribbon, beaded ribbon patch and ‘padded tubes’ are also shown below.
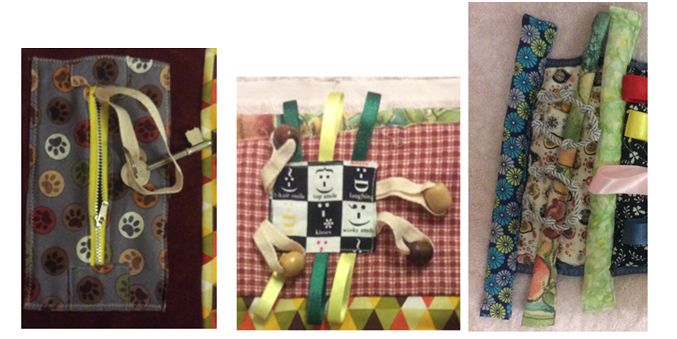
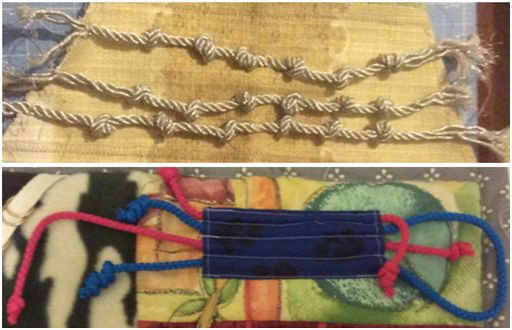
Knotted cord provides good texture or you can simply sew a rectangle of fabric with parallel rows, thread cord through and knot each end so it can be pulled backwards and forwards with ease.
Don’t worry if you piecing and stitching isn’t perfect, as long as the fiddle attachments are firmly stitched and they hold up to being manipulated and washed it should be fine.
Choose your wadding material – I generally use standard wadding or cotton interlining but I have seen some sandwiched with fleece, back with padded/quilted work shirts, simulated sheepskin mattress toppers or thick towelling.
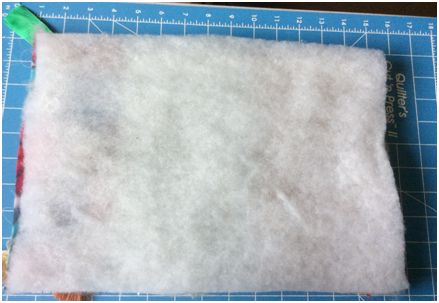
Either pin/clip and/or baste your quilt top and wadding together (spray fabric adhesive works just as well).
Backing your Fidget Quilt
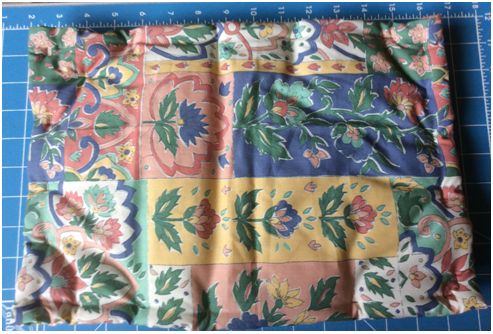
Cut your chosen lining/backing material approx 2 – 2 ½ inches wider than the quilt top and use the fabric overhang as a binding.
Pin down or baste the ‘fiddle’ attachments to avoid them becoming trapped in the seams (sellotape or masking tape can be useful here). Fold the fabric ‘overhang’ towards the right side of the quilt top to create a border.
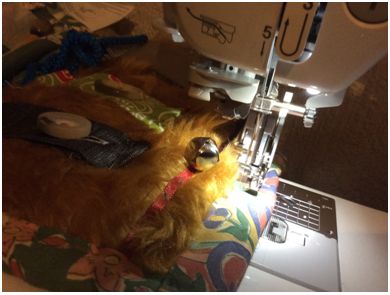
Pin/clip and/or baste ‘binding/edging’ in place and sew at least a ½” from the edge using a Walking Foot (I found using the Walking Foot helped to avoid puckering and sewed more smoothly). Press with an iron.
Alternatively cut 2 pieces of fabric slightly longer than your quilt top, pin right sides together with the overlap of fabric in the middle of the quilt. Stitch around the edges with an approx ½ inch seam using a Walking Foot. Turn right sides out and lightly push out the corners (trim where necessary). Join the centre seam together by hand or machine. Press with an iron. You can also top stitch around the edge if desired.
Here is the finished Fidget Quilt that will shortly be winging its way to a local Residential Care Home.
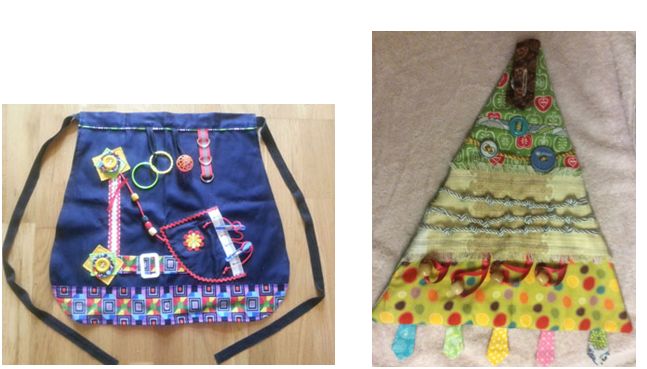
Fidget Quilts are known by lots of different names; busy blankets, sensory blankets, twiddle muffs and memory quilts and many others. They can be personalised for the individual using your knowledge of their favourite memories or activities, male, female, themed. They don’t have to oblong or square in shape – they can be any design you wish. Have fun and experiment with them. If you are feeling adventurous and want to try something different why not have a go at making a fiddle apron or a different shape e.g. triangle, circle, animal shape, vehicle, etc.
If you want some more ideas check out the pdf documents below – if the links below do not work just copy and paste them into your browser. There are lots of images on the internet to give you inspiration too.
National Federation of Women’s Institute
FIDGET-QUILT-for-website-And-members-who-request-via-email.pdf
SAVAHCS (Arizona) Nursing Care Line
1_FidgetApron-and-Instructs.pdf
If you are making Fidget Quilts for charitable groups, donating to hospitals etc. then you might want to check if they specify any particular requirements that might affect whether they would accept them. Some places might not want you to put a pocket on them, some may be shared amongst everyone in the day centre or community group and some might be given to one person for their personal use which they will take home later.
Keep them simple and not too busy, too many fiddles might be overwhelming. Each time I make them I try to do something different with them. I met recently with a young lady at work and had a fidget quilt on my table; she played with it during the whole meeting and it helped her to talk calmly about some difficult things in her life so I’m already planning my next one which I will keep at work for a younger audience.
Why not suggest your sewing or quilting group dedicate a session to making some and donate locally? As well as bringing the group together to share ideas and skills whilst working for a common cause, I’m sure they will provide great enjoyment and relaxation to those receiving their ‘gift’. Get the family involved too – perhaps it will inspire our next generation of quilters!
I hope you enjoy making Fidget Quilts as much as I do. Be warned though, it can be quite a wrench to give them away! (Carol)

Responses