First I would like to thank UKQU: https://ukqu.co.uk/ and https://www.clover-mfg.com/ for giving me the opportunity to review and test the Clover Fabric Tube Maker.
It came through my door three days before I went to the Festival of Quilts show 2022. If you want to check out my mini adventure while at the Festival of Quilts looking for fabric for this product. Please read my Blog: Who needs a reason to shop?
I was not completely sure what the product would do until it arrived, once it arrived I was really excited. Normally I use the items I have to hand, however I was off to the Festival of Quilts so I thought I would just have a browse to see what I could find.
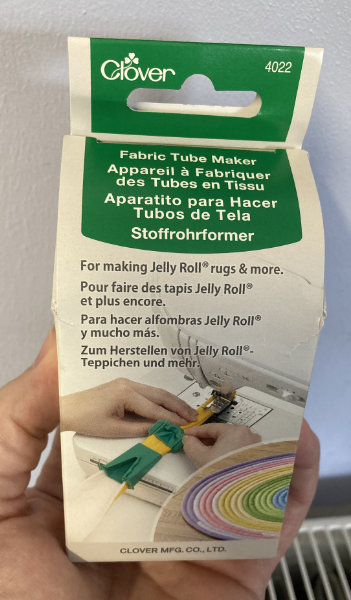
This product is designed to make fabric tubes, which can be used for bags or mats. I have been after a new bathmat and I have not found the right colours or the right price. Now I can make my own bathmat with the colours I want. Until the Clover Fabric Tube Maker arrived I had not considered making mats this way.
The links below are tutorials from the Clover website for projects using the Fabric Tube Maker. Although I am sure you could find more inspiration for things online.
https://www.clover-mfg.com/sites/default/files/project/pdf/IC-S-168_Fabric%20Tube%20Table%20Mat.pdf
https://www.clover-mfg.com/sites/default/files/project/pdf/IC-S-167_Fabric%20Tube%20Basket.pdf
This product will be widely available shortly however; there are a few stockists that already stock it.
So what comes in the box?
In the box you get the instructions written in four languages with black and white images for each step of the process.
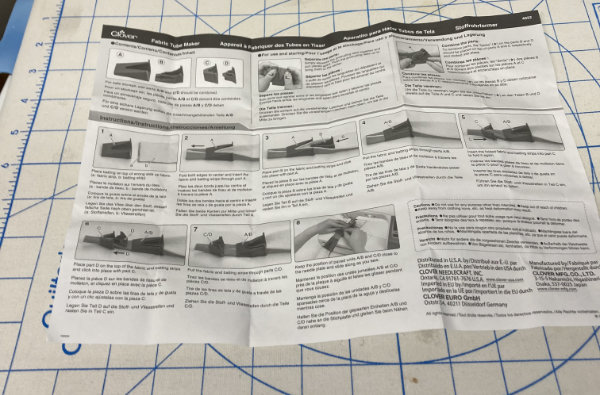
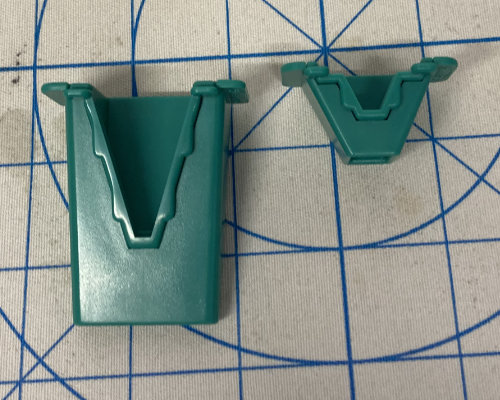
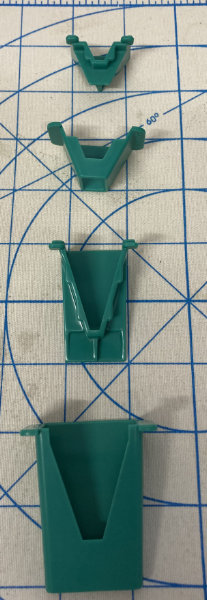
Items come in two sections which you needed to pull apart so that you get four separate pieces; the instructions guide you on how to pull a part. It may be awkward at first as the plastic might be stiff.
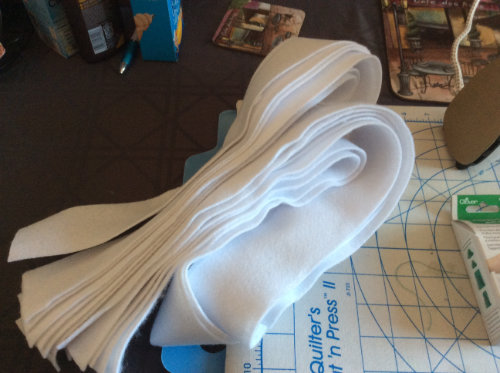
Before you carry on with the next step I would recommend you get your fabric prepared. It tells you on the box what size fabric you can use with this product and recommends a light weight batting if you are cutting the strips yourself. You can use 2.1/4 inch -57mm – or 2.1/5 inch – 64mm – wide strips of fabric.
Let’s get the “ingredients” together to prepare the fabric:
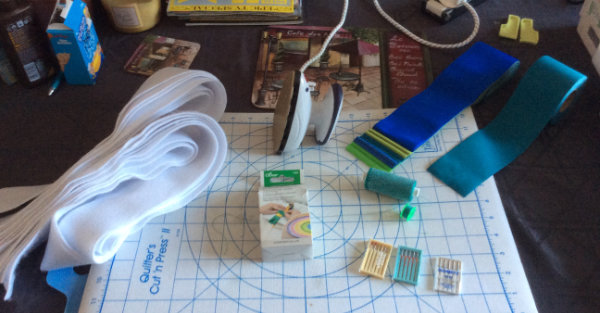
• I have chosen to use jelly strips, pre-cut fabric.
• I cut my own batting into 2.5 inch strips.
• An iron and press pad.
• Cotton and matching bobbin.

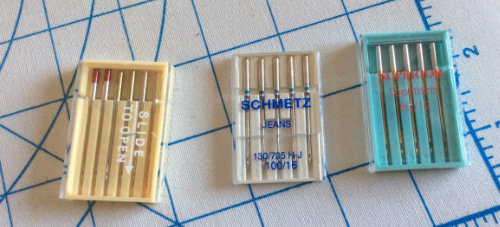
• Because of the bulk of fabric and batting, I am using a jean needle. However, top stitch needles could work as well.
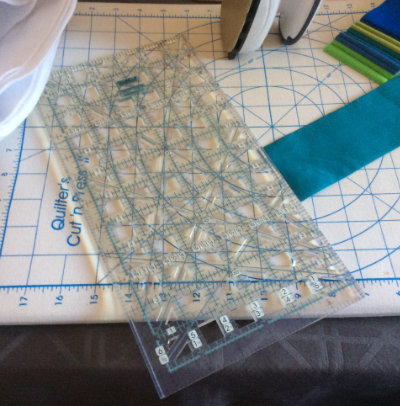
• A ruler for marking up the mitred corner.
• Scissors for trimming thread, rotary cutter optional if you prefer to use those for trimming.
• Walking foot, again optional if you have it.
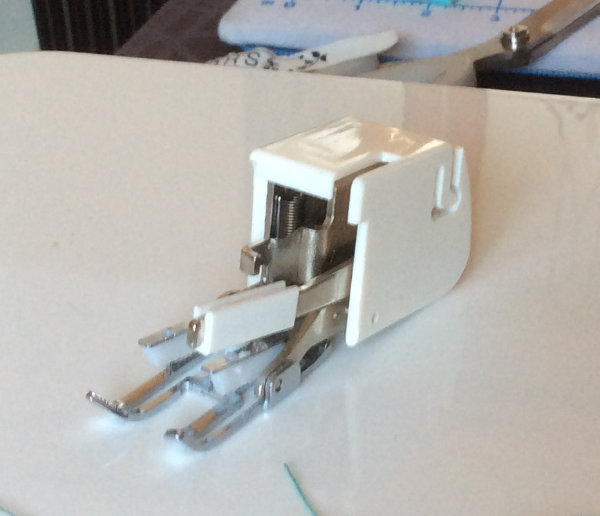
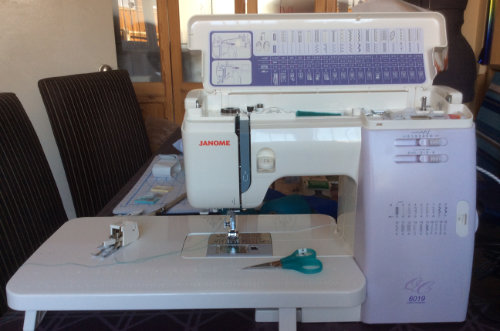
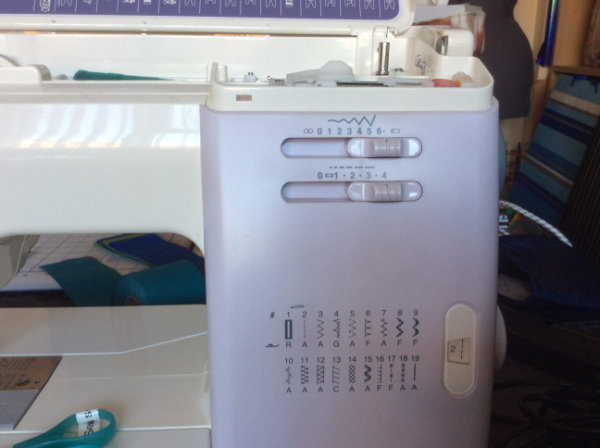
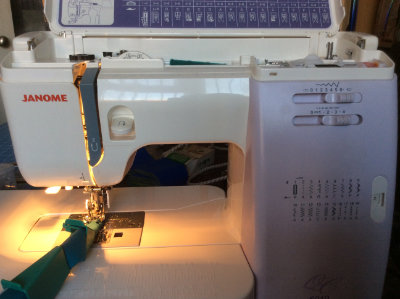
• A sewing machine that allows you to adjust the stitch length of both the straight and zigzag stitches is ideal. I have used my older model machine because of its large throat area.
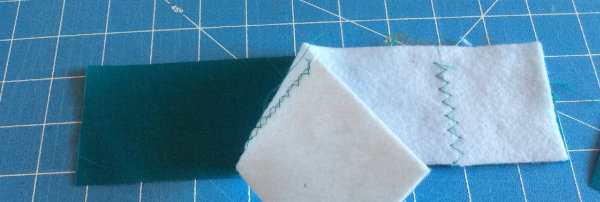
Depending on what you are to make with these fabric tubes – I have chosen to make a bathmat – you will need to join your strips of fabric together forming one long continuous piece ideally before you place it in the Clover Fabric Tube Maker.
With the fabric cut to width – remember 2.1/4 inch -57mm – or 2.1/5 inch – 64mm – you will need to join them up with mitred corners.
I advise starting off with smaller strips, so you can find the best settings on your machine. This also gives you practice using the Clover Fabric Tube Maker, before you start on your actual project. I made three samples first, before starting on my main piece.
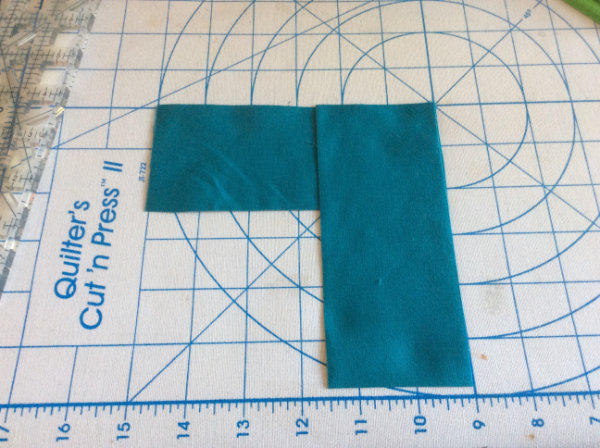
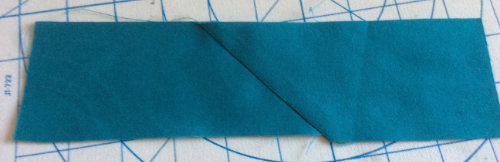
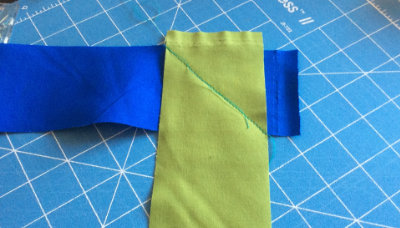
Place one strip with right sides facing up and with the end of another strip place it perpendicular to the first with right sides facing down.
Make a diagonal line as shown in the picture below. Sew along that line.
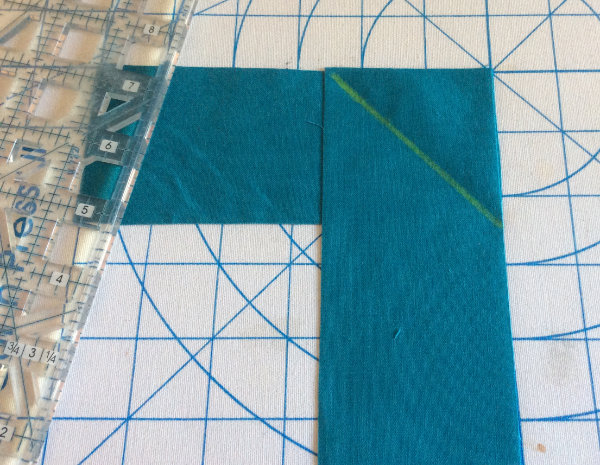
Allow a quarter inch seam allowance, mark then trim.
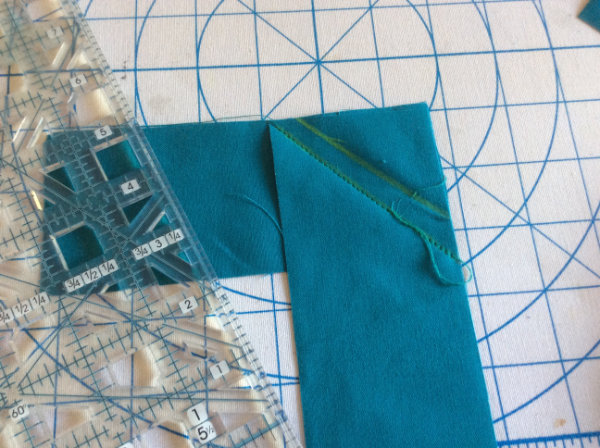
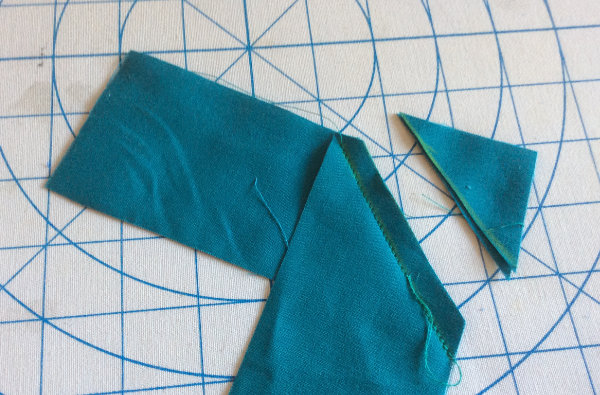
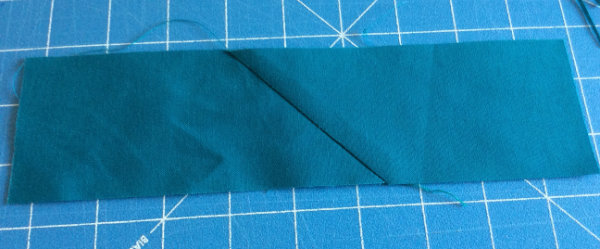
Iron the seam allowances so that it will lay the same direction as you will make the tube.
If like me you find that it does not quite sit right than, using your ruler trim off carefully.
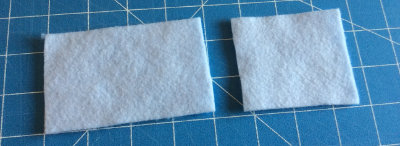
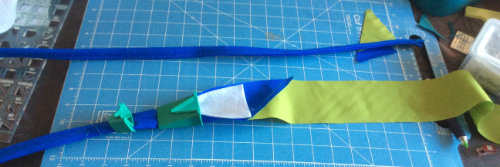
You will also need to join the batting.
Gently butt both pieces of batting up against each other, and using a zigzag stitch attached the two edges.
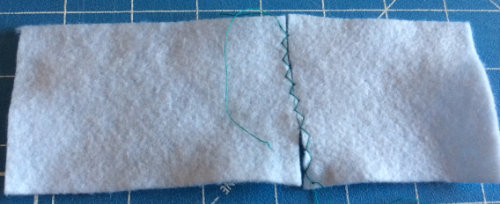
My first one did not quite work as my zigzag was not quite wide enough.
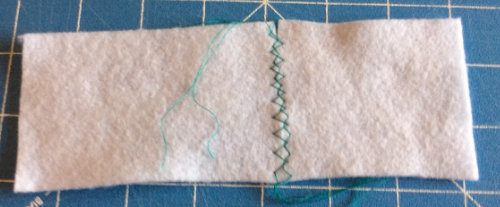
I redid the stitches again going over the ones I already stitched as they would not be seen or increase the bulk.
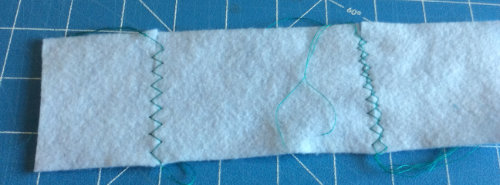
Then I added another piece of batting as I had not cut my sample to the length of my test fabric, here you can see clearly how the longer zigzag holds the edges better in place.
The written instructions are easy to follow and once your fabric is prepared you can then refer to them.
Instructions summed up, however, refer to those in the product, for a clearer step by step guide.
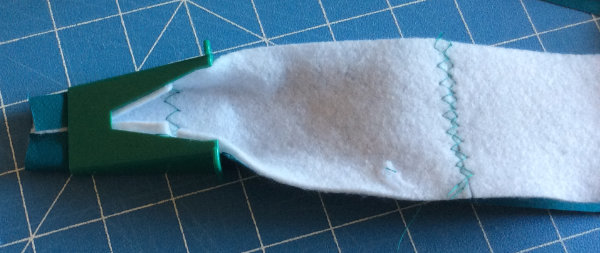
Make sure to place batting wrong side up on the fabric.
Fold the edges of the fabric into the centre.
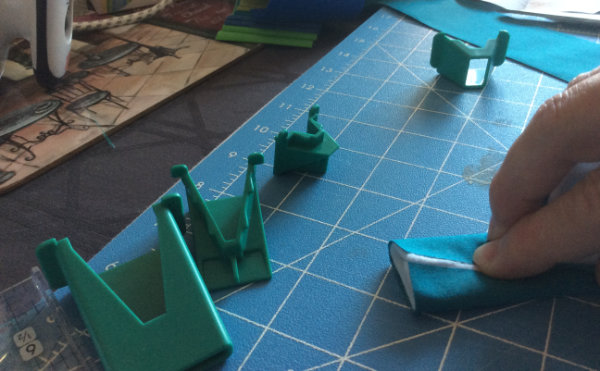
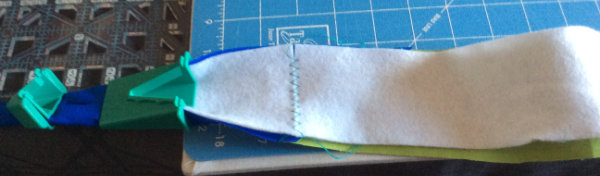
Insert fabric into section A of the tool.
Place part B into part A and push in place making sure that you do not trap any folded bits of fabric into it. Click part A and B in place.
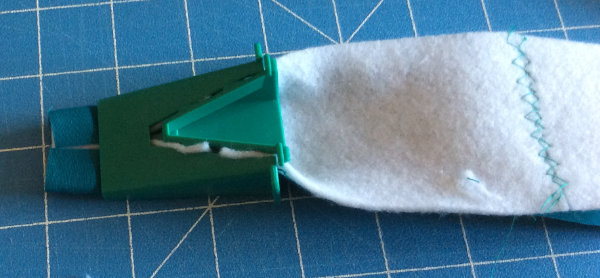
Pull fabric through both parts.
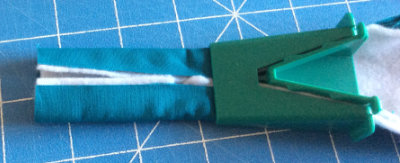
Insert the folded fabric into part C and fold it again to form a tube.
Insert part D into C and click in place.
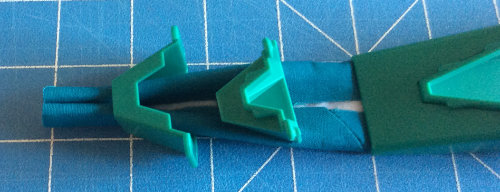
Pull the fabric through parts C and D.
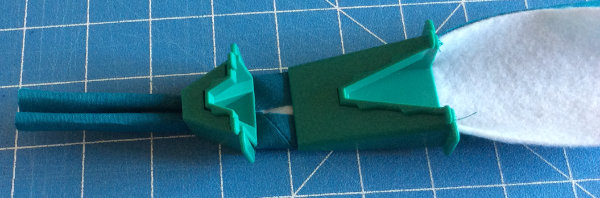
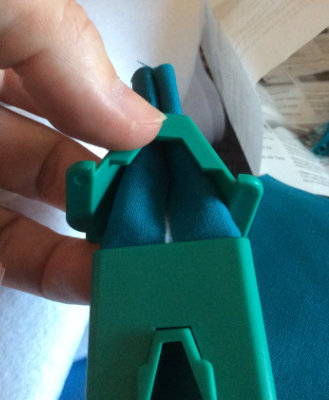
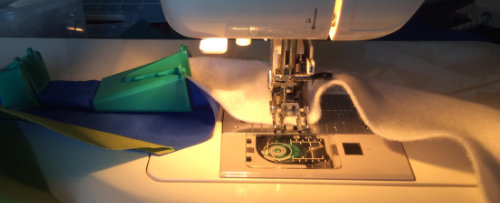
Keep both sections near the needle place and slide down as you sew.
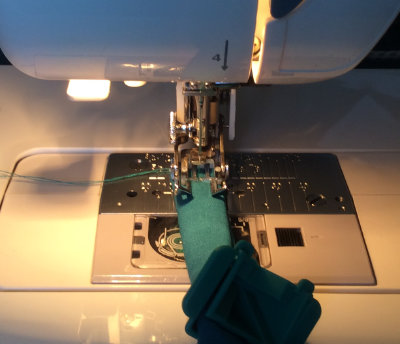
I made three sample tubes. The first I used an ordinary sewing foot on my machine. However because I could not adjust the position of the needle so that it would sew further right, the stitch line was more in the centre of the tube.

I made the second sample with the walking foot added, this helped guide the fabric along better, but not by much. As you need to go slow with this project the fabric does not move much. Again I still had the issue with where the stitch line sat.

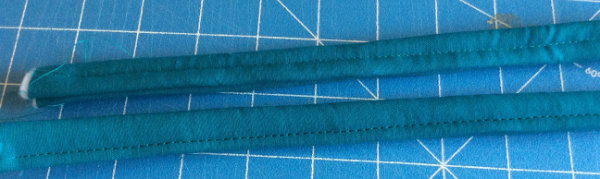
For my third sample, I had a brain wave and turned the fabric over so that the edge was facing to the left and altered my needle –setting the needle to the left as if I was doing a zigzag or zipper line – and sewn it out. I was happy with this technique and line positioning.
I made a start on my project. However, what I had failed to take into account was the width of my second lot of fabric, it was 70 mm which was bigger than the tool says to use. I figured I would push it and it worked, however, the fabric got creased or slipped out of place. So I would not recommend using wider fabric with this tool.
Because I am not sure how many strips I will need because I am working without a pattern. I am adding strips as I go; therefore I am keeping the tool in place while the project is ongoing.
Due to time commitment the bathmat will not be finished within a time frame suitable for this blog. However, I will post another blog about it when it is finished so please watch this space…


Great blog / product review!
Thank you.