SANTA CHRISTMAS TREE DECORATIONS
Here in Spain the Spanish do not celebrate Christmas in the same way as we do in the UK. Christmas Eve is their main event and the Family gets together to have a celebration meal and they generally eat the shops out of Prawns and other seafood!!! Although they DO have Christmas Day off as a holiday there is no Boxing Day in Spain and they go back to work after the 25th – their main day is 6th January when they give and receive their presents.
However, in the last few years they have adopted Christmas Trees, Decorations, Lights and Fireworks – usually bangers!!! There are usually loads of Santa’s climbing up ladders outside the upstairs windows!!! UGH!!!!! Lots of the children will also be given one of their presents to open on Christmas Eve.
When my grandchildren lived here, in the next village, my daughter used to keep one of their Christmas presents for them to open on the 6th January, and when they went back to live in the UK, they wanted to have presents on the 6th as well HAHA…
For the past year the villagers (and Incomers) have been busy raising money for a Village Defibrillator Machine, and so at the Winter Fiesta last November the ‘Brits’ had a stall selling Christmas Decorations. I made several of the Santa Christmas Tree Decorations and they sold like hot cakes! or Pastel Calientes…
Well, as it is nearly THAT time of year again, I thought I would make some new Decorations for our tree.
This is an easy project and quick to make last minute.
Requirements
1 piece of Pink Fabric 2.5 inch square
1 strip of white fabric 3/4inch wide by 15inch (approx.)
3 strips of different (toning) fabric 1inch by 25inch (approx.)
1 square of one of the toning fabrics 6 1/2 inch square
2 squares of backing fabric 6inch x 6inch
Use 1/4inch seams
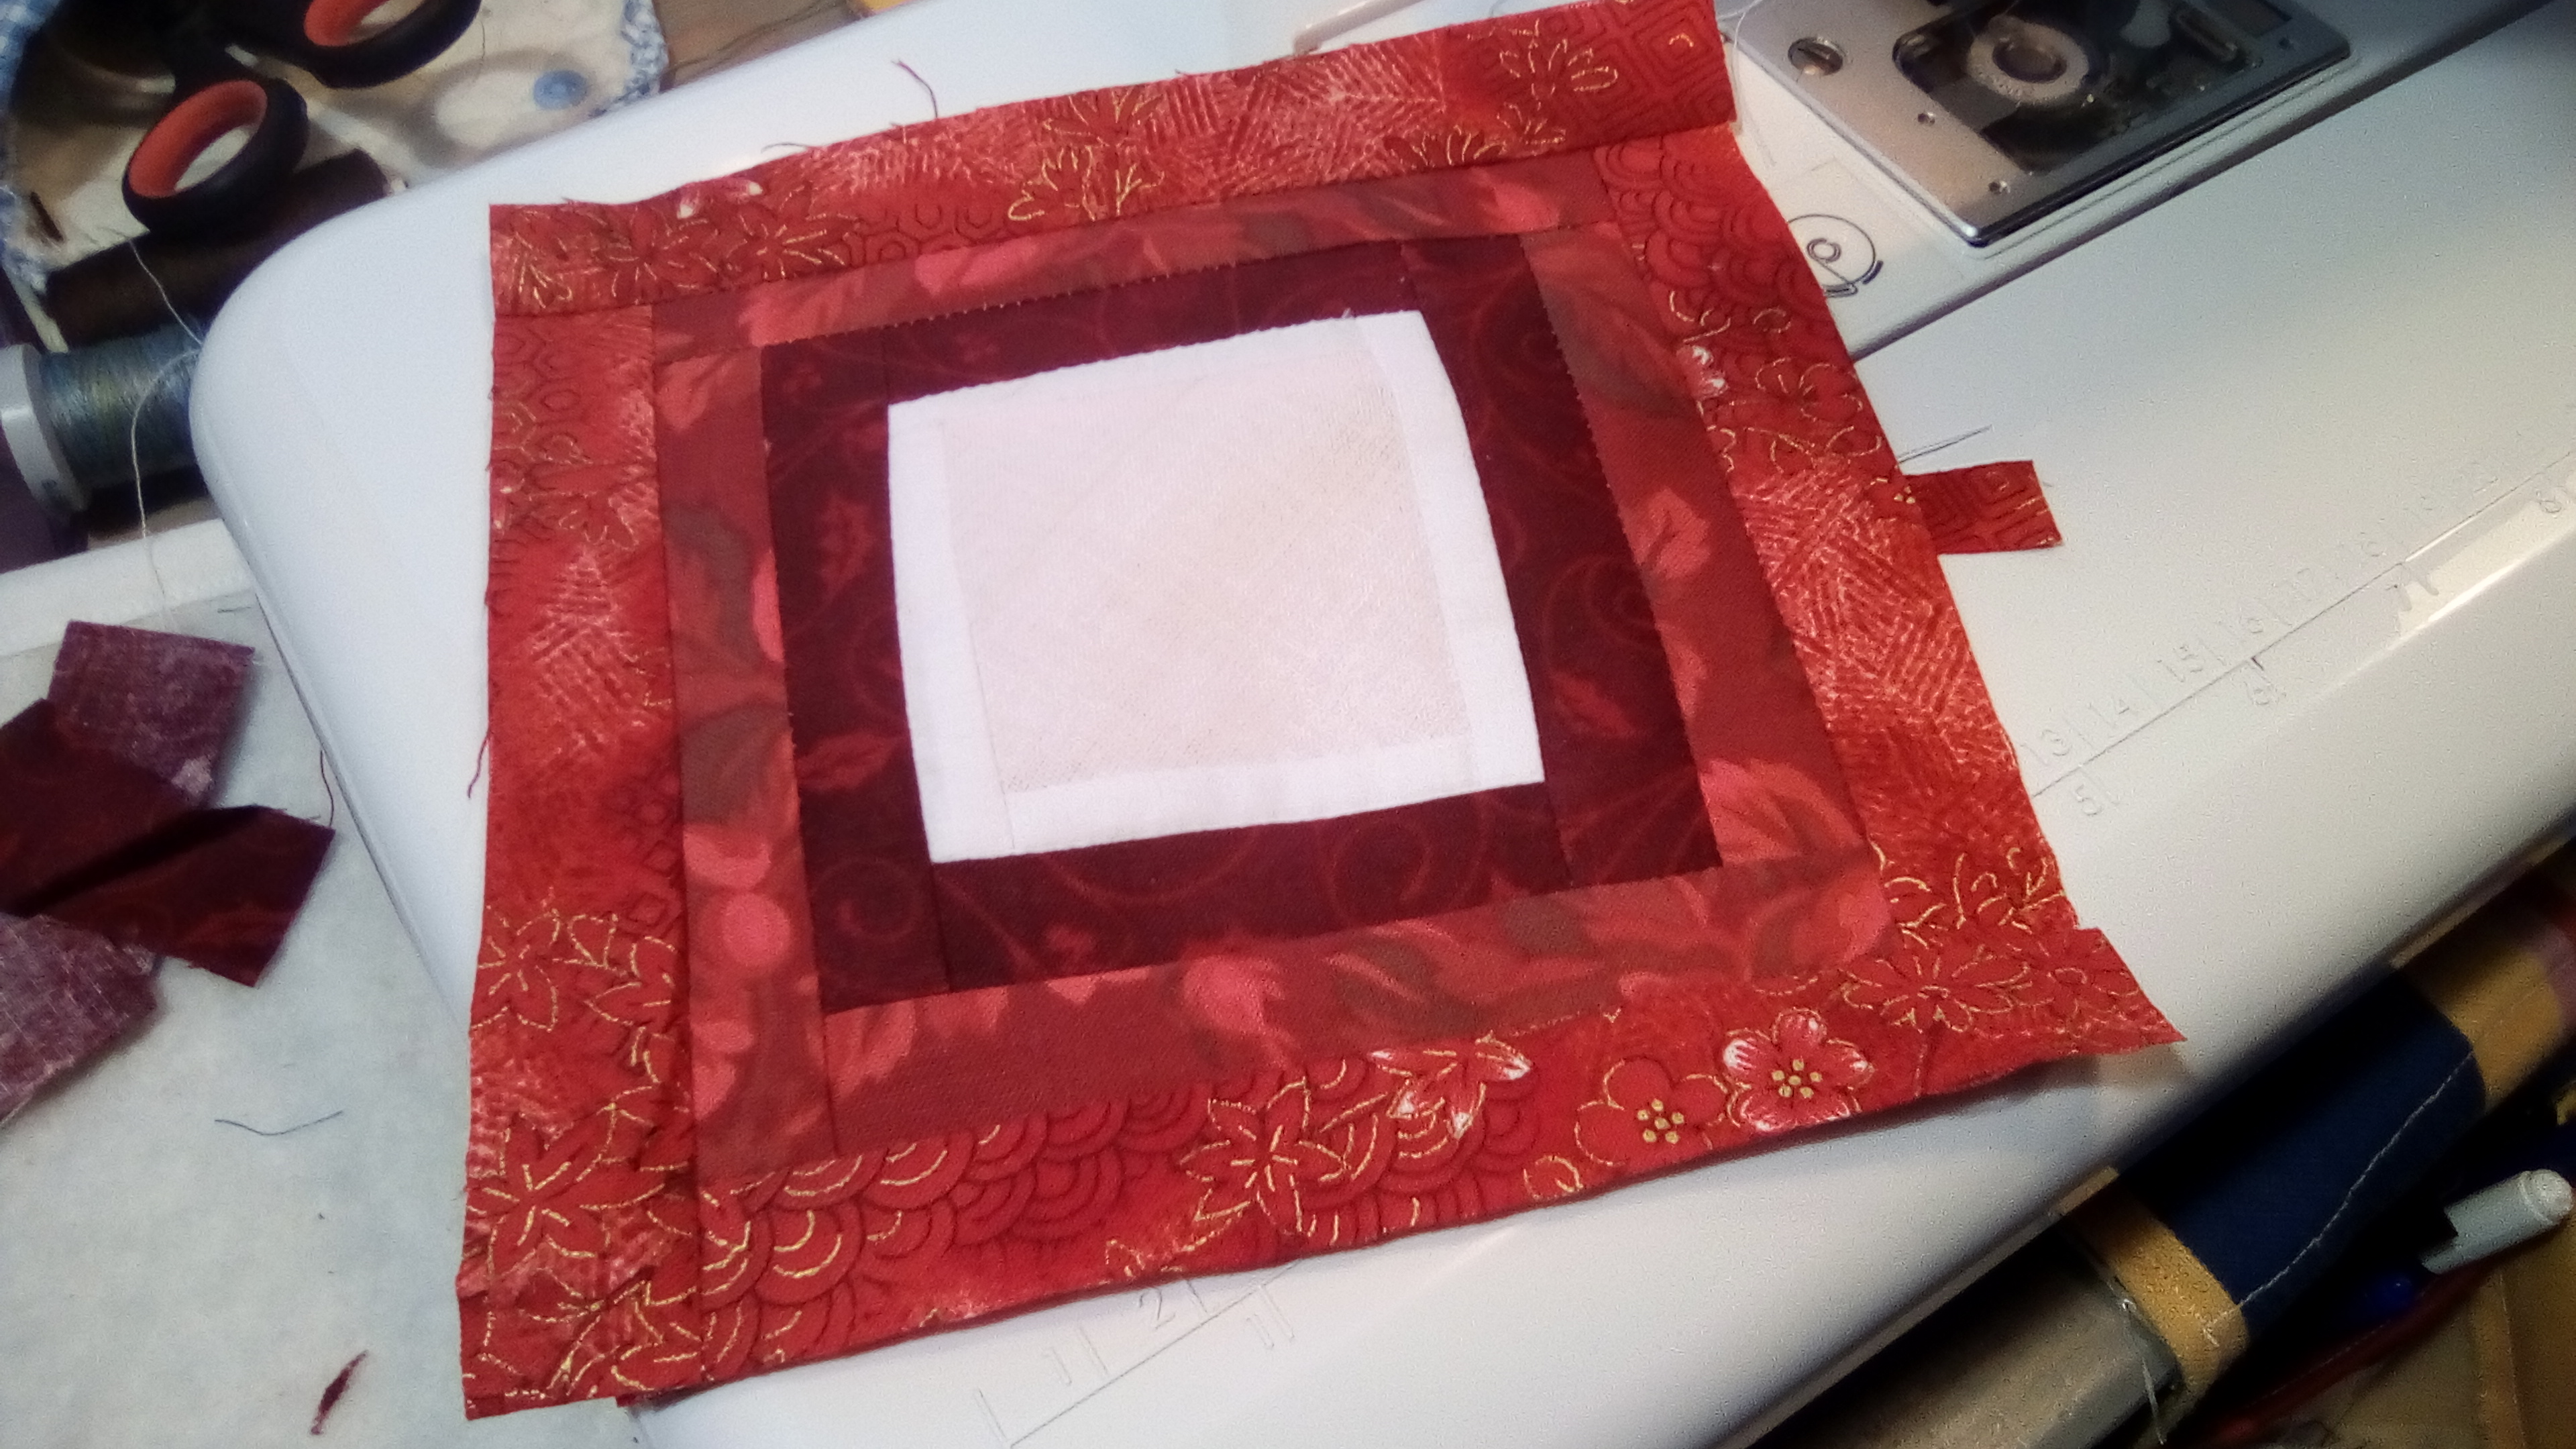
Starting with the PINK square pin and sew the white fabric to the four edges, one side at a time.
Once the 4 white strips are sewn on – proceed to pin and then sew on the remaining toning fabrics, one by one.
You should now have a Courthouse Square patterned block.
Take the square of toning fabric and draw a pencil line from one corner to the opposite diagonal corner.
Pin the made-up square (right sides facing) to this square. Sew 1/4inch away from the pencil line, keeping the pencil line in the centre.
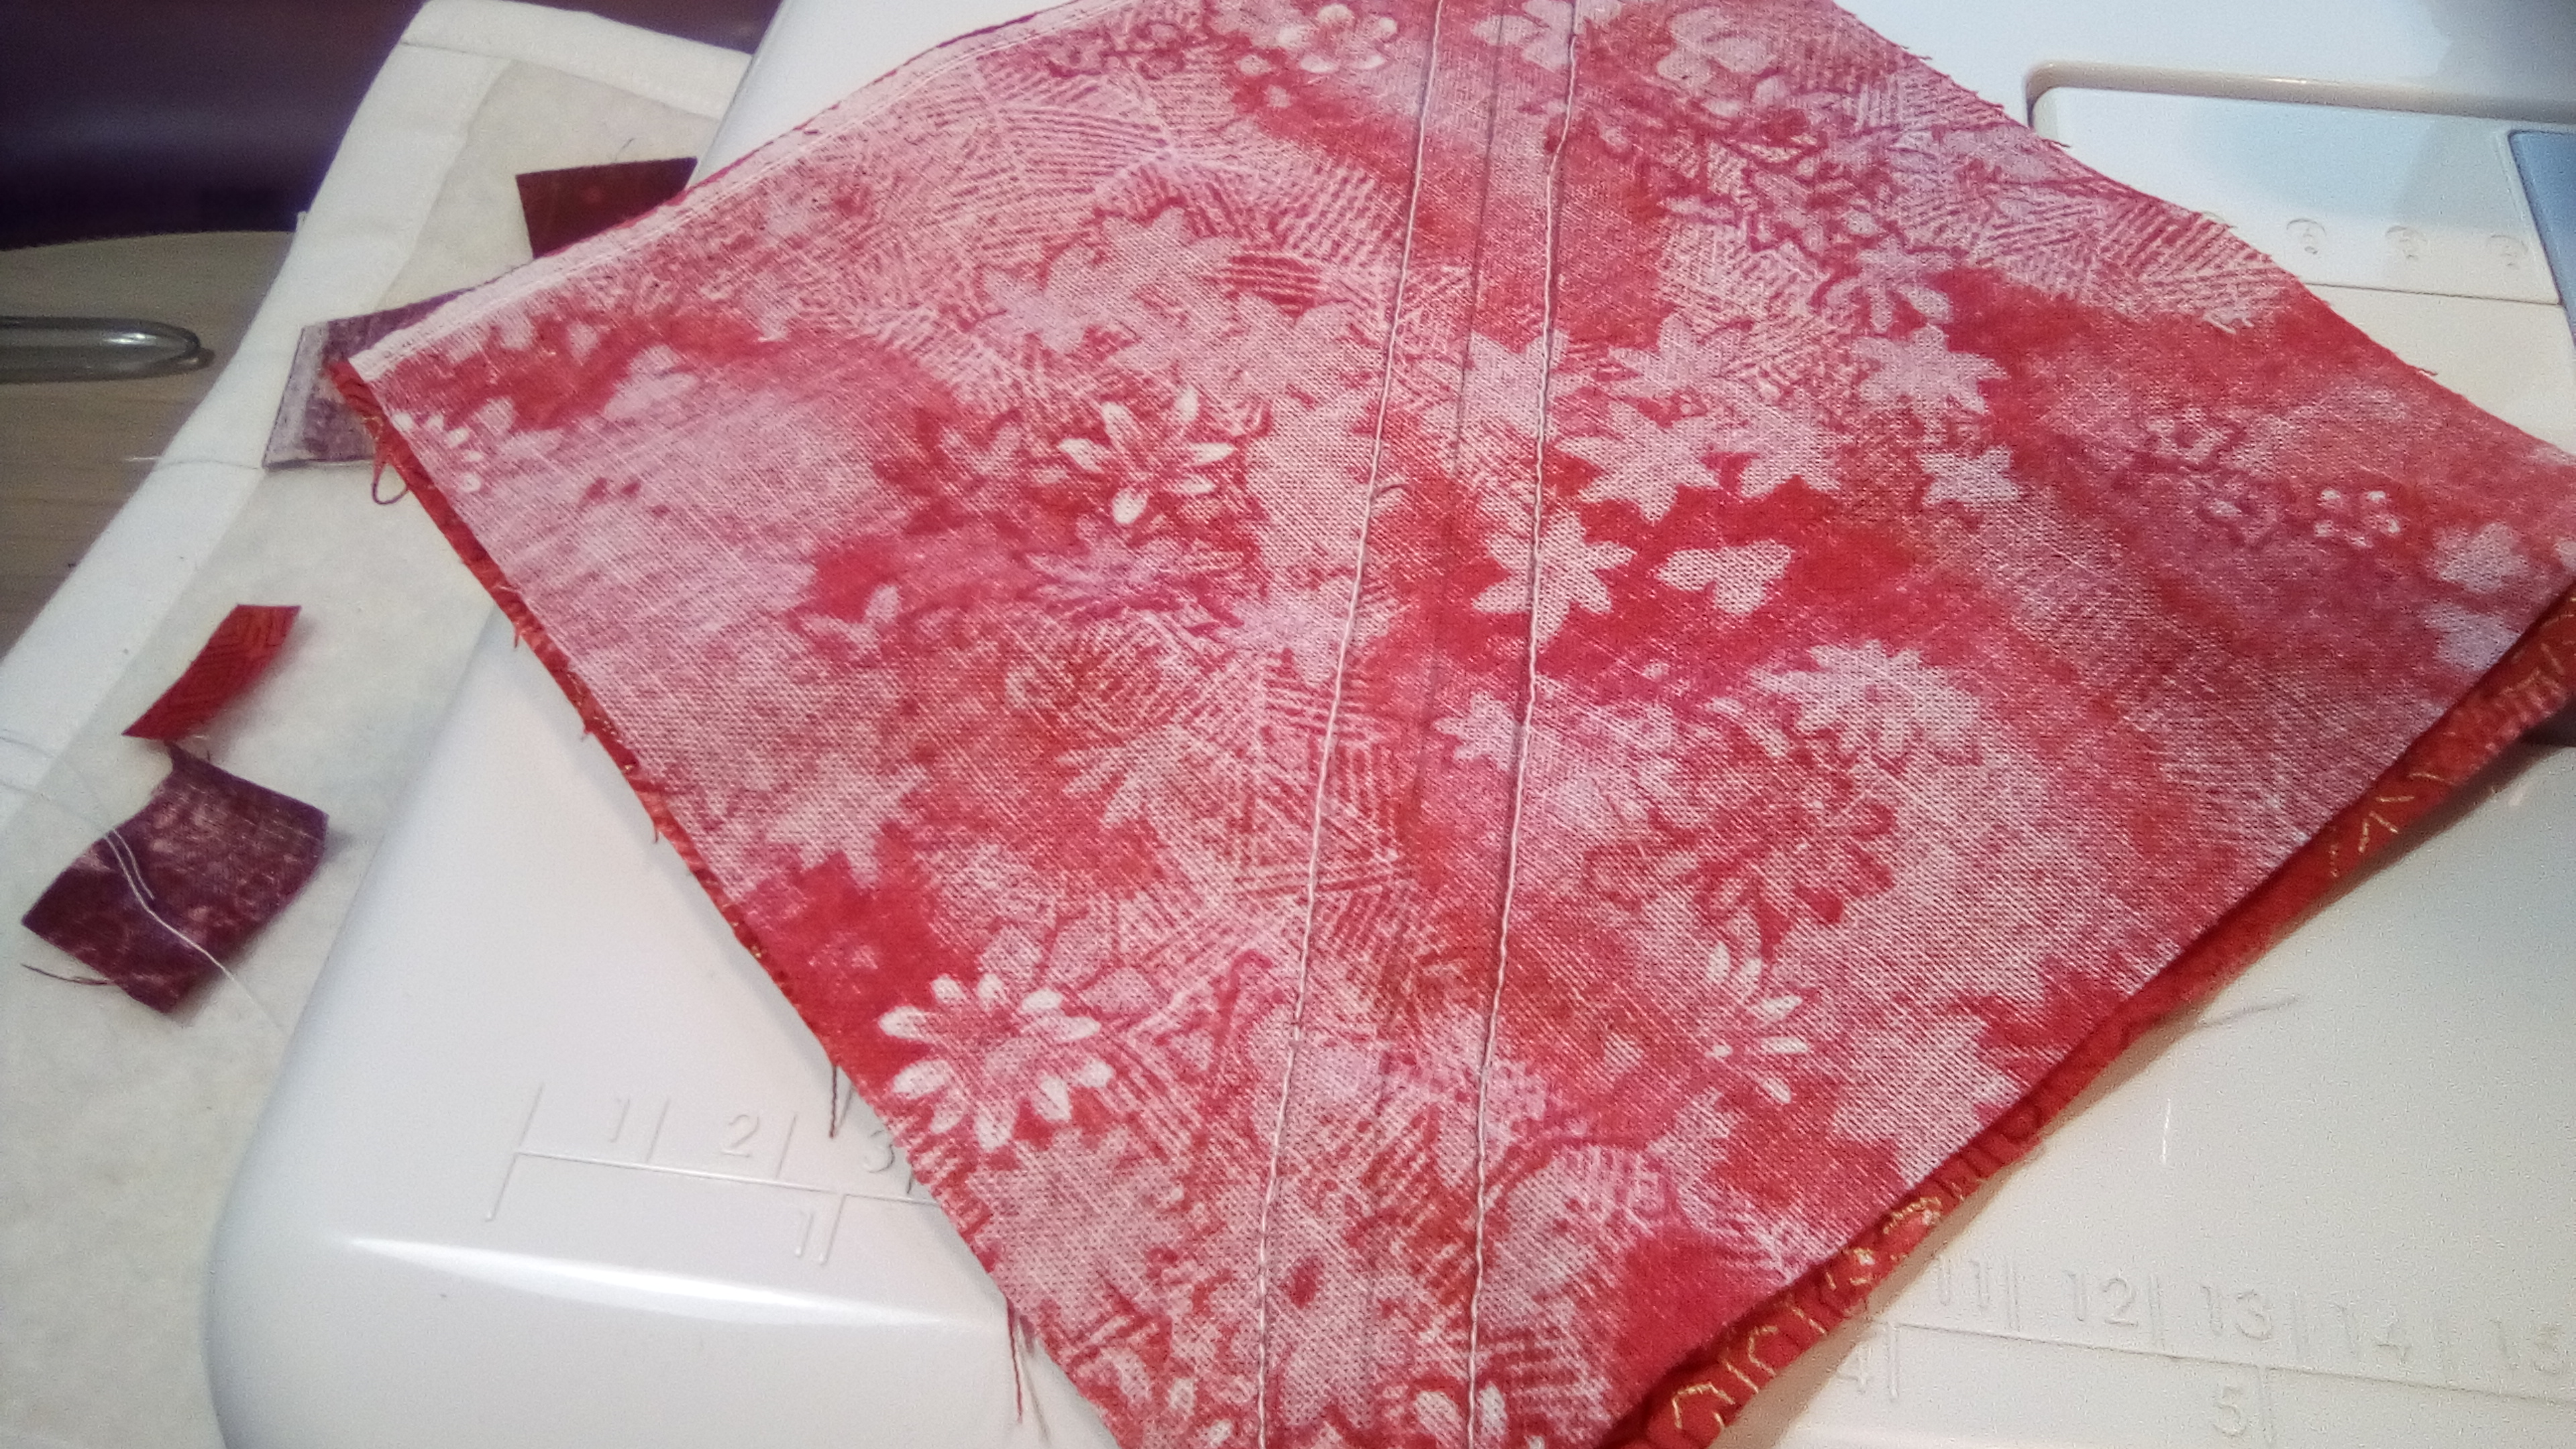
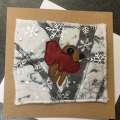
Cut along the pencilled diagonal line so you now have 2 squares the same. Press the seams flat (see photo).
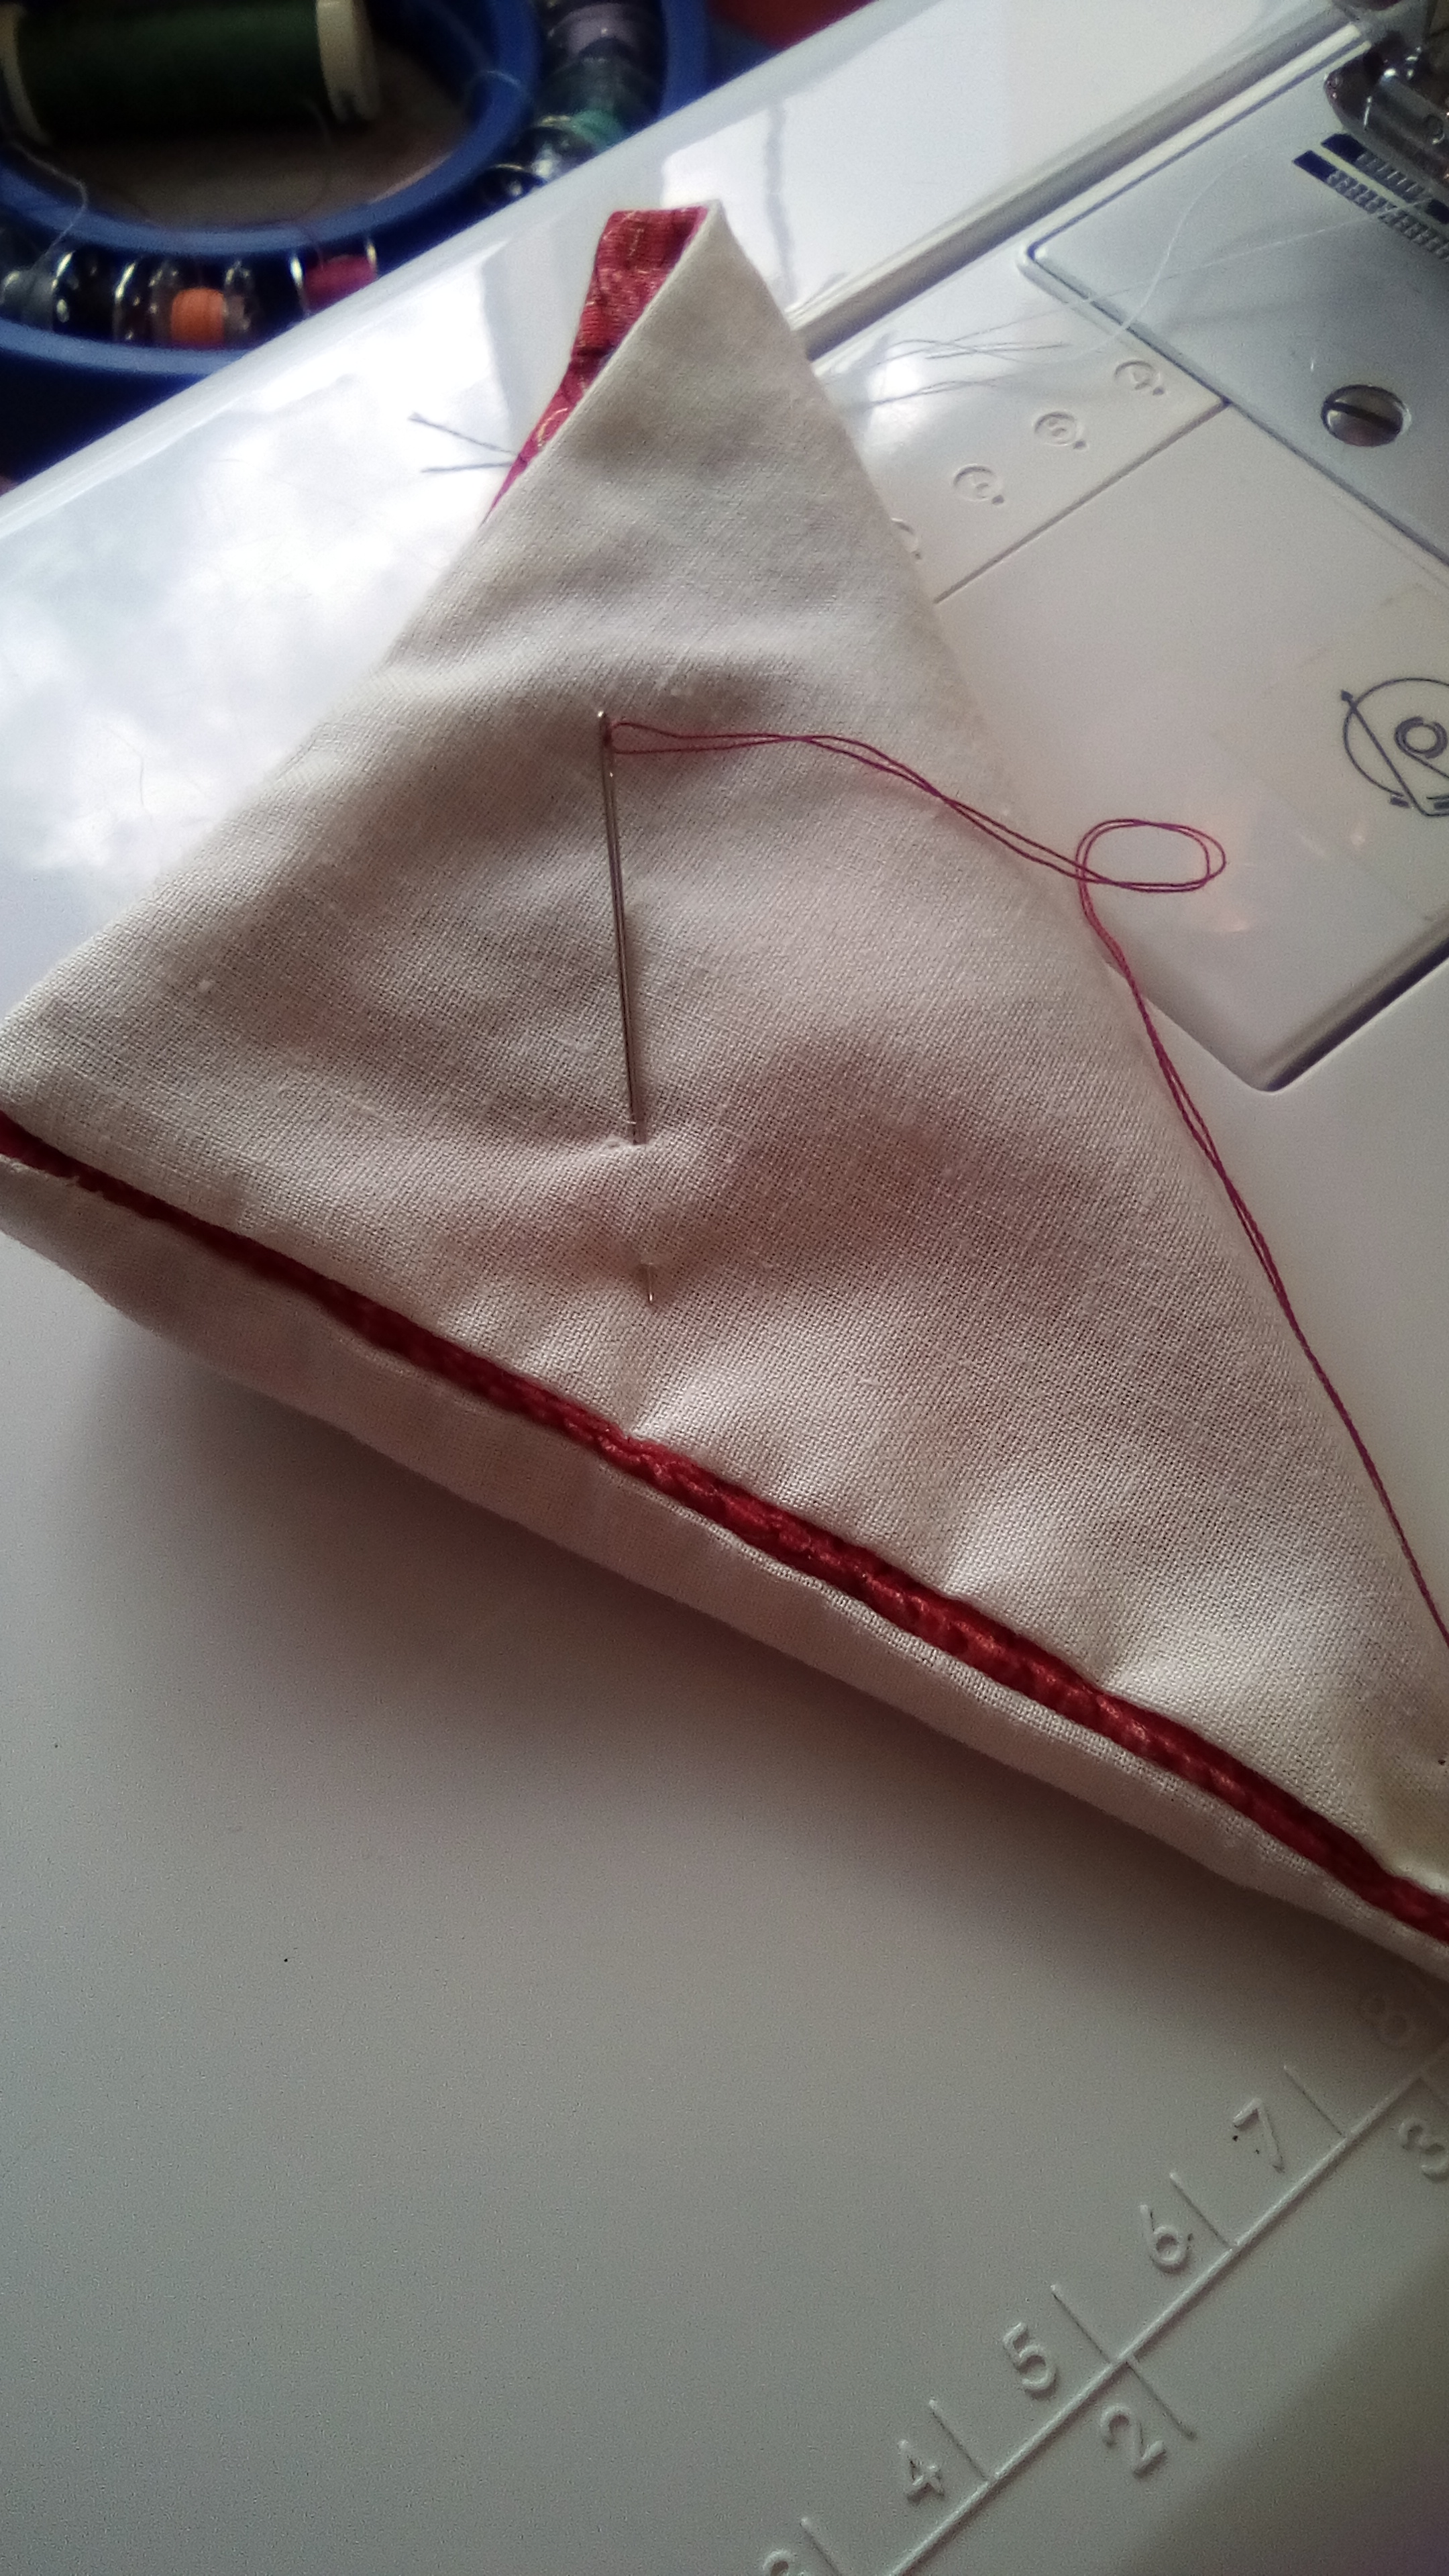
Using 1 of the backing squares pin to the right side of the coloured square and sew round the edge, leaving about an inch for turning the square inside out.
Trim the corners and turn the square to the right side – pulling the corners into a sharp point.
Press. Make up the 2nd ‘Santa’ in the same way.
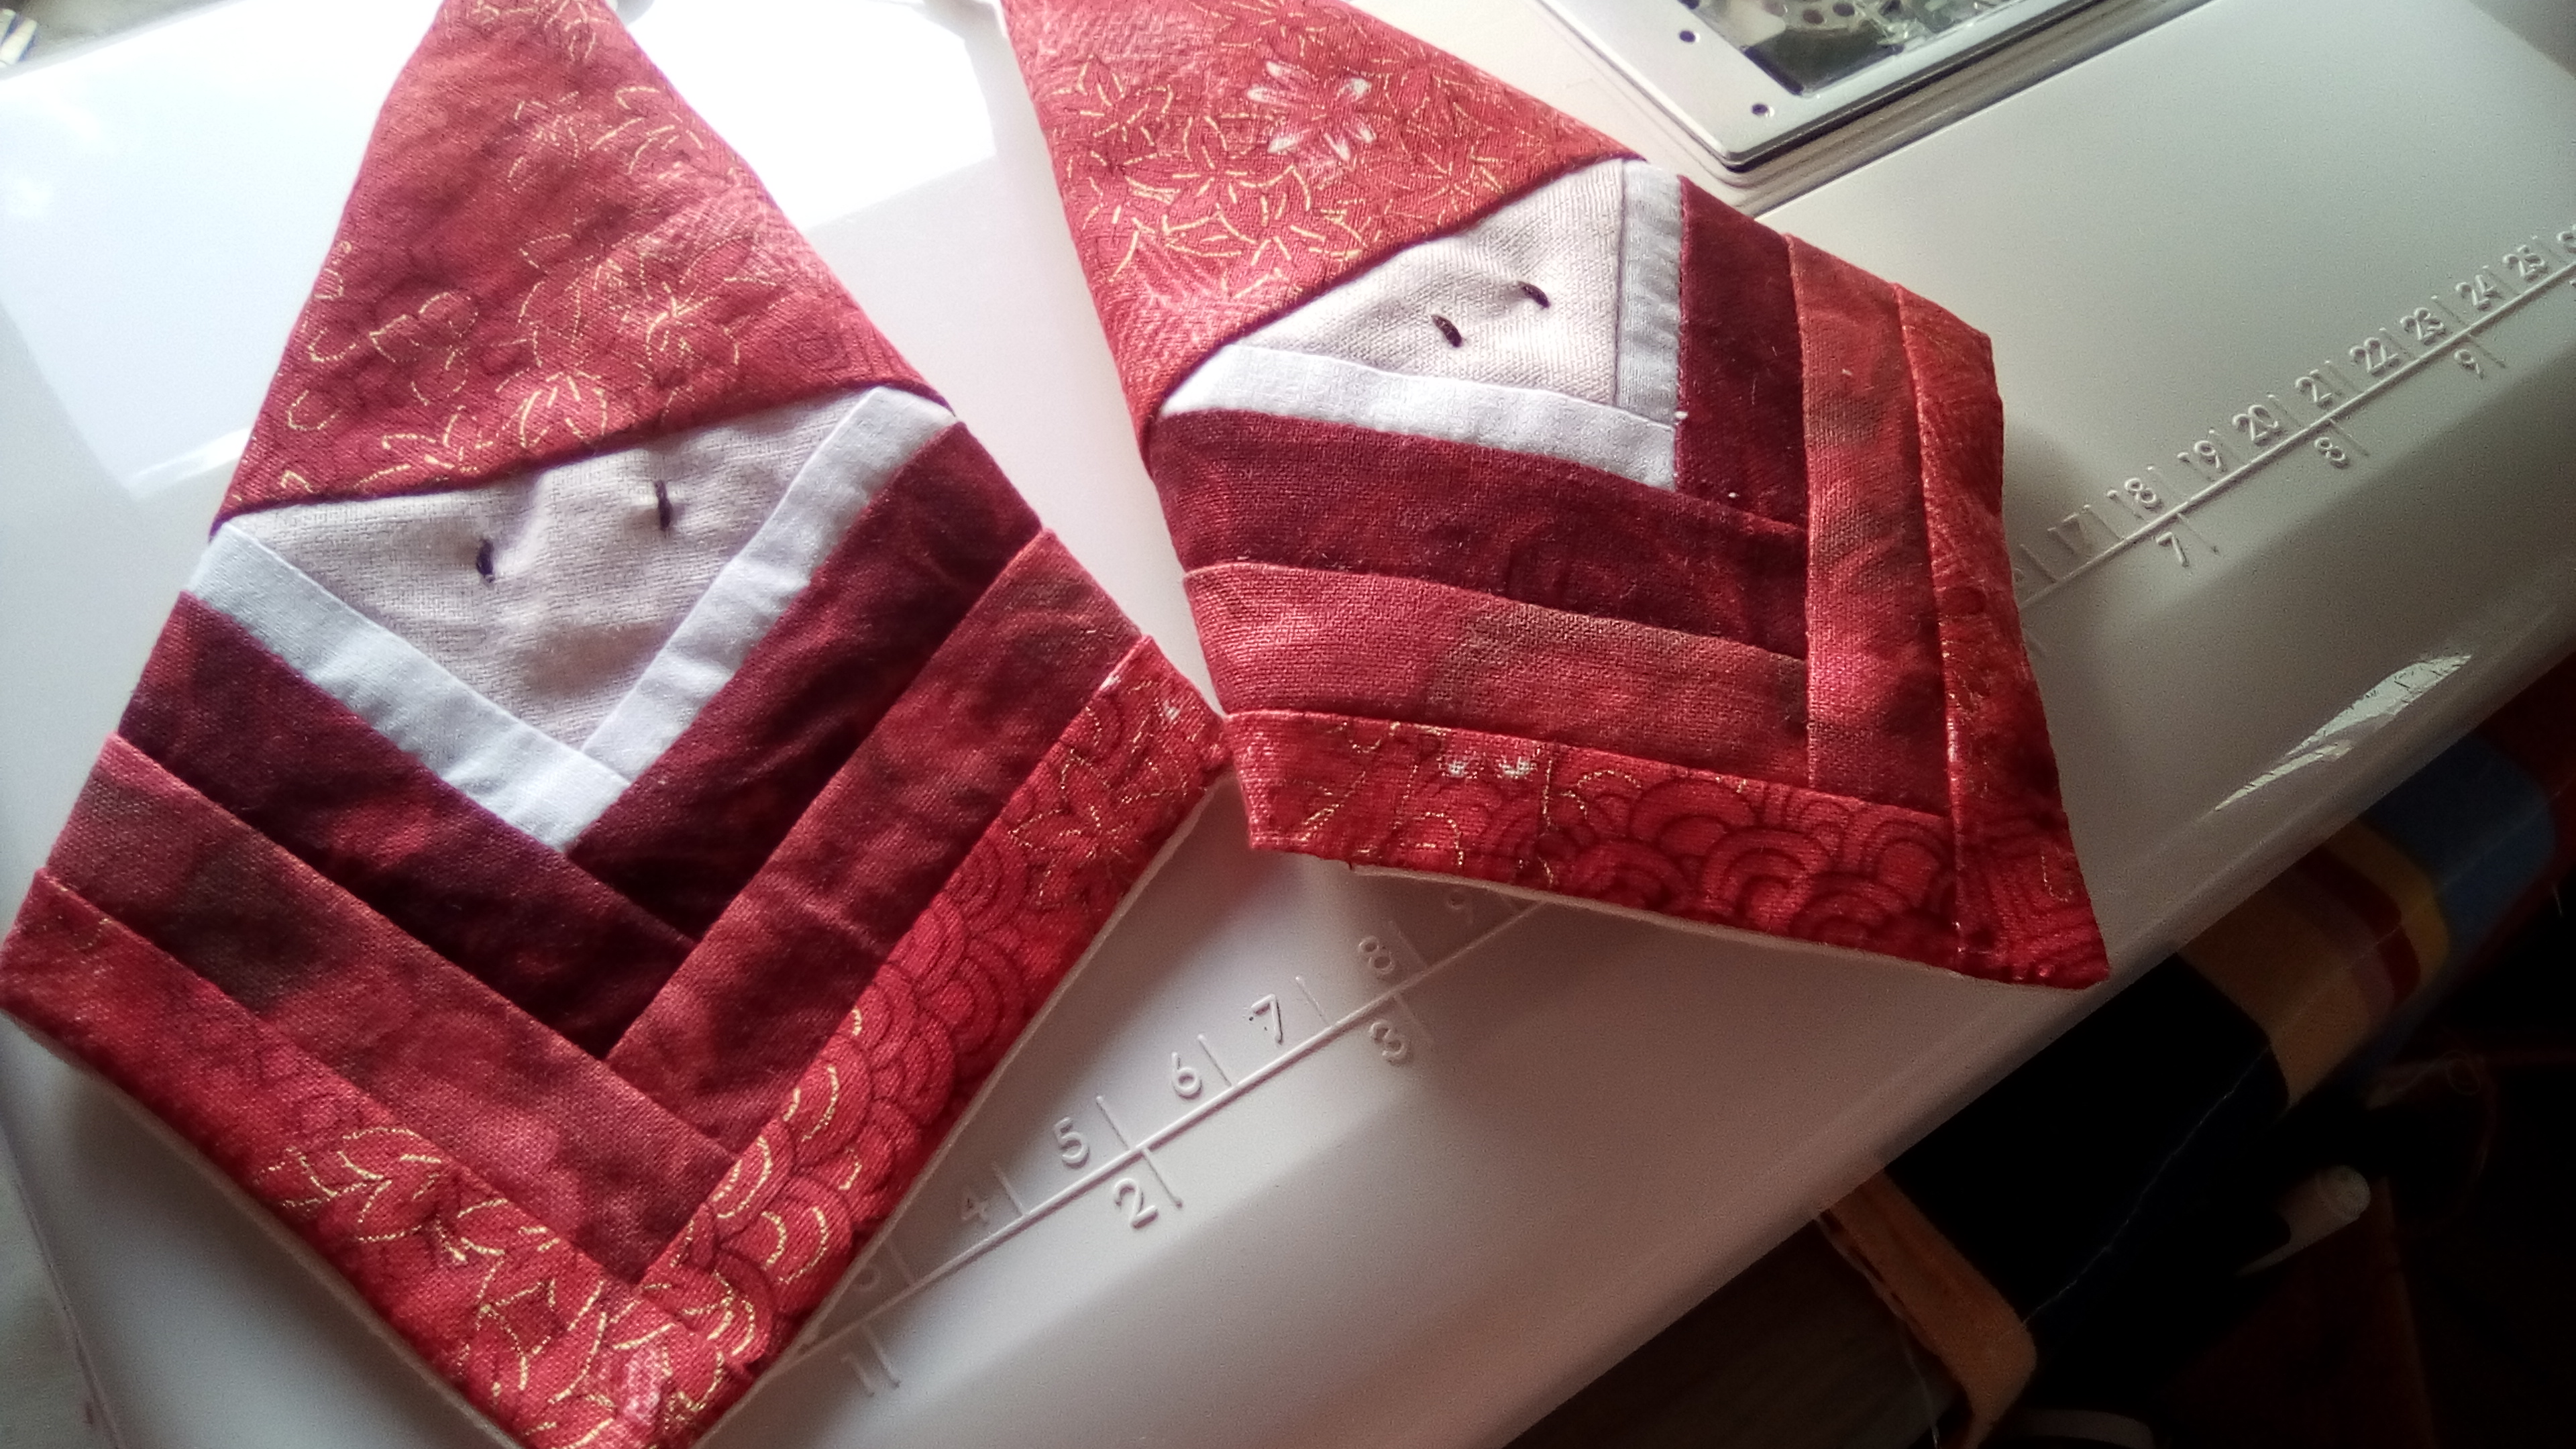
Sew two edges together, inserting a loop of Ribbon in the top.
To finish – sew 2 dark stitches, to look like eyes, on the pink fabric. The Santa’s should now look like the photo.
I hope you will have a go at making these Santa – they are a good way of using the odd bits of fabric.
Do comment and, perhaps, post photos of your makes.
Thanks


Responses