Want to learn to quilt but not sure where to start or what to make? You can quilt but want to build up your confidence to try something more challenging? A sampler quilt is an ideal place to start!
Welcome to the quiltsewgo (QSG) Beginners’ Sampler Quilt!
I started my quilting journey about six years ago after joining a local friendly quilt group and they helped me on my way. Shortly after I was asked to write some product reviews for ukqu.co.uk and have learnt so much from my blogger colleagues and from reviewing products that I thought this would be my way of giving back and supporting others.
Please take time to read through this blog as it will help you to prepare for making your quilt top. If this is your very first foray into the world of patchwork/quilting, then I hope to make this series as straightforward as possible for you to follow.
We are going to work through a series of quilt blocks that will build your skills and confidence so that the next time you see a quilt pattern you can think, yes, I can make that! The SAMPLER quilt will be made of at least 15 blocks and will have some sashing and borders to make sure it measures at least 40” x 66”. I’m not going to reveal them all now but each week I will reveal the next block at the end of each blog! There will also be a couple of blogs at the end that will explain how to sash, border, layer, quilt and bind your final quilt top.

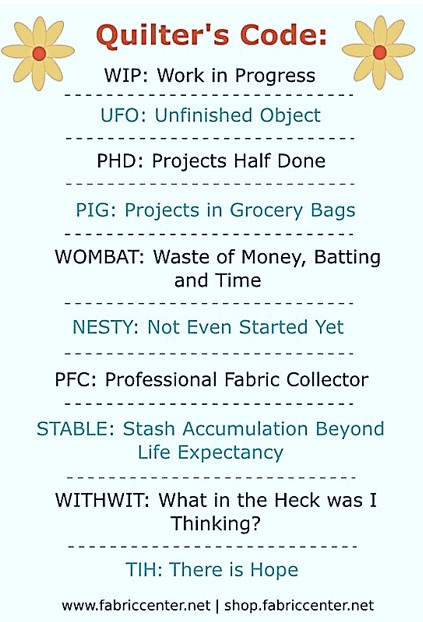
There’s also a whole new set of acronyms that you will learn too; for those of you with a sewing background, you may know some of them but will perhaps learn some more! I’ve been quilting for six years now and still learning the language and still finding different blocks to make that I’ve never made or heard of before, a few of which are in the SAMPLER! So, if you want to know what at HST, BOM or DSM is, check out Juliet’s ukqu.co.uk blog that explains some of these quilting acronyms! But, I promise, for those I use, I will explain them as we go on this journey.
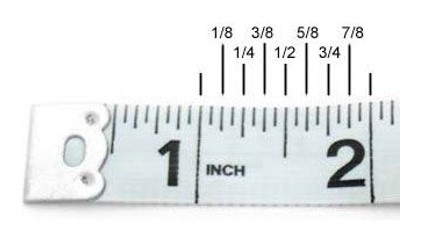
One of the key things to remember is that most quilt patterns are in imperial measurements (inches) not metric (centimetres – cm) whilst the tools (rulers/templates) can be in both so check before you buy. Cutting mats might have inches on one side and cm on the other.
If you haven’t got your rulers and templates together yet check out Jane’s blog, she gives some sensible advice on what you can start with.
https://ukqu.co.uk/blog/2020/08/10/tips-for-beginners-essential-tools-for-quilting/
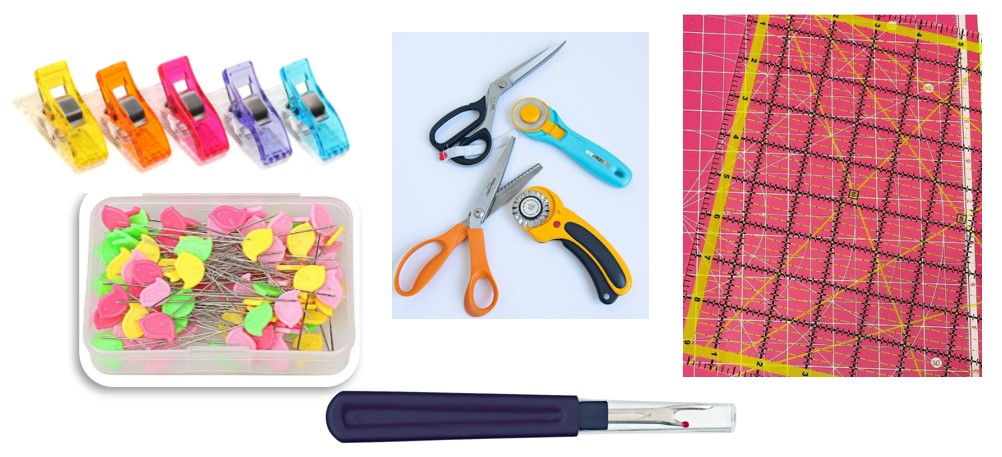
WHAT YOU WILL NEED
• Fabric (more about this later)
• Sewing machine (they can also be done by hand if you prefer).
• Cutting mat
• Ruler (imperial measurements)
• Rotary cutter/scissors
• Pins and/or clips
• Sewing thread – I use a silver grey as it blends into most coloured fabric you use; cream thread is useful too.
• Iron and Ironing board (or mat) – your household iron/board is fine.
• Soft lead pencil (e.g. 4b, 6b), tailors chalk or similar.
What you might need!
Stitch/Quick Unpick (commonly known as Jack in the quilting world!)
I’ve accumulated lots of quilt rulers over the years, many only used once or twice and, like other quilters, I told myself I would need them in the future as I had an idea of what I was going to make!
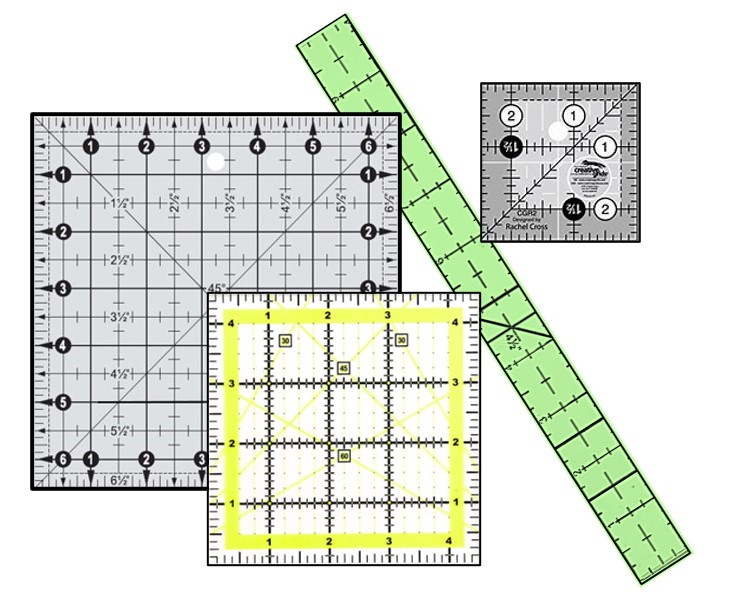
The rulers I use most are my 2.5” x 18” ruler, 3.5” x 9.5” ruler, 6.5” x 24” ruler, a 4.5” and a 6.5” square ruler.
I’m also lucky to have a Shape Cut Ruler which I use a lot, but these blocks can be made without using one. There are several on the market now, I’ve recently bought one that cuts 8.5” x 12.5” which I quite like too. There’s always your Christmas or birthday list you can add it to! If any of your friends have one – ask if you can try it first.
Check out the link below if you want to know more about them.
https://ukqu.co.uk/?s=shape+cut+ruler
THE PDF BLOCK PATTERN
I will endeavour to follow the same ‘layout’ for each Block pattern.
This will include brief introduction to the block, the Fabric and Cutting guide; KEY to any symbols used in the images; Assembly Instructions with STEPS, and the name of the next block. They might also include links to websites, tips, etc.
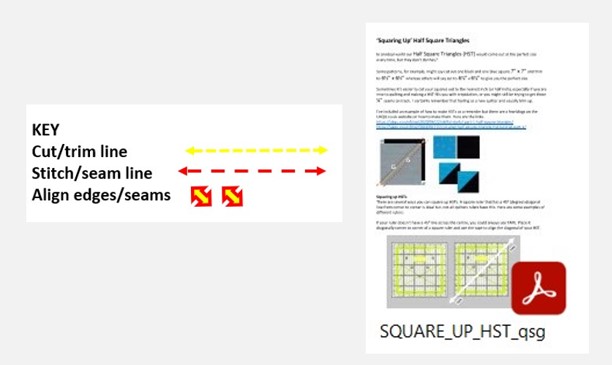
You will be able to download, save and/or print out the pdf pattern from the link in the blog: i.e.
Click HERE for the pdf block pattern.
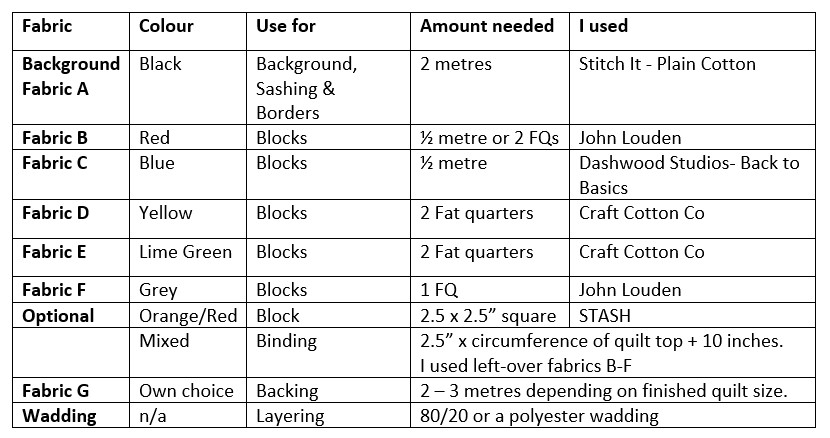
FABRIC
I have used fabric that isn’t super expensive but is of good quality, so it makes it affordable for anyone’s budget. Most were priced between £6 – £9 per metre. Packs of Fat Quarters (FQ) generally measure 18” x 22” but can vary. One FQ is usually equivalent to 0.25 of a yard and two FQs is the equivalent of 0.5 yard.
You do not have to use the same colours as I chose but stick to the same amounts and number of colourways. Alternatively, you can use different fabrics for each block – if you do, I suggest that you use the same BACKGROUND FABRIC A throughout.
If you have other fabrics and want to make up a ‘sample’ block for those you feel less confident at making, then that’s okay. Even now after six years, if I’m trying out a new block, I use my scrap stash rather than the main fabric and make a sample first (orphan block). I don’t throw them away either, I use these ‘ORPHAN BLOCKS’ for other projects.
How much FABRIC will I need?
For this BEGINNERS’ SAMPLER QUILT I decided to use plain 100% cotton Black as the Background Fabric A and chose 5 other colours to go with it.
Throughout the series of blogs, there will be a Fabric and Cutting section that tells you which fabric I’m using for each block and the size of the pieces you need to cut.
Each fabric will be listed as Backing Fabric A: Black, Fabric B: Red, C, D, E or F. Make a note of your chosen fabric colours as it will help you to balance the colour combinations across the quilt top.
In the block pattern Assembly Instructions, I will refer to the colours I’m using, e.g. Red, Black, Yellow etc.
Here are my chosen fabrics from my stash.

WHAT ELSE DO YOU NEED TO THINK ABOUT?
There are some great blogs on UKQU.co.uk website that can support you in your quilting journey – click on the search icon and just type, e.g. ‘Pressing’ and click again.
Pressing your seams.
Yes, pressing is different to ironing! check out this blog from Helen Kent to get the best from your block pieces.
https://ukqu.co.uk/blog/2018/02/25/in-a-nutshell-pressing/
Accurately cutting your fabric.
For this SAMPLER quilt you will cut out the pieces as the blogs are posted, i.e. when you get the pattern from the blog or pdf. Use your fat quarters and yardage efficiently when cutting out your blocks.
Measure twice, cut once is the mantra we work to, if your block pieces aren’t cut to the correct measurements then it will affect the size of your finished block. So, check your pattern/blog, READ AGAIN, MEASURE TWICE, CUT ONCE!
Sewing your seams at 0.25” (¼”)
With all the best will in the world quilters will have blocks that turn out slightly smaller or larger than they should as that pesky 0.25” seam isn’t quite right all the time. Helen has produced a few blogs to explain how you can get his right and what a scant seam is. Check them out at:
https://ukqu.co.uk/blog/2021/01/20/sew-a-fine-seam-beginners-piecing/
https://ukqu.co.uk/blog/2021/01/30/sew-a-fine-seam-beginners-part-2/
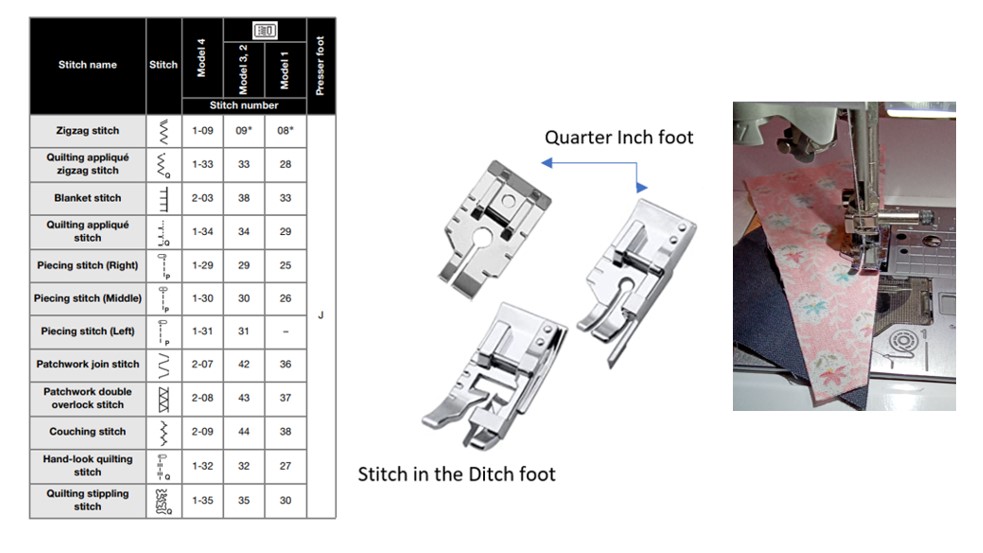
If you’ve done all that Helen suggests and your block still measures slightly less than the 12.5” it should do, then try this first. Sometimes those seams are not just sharp enough at first go so PRESS again using the steam function on your iron.
Check if your machine comes with any of these sewing machine feet too. They might come in useful. Also, check if your machine has a ‘piecing’ stitch which will accurately measure the 0.25” for you. I have a Brother NV1800Q and it has a left, centre and right piecing stitch function.
You will see the term Unfinished Size in quilting. UNFINISHED simply means the block size before other blocks are sewn around it.
All the blocks in this series should measure 12.5” x 12.5” unfinished but don’t worry, it’s not the end of the world if they are not. It might be that the remainder of your blocks will measure slightly less than this, but if they are all the same, they’ll all fit together nicely in the end. You can always adjust the size of the sashing and borders, but we’ll talk about that when we get there.
You might be thinking, ‘What if I run out of fabric?’ You won’t! Some of the blocks may only use one or two different fabrics, some might use all and others might use all but the background fabric (A). Any left-over fabric can be used for the binding you can also use some of the ‘offcuts’ can be used for other projects … more of this later.
Thread? Cotton or Polyester?
I tend to use polyester thread in most of the quilts I make, some quilters swear by only using cotton thread. The choice is yours!

WHAT IF?
…. I don’t keep up with the weekly blogs/ block patterns?
Life gets in the way sometimes. Don’t worry, the blog and pdf will still be there – hit the search feature with key phrases such as qsg, beginners’ sampler etc and it should list all the blogs made in the series.
… they’re too difficult/easy?
Difficult? Read through the instructions again, use some other fabrics and make up a sample block first.
Easy? We are all at different stages of our confidence in sewing so wait a few weeks to see what other blocks are being made. Make the block anyway as they really do all go well together at the end. If it’s still not for you, that’s okay, you can opt in and out at any time.
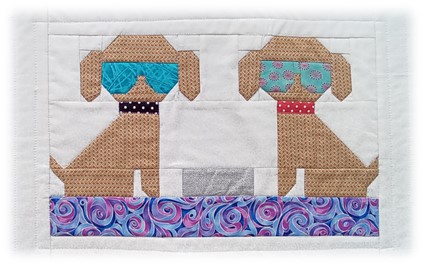
Before long you’ll be making lots of different blocks, table mats, and much, much more.
WHAT NEXT?
Gather your fabrics, ready your equipment and you’re ready to go!
Look out for the first block next week! BLOCK 1: 9-Patch then the following weeks BLOCKS 2 & 3: Patience Corner and Confetti.
It’s FREE, tell your friends!

Carol Lightburn
Twitter: @quiltsewgo Instagram: quiltsewgo
Twitter: @ukquilters Instagram: uk_quilters_united
Brilliant Carol..let me know if you need any more scraps
Thank you. Ha, ha, just keep saving them Lyn!