Welcome to Block 3: Confetti of your Sampler Quilt.
http://www.pieceandquilt.com/2015/01/how-to-confetti-quilt-block-30-days-of.html
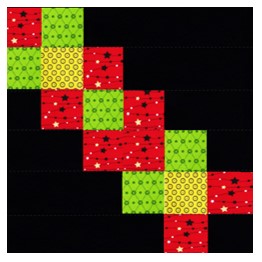
This modern block is made up of squares and rectangular strips and will help you to gain accuracy in cutting, matching at seam points and sewing your 0.25” (¼”) seams. There are lots of images in this block and I’ve shortened the instructions too. Don’t panic, read through carefully and refer to the pattern or blog at any time.
Click HERE for the pdf Block pattern.
UNFINISHED SIZE of block is 12.5 “x 12.5” square.
ASSEMBLY INSTRUCTIONS
STEP 1: ROW 1:

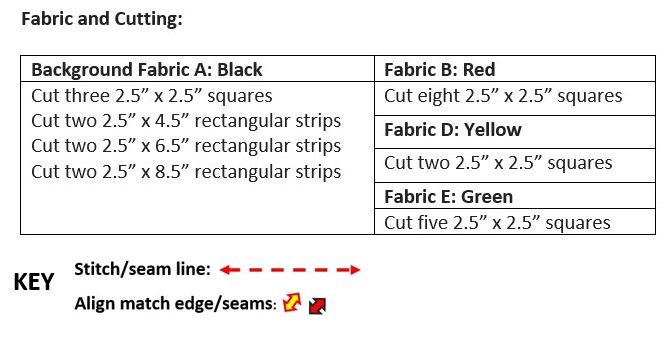
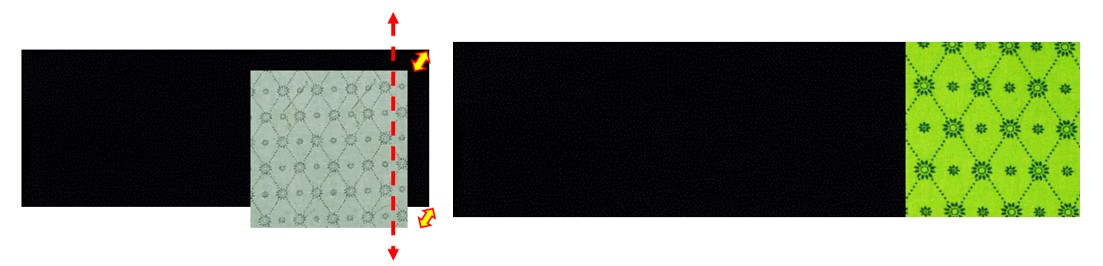
Place one Red and one Green 2.5” x 2.5” square Right Sides (RS) facing together. Sew a seam 0.25” from the Right Hand (RH) side as shown. PRESS
STEP 2:
Now add the Black 2.5” x 8.5” rectangular strip by aligning it to the RH side of the Red/Green unit and sewing a 0.25” seam. PRESS. It should measure 2.5” x 12.5”.

STEP 3:
Row 2:
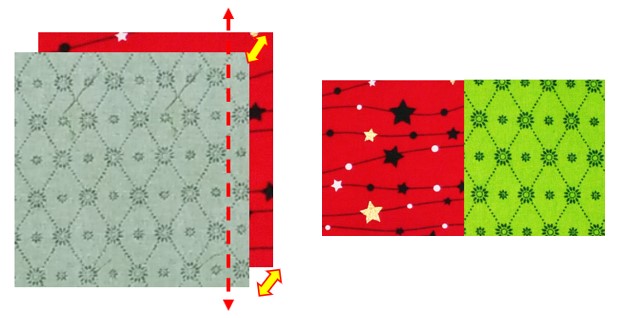
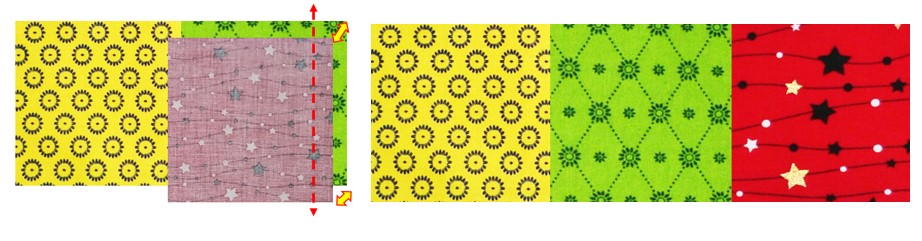
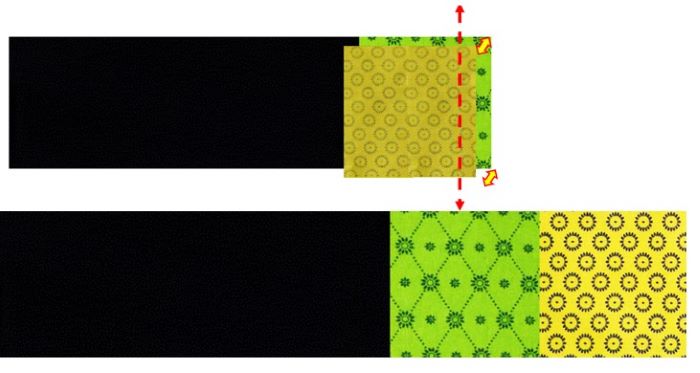
Sew one Green and one Yellow 2.5” x 2.5” square together. PRESS open.

STEP 4:
Now add the Red 2.5” x 2.5” square placing it RS facing to the Right of the Yellow square. Sew the seam and PRESS open.
STEP 5:
Now add one Black 2.5” x 6.5” rectangular strip together. PRESS open. Row 2 is complete.

STEP: 6
Row 3:
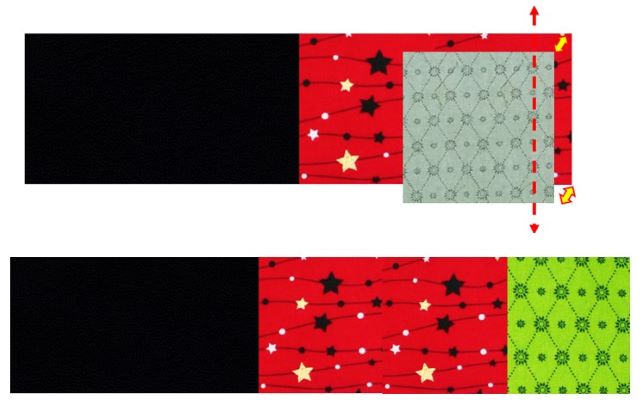
Sew one Black and one Red, 2.5” x 2.5” square together. PRESS open.

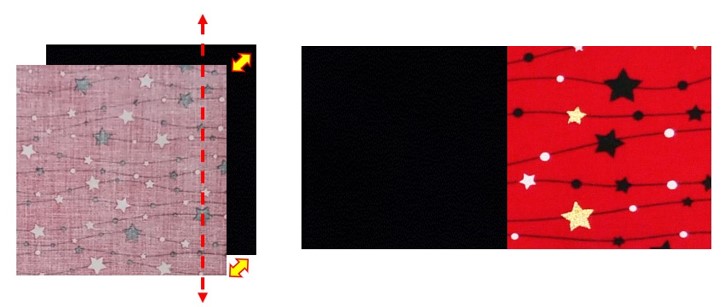
STEP 7:
Next add a Green 2.5” x 2.5” square. PRESS open.
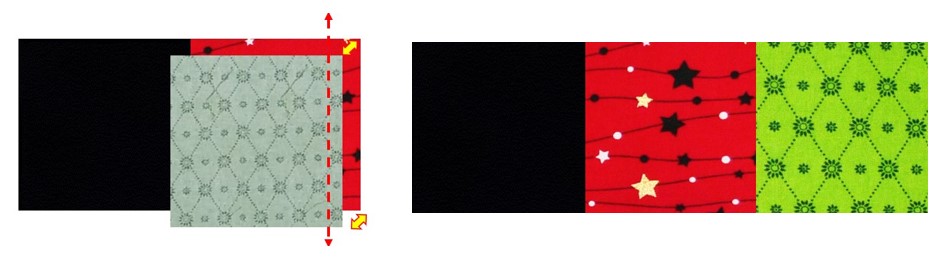
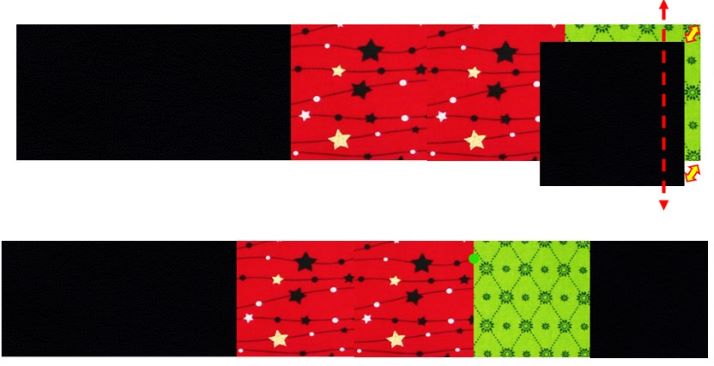
STEP 8:
Next add another Red 2.5” x 2.5” square and one Black 2.5” x 4.5” strip together. PRESS open.

STEP 9:
Next add a Black 2.5” x 4.5” rectangular strip. PRESS open. Row 3 is complete.
STEP 10:
Row 4: Sew one Black 2.5” x 4.5” strip, two Red, one Green and one Black 2.5” x 2.5” squares together. PRESS open as you go. Follow the pictures below to complete the row:


STEP 11:
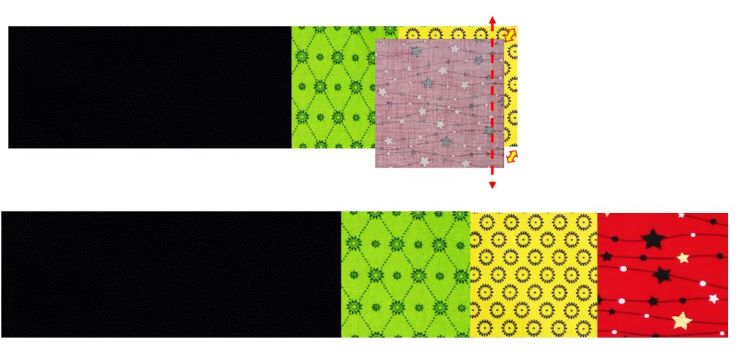
Row 5: Sew one Black 2.5” x 6.5” rectangular strip, one Green, one Yellow and one Red 2.5” x 2.5” square together. PRESS open.
Follow the sequence of pics below to complete the row.

STEP 12:
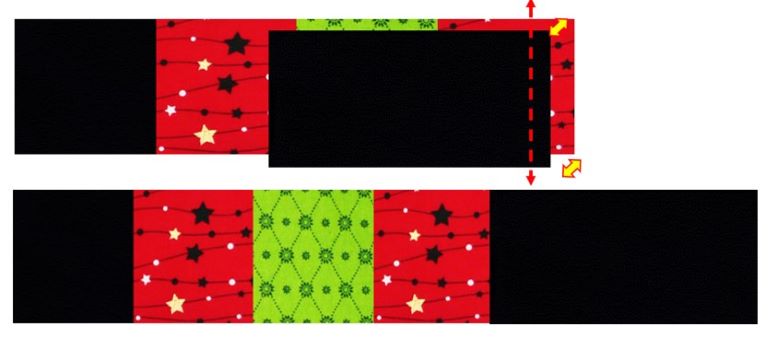
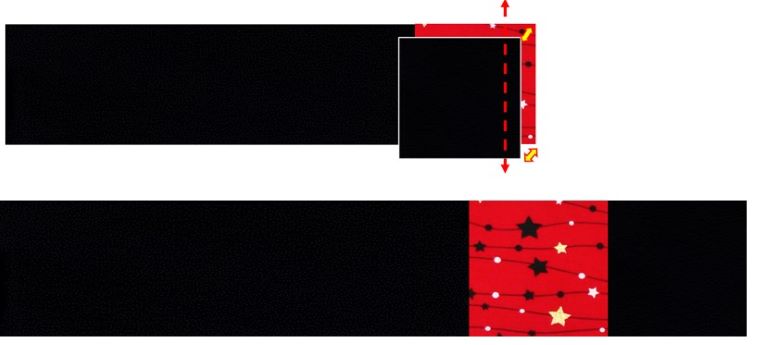
Row 6: Sew one Black 2.5” x 8.5” rectangular strip, one Red and one Black 2.5” x 2.5” square together. PRESS open. Follow the sequence of pics below to complete the final row.


STEP 13:
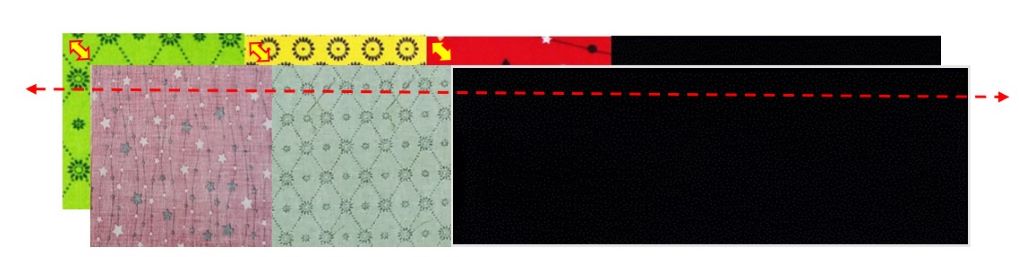
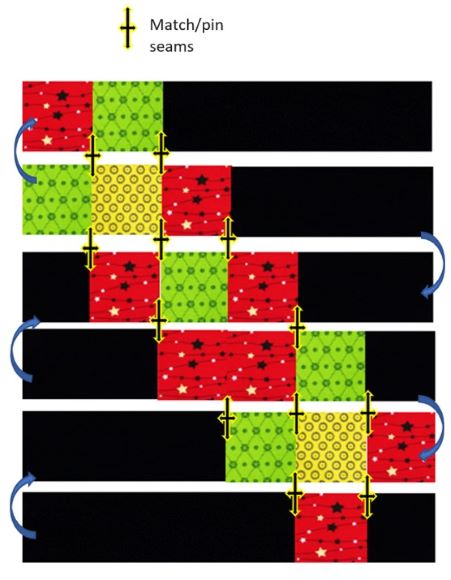
Lay out the six rows. Sew the six rows together using 0.25” seams. PIN where the seams match for accuracy as shown below. I started at the top row and flipping it 180⁰ over the second row.
The diagram below shows how to match the first one. PRESS open.
STEP 14:
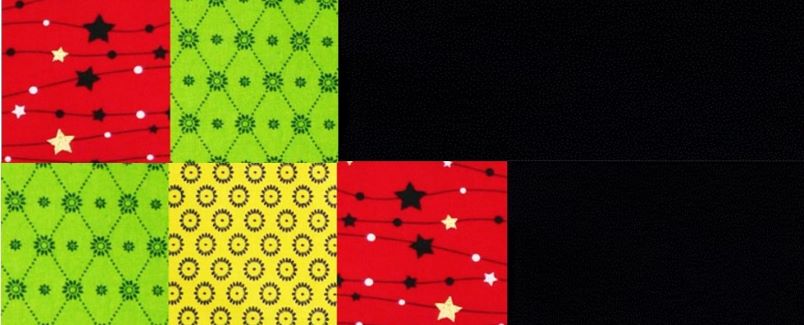
The larger diagram shows where you need to match the remaining rows/points.
You have already completed the first two rows!
Check after pinning and/or sewing that you have the rows in the right order – it’s easy to get muddled. I know I’ve done it!
PRESS open.
Voila you’ve made your third block!
Well done.
It should measure 12.5 inches x 12.5 inches.

There are similar blocks to this such as Deck of Cards, Up from Here and Garlic Knot (scrap stash).
https://quiltingismorefunthanhousework.blogspot.com/2019/07/oh-scrap-some-scrappy-progress.html
https://beyondsockmonkeys.wordpress.com/tutorials-2/deck-of-card-quilt-tutorial-version-1/
http://stashbee.blogspot.com/2018/03/hive-4-march-tutorial-up-from-here-block.html
So, ready for the next one? Block 4: Woven Ribbons
Coming soon: Block 5: Cabin in the Cotton, Block 6 Pinwheel

Carol Lightburn
Why not post a pic onto social media below? I would love to see what you’ve made.
Twitter: @quiltsewgo Instagram: quiltsewgo
Twitter: @ukquilters Instagram: uk_quilters_united
Responses