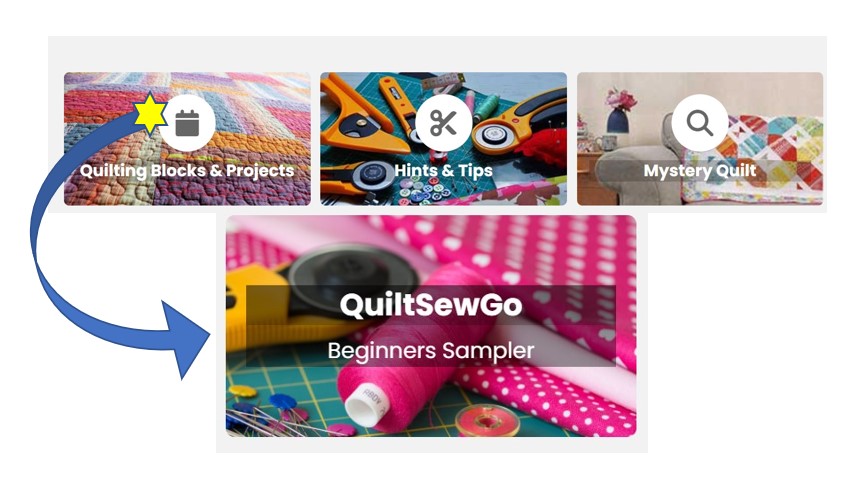
Hello and welcome to the first block in the QuiltSewGo Beginners’ Sampler Quilt. Once you get to the ukqu.co.uk website the homepage will show you a list of options and, to make it easier Sylvia has very kindly arranged for these to be found in one place. – on the HOMEPAGE look for the Quilting Blocks and Projects tab, click into it then look for the QuiltSewGo tab and you should find them there.
If you have not yet read the Introduction you can check this out by following the link below:
https://ukqu.co.uk/blog/2022/11/04/quiltsewgo-beginners-sampler-quilt-introduction/
ARE YOU READY TO GO?
BLOCK 1 – 9-PATCH
Your very first block for the QuiltSewGo Beginners’ Sampler Quilt is the 9-PATCH. A simple block consisting of squares and helps develop your accuracy in making 0.25” seams and matching/aligning points. It has been around since the early 19th Century and still widely used today.
The very first patchwork project I made was a tote bag made up of squares. It came in kit form and gave me my first taste of quilting. Once you gain confidence you can check out other blocks and patterns using a Disappearing 9-patch too.

Click HERE for the PDF BLOCK PATTERN
Unfinished size of block: 12.5” x 12.5”

REMEMBER:
MEASURE twice – CUT once
PRESS across the seam on the wrong side of the fabric first, turn to Right Side (RS)
PRESS away to the darker fabric.
0.25″ = ¼ inch
ASSEMBLY INSTRUCTIONS
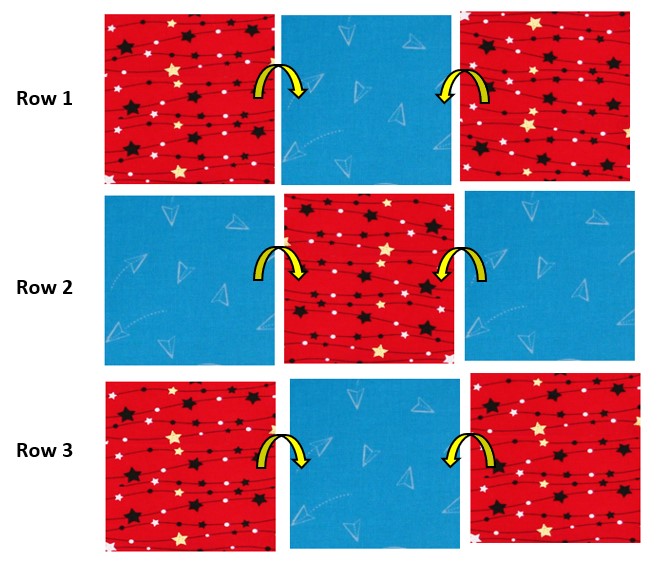
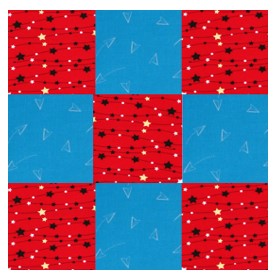
STEP 1: Lay out your squares as shown:-
This helps to see what your block should look like when it’s finished.
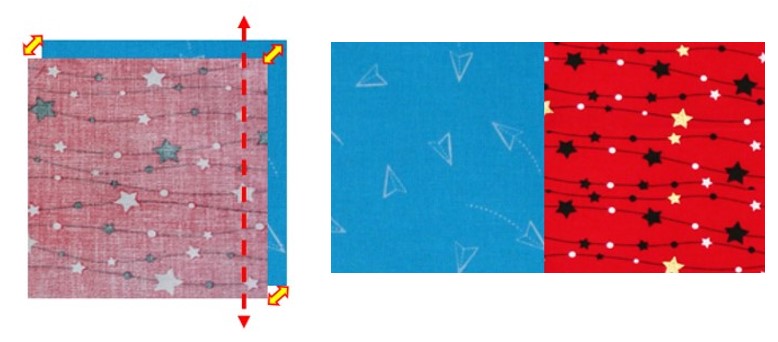
STEP 2: Starting with Row 1 place one RED and one BLUE square Right Sides (RS) together and align the edges. PIN and sew along the seam 0.25” away from the Right-hand edge. PRESS.
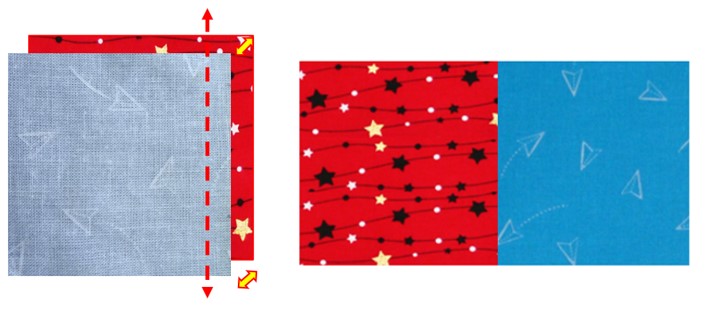
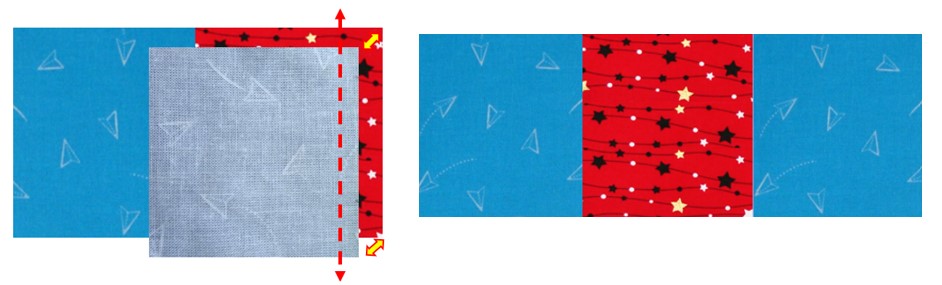
STEP 3: Place a RED square with the RS facing the BLUE as shown below. PIN and sew a seam 0.25” away from the edge.
PRESS the seams so they are facing towards the RED fabric on the reverse. Row 1 is now done.
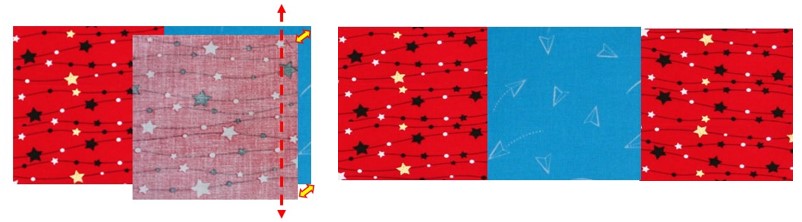
STEP 4: Now for the Centre Row 2. Place one BLUE and one RED square RS together as shown below. PIN and sew a seam 0.25” from the edge.
PRESS the seams towards the RED fabric.
STEP 5:
Place a BLUE square with RS facing the RED square as shown below. Pin and sew a seam 0.25” from the edge. PRESS with the seams towards the darker RED fabric on the reverse. Centre Row is now complete.
STEP 6: Row 3 is the same as Row 1. Sew one RED, one BLUE and one RED square together as shown in STEP 2 & 3.
PRESS the seams towards the RED fabric.

STEP 7: Sewing the whole block together!
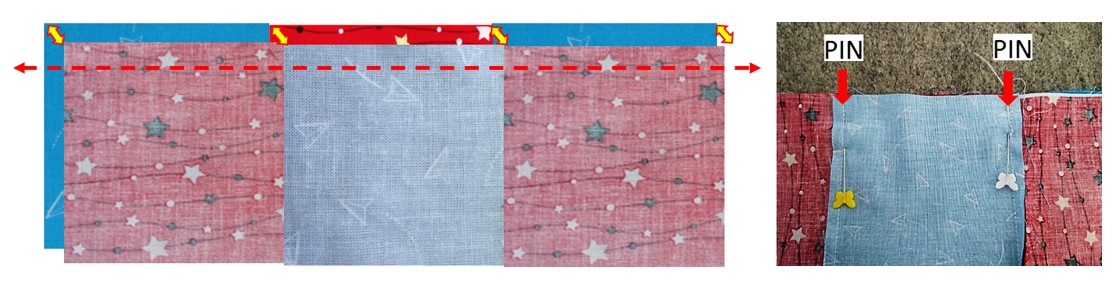
Sew Row 3 (bottom) and Row 2 (centre) RS together. Align and PIN the edges and where the squares meet. To help with accuracy of matching the points PIN where the seams meet. I do this by lining up my pin along the stitch line and checking it matches the stitch line on the reverse side.
Sew a seam 0.25” away from the edge. PRESS open. FLIP it 180⁰ (degrees)
STEP 8: Sew this bottom and centre section and Row 1 (top) together aligning the points/seams for accuracy.
PRESS open.

Voila – you have made your first block.
Well done.
It should measure 12.5 inches x 12.5 inches.
If your block measures less than this, then try this first:
PRESS again using the steam function on your iron.
If not, then it’s possible that your 0.25” seam is slightly off. Check the seams, are they wider than 0.25”? If so, can you unpick them and restitch them? Don’t worry too much at this stage as we will be sashing the blocks together later and your accuracy will get better the more blocks you make.
So, ready for the next one? Block 2: Patience Corner

Carol Lightburn
Twitter: @quiltsewgo Instagram: quiltsewgo
Twitter: @ukquilters Instagram: uk_quilters_united

Responses