While reading the many posts on facebook; I came across Boro, Japanese style patchwork. It intrigued me, as I find myself draw more and more into the world of Japanese textiles. Yet I know very little about them. Susan Briscoe, author and another blogger on this site has a wealth of information on it.
So rather than reinvent the wheel so to speak, I am going to give you a brief rundown of what Boro is and then discuss my Boro inspired project.
Boro- meaning rags is a technique used by the Japanese to repair their worn-out clothes. Used primarily with heavy cotton or denim based fabric. When the clothes had worn or holes had formed, they used small stitches and the reversed appliqué technique to sew the edges of the hole onto a patch placed underneath the fabric.
This is a general search, but it gives great examples of Boro. https://www.google.co.uk/search?q=boro+japanese+mending&source=lnms&tbm=isch&sa=X&ved=0ahUKEwjPmd-8m9PaAhWLa8AKHZcKA3cQ_AUICigB&biw=1920&bih=1012
I do not have the cotton or the needles do to Sashiko stitching so instead I am going to do a Boro inspired project. This is will span over a few months and I may turn it into a thread basket / bin for the sewing room. I am undecided.
Boro – Blue on Blue.
Using blue denim, blue cotton fabric and blue thread, my Boro inspired cloth will take shape.
Let’s start…
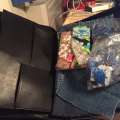
… There are items we need that may not already be in your sewing kit. If you have been following my blog, we have been acquiring items. This month is no different. We are adding some embroidery thread that you can by in packs from the Poundshop, and some embroidery hoops, which Amazon and eBay have for less than £10. It is also a good idea to purchase some embroidery needles, but this is not essential as long as you can fit the thread through the eye.
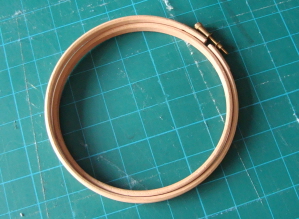
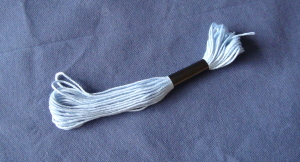
Embroidery hoop and embroidery thread.
Embroidery thread is thicker and comes in six strands twisted together. For this, I am using three strands so therefore I need to separate them. You do not need a long piece of thread and I would recommend no longer than 22 inches.
Take the end of your thread and separate it, to do this remove two strands and pull slowly apart.
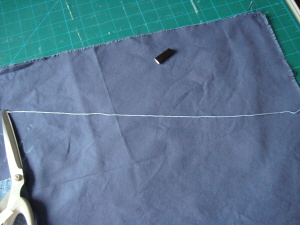
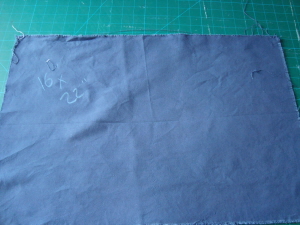
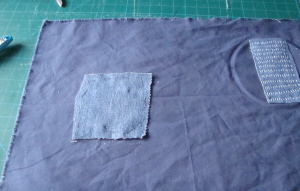
You need a base fabric and mine is cotton twill. I have cut it to 16 inches by 22 inches.
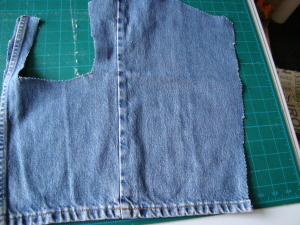
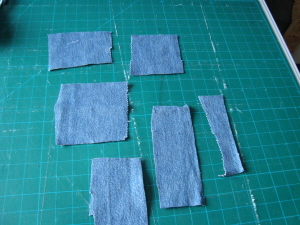
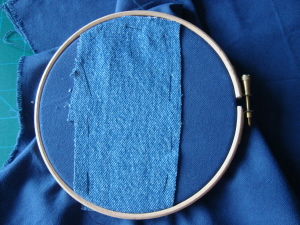
Using a section of a pair of denim jeans – 100% cotton optional – I cut various size patches out.
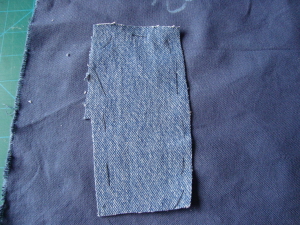
Using large tack down stitches with ordinary cotton, I placed a patch randomly on the backing fabric and tacked in place. I made sure that it sat squarely in line with the edges.

Then I placed this in the embroidery hoop by laying this fabric over the inner circle, pushing the outer circle over the hoop, keeping the fabric taught. Then I secured the outer hoop in place by turning the screw.
Using running stitches, I began to sew in straight lines.
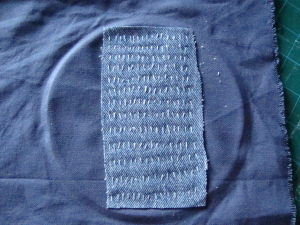
Once complete I removed from my embroidery hoop and tacked on another patch in another random location. Again keeping it square on the fabric.
Again, place back into the embroidery hoop and continue to work on it with straight stitches and maybe this time a different shade of blue thread. This is not a five-minute project and I will post back my progress as I work.
Next month I am undergoing an operation, so as of yet, I am unsure what my blog will entail.
Watch this space.
Related posts:
 The Cheap Procrastinator – Boro, Boro, Bin it, Threads that is! Final Boro Part
 The Cheap Procrastinator – All the small things you can do; Boro Part Two
 The Cheap Procrastinator: Hints and Tips from a Hospital Bed – A4 Presentation Portfolio Folder.
 The Cheap Procrastinator – All the small things you can do; Kantha Quilted Pincushion
Denise I love Boro and all it means and stands for. My first attempt was last month and I really enjoyed doing it. Look forward to reading more,
Thank You. Working on part two at the present time.
Haha, I have been doing this sort of ‘darning’ and mending of my OH and childrens’, and grandchildrens’, jeans for the past 30 years or so and never knew it had a name! Thank you again for another eye opener!!!!!
You are most welcome. I will be learning the correct stitches so hopefully it will look more japanse by the time I finish it.