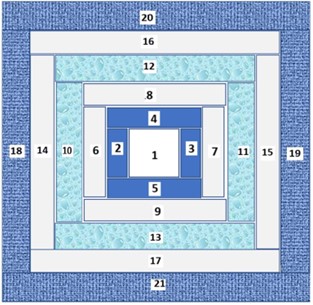
Block 5: Cabin in the Cotton
A third of the way through for making the blocks for your Sampler Quilt. I just love a Log Cabin block. There are so any variations of the Log Cabin block, and this is just one of them. Deceptively simple, this block will help you to build up your accuracy in sewing straight 0.25” (¼”) seams and pressing carefully to avoid ‘wonky’ seam lines.

The centre ‘RED’ square has significance as it symbolises the hearth of home whilst a yellow centre represents a welcoming light in the window. More background of this block is found via my blog at https://ukqu.co.uk/?s=cabin+the+the+cotton
This block is taken from the book Quilting: Patchwork and Applique, published by Dorling Kindersley, October 2014. No instructions were included on how to put this block together, so I have wrote the pattern to share with others,
Click HERE for the pdf Block pattern.
Unfinished size: 12.5” x 12.5” square
TIP: Press carefully as you go and try not to distort the seam lines, e.g. PRESS pieces 1, 2, 3, Press 4, 5, Press 6, 7, etc.

ASSEMBLY INSTRUCTIONS
Tip: accurate 0.25” (¼”) seams are needed throughout and careful pressing at each stage of the construction produces an accurate finish to the block.
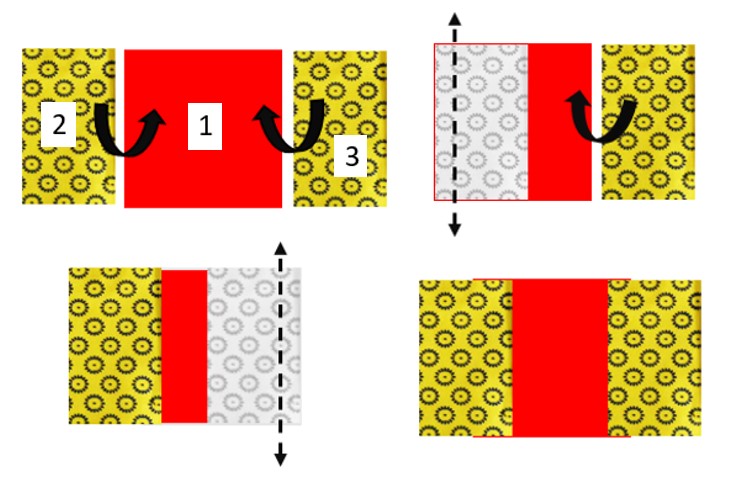
STEP 1.
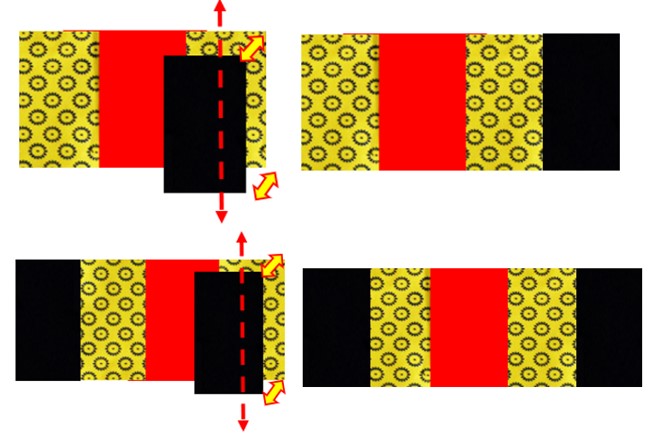
With the 2.5” x 2.5” Red square at the centre, sew pieces 2 and 3 (Yellow) to r the Right and Left side using a 0.25” seam. PRESS open.
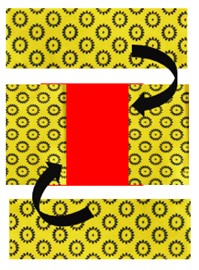
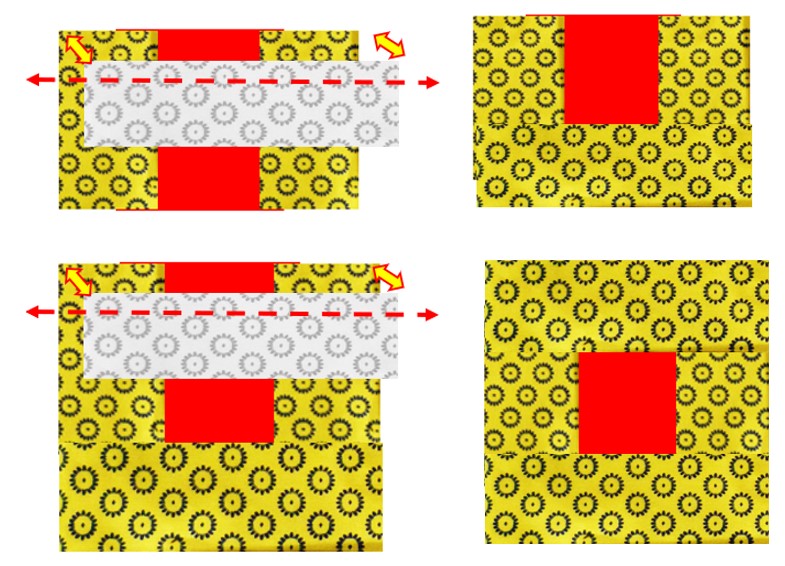
STEP 2:
Repeat with pieces 4 and 5 (Yellow) by sewing across the top and bottom using a 0.25” seam. PRESS open.
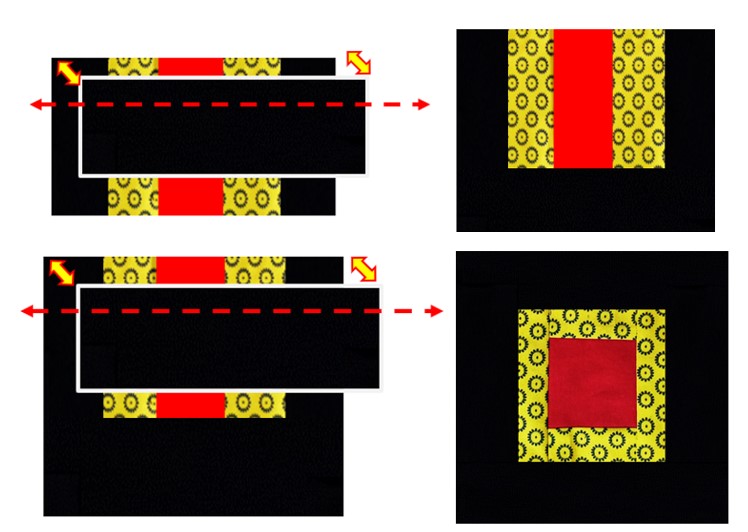
STEP 3:
Using pieces 6 and 7 (Black) sew to the Right and Left sides of the last ‘row’ using a 0.25” seam. PRESS open.
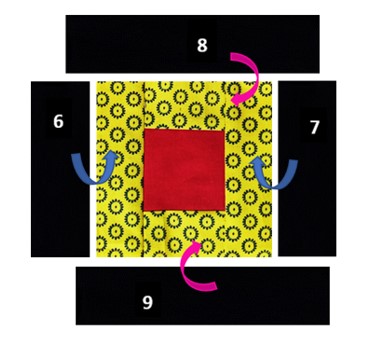
STEP 4:
Using pieces 8 and 9 (Black), with 0.25” seams, sew to the top and bottom of the last ‘row’ and PRESS.
Continue building up your block in this way using the pieces as below.
STEP 5:
Using pieces 10 and 11 (Yellow), with 0.25” seams, sew to the Right and Left sides of the last ‘row’ and PRESS open.
STEP 6:
Using pieces 12 and 13 (Yellow), with 0.25” seams, sew to the top and bottom of the last ‘row’ and PRESS open.

STEP 7:
Using pieces 14 and 15 Fabric A (Black), with 0.25” seams, sew to the Right and Left sides of the last ‘row’. PRESS open.
STEP 8:
Using pieces 16 and 17 Fabric A (Black), with 0.25” seams, sew to the top and bottom of the last ‘row’. PRESS open.
Remember these last four rectangular strips are 2” wide instead of the 1.5”!
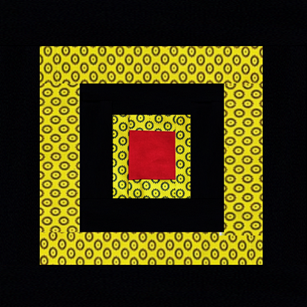
STEP 9: Using pieces 18 and 19 Fabric D (Yellow), with 0.25” seams, sew to the Right and Left sides of the last ‘row’ and PRESS open.
STEP 10: Using pieces 20 and 21 Fabric D (Yellow), with 0.25” seams, sew to the top and bottom of the last ‘row’ and PRESS open.
Check the size before you trim – it might measure 13” x 13”
PRESS the whole block, trim and square up to 12.5” x 12.5” square (you will be trimming 0.25” off each side).

Voila, you’ve made your fifth block!

So, ready for the next one? Block 6: Pinwheel
Coming Soon: Block 7: Hatchet, Block 8: Flying Geese
The next few blocks will have you making Half Square Triangles (HST) (including some bonus ones) and connecting corners.

Carol Lightburn
Twitter: @quiltsewgo Instagram: quiltsewgo
Twitter: @ukquilters Instagram: uk_quilters_united

Responses