TOILETRY BAG – Easy make, in about half an hour.
As the summer is just around the corner (well, maybe), I thought I would make and Blog a Zipper Pouch Toiletry Bag.
I have made several of these, they are quite quick and relatively easy to make.
Here goes:
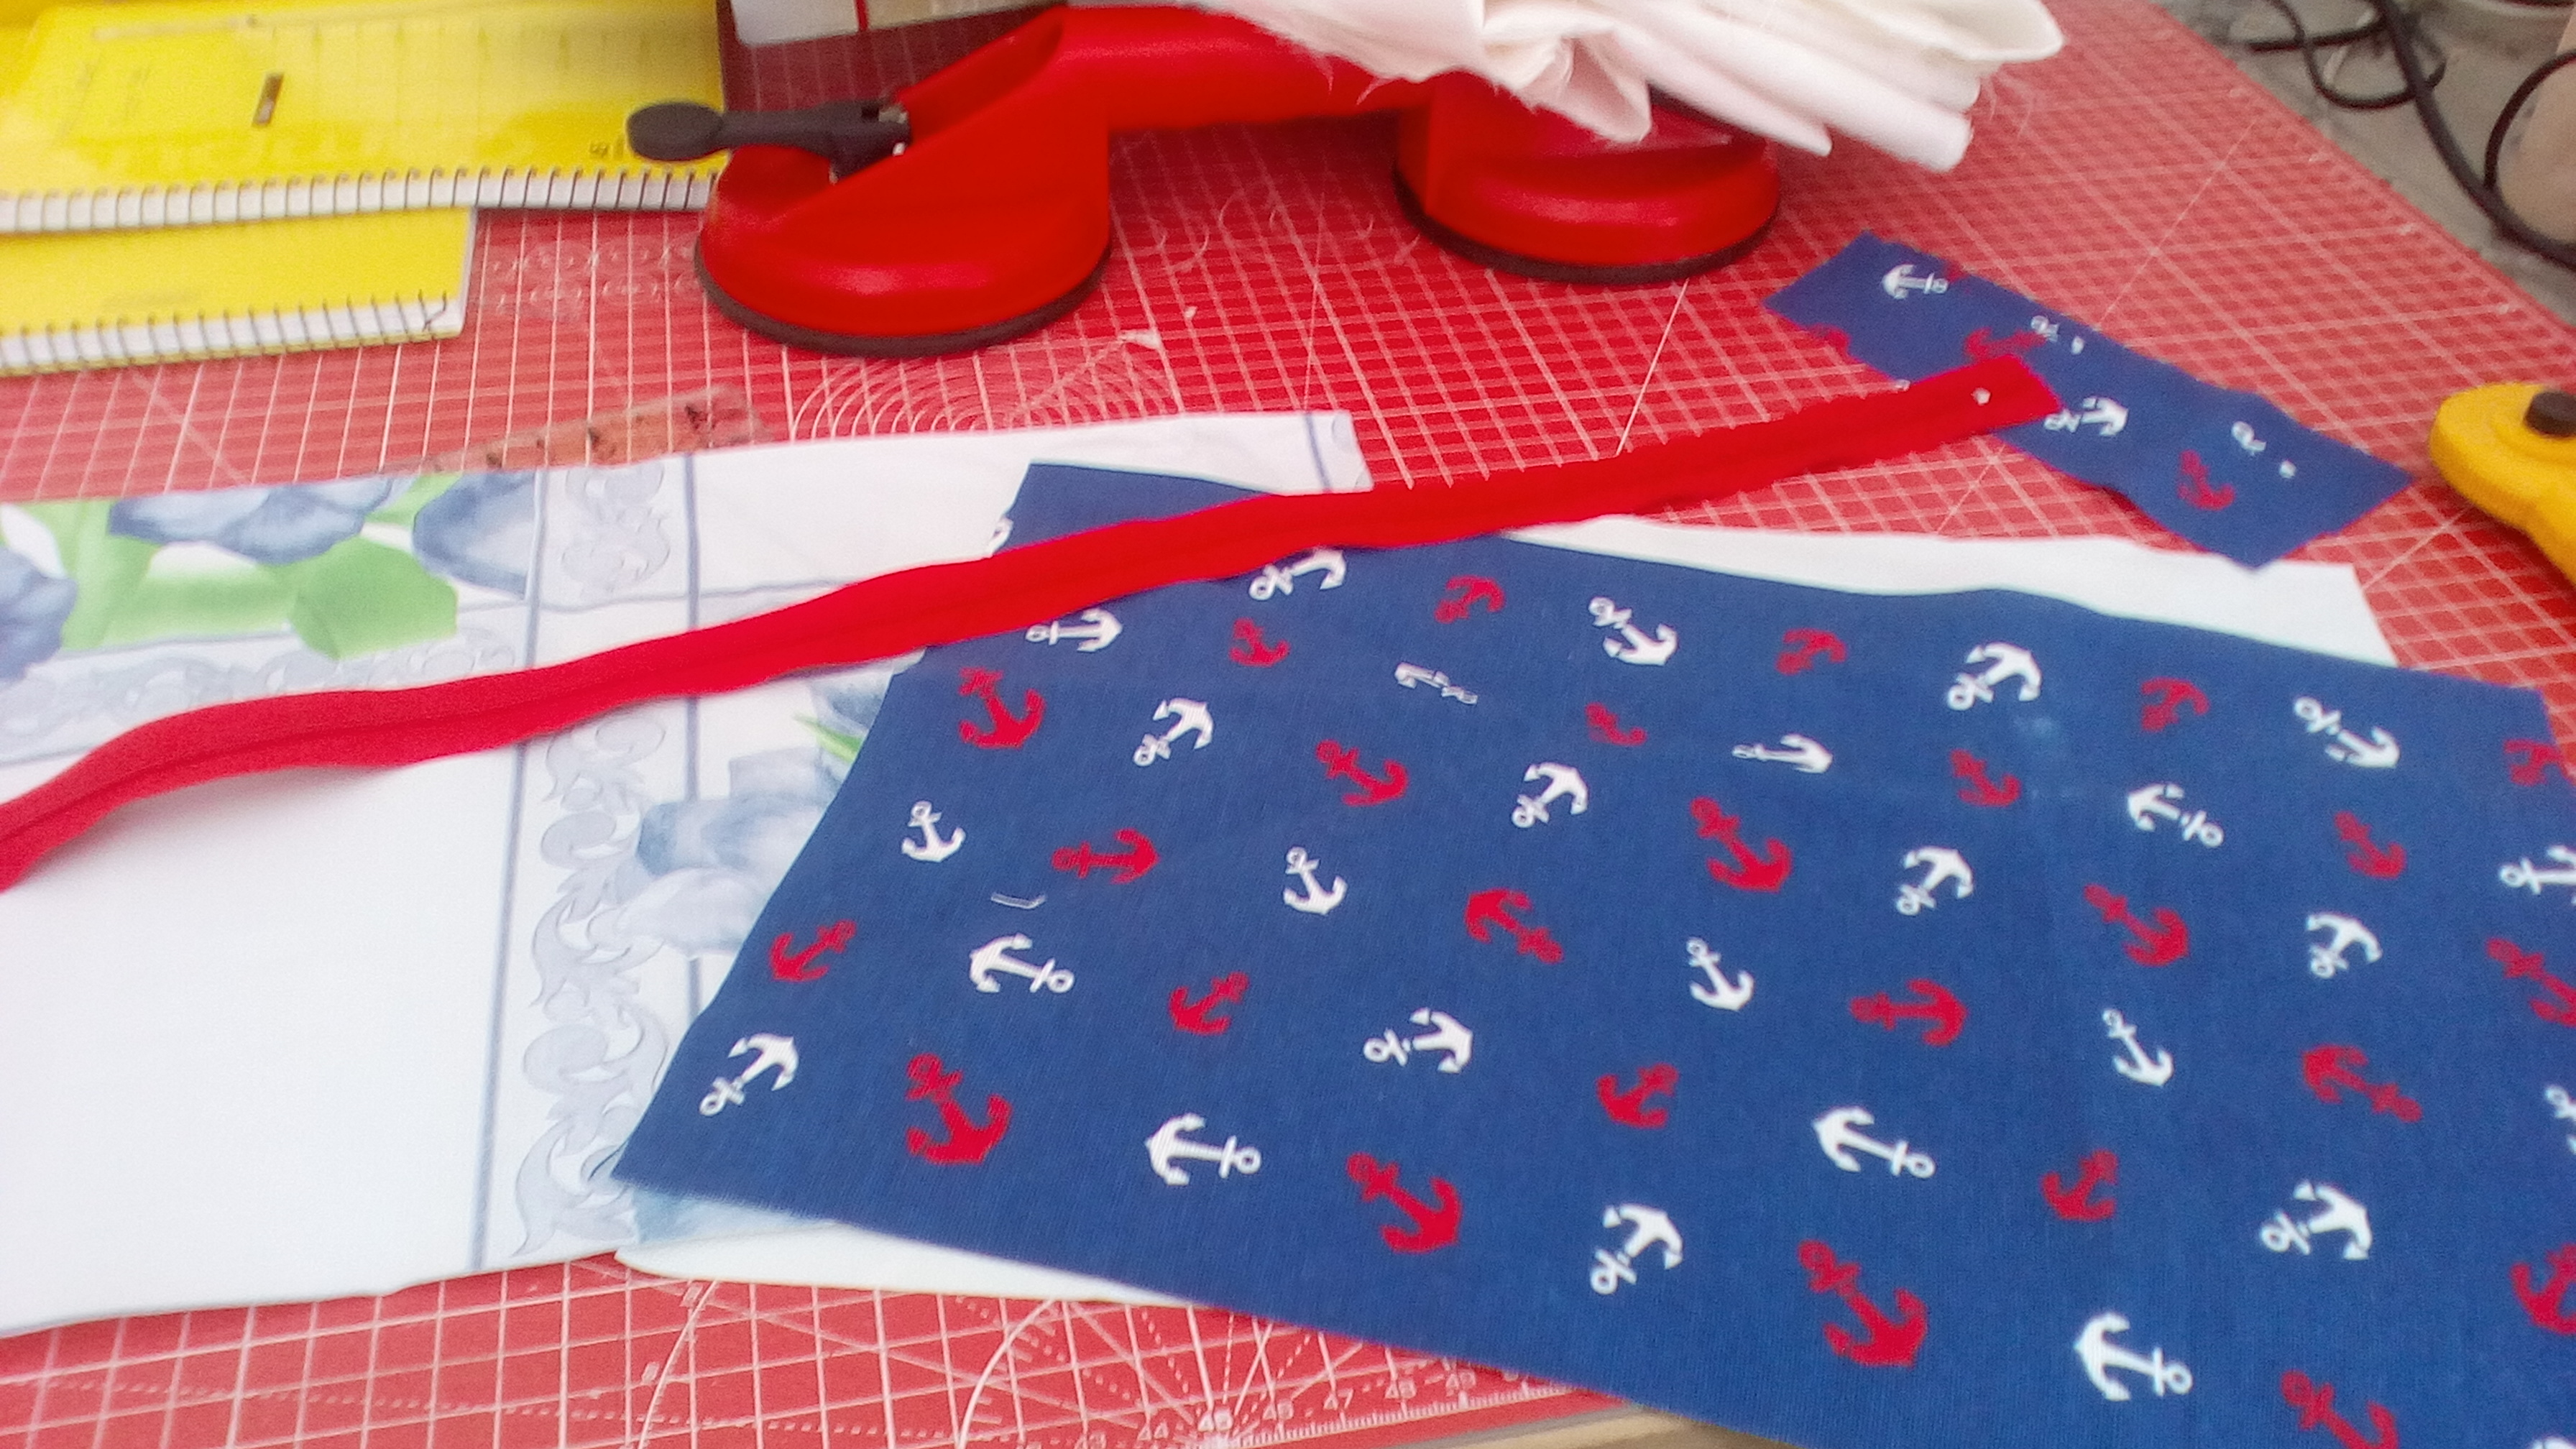
You will need 2 pieces of main fabric 9.5inches x 14inches wide
Two pieces of lining fabric (same size as the top) **
15inch zipper to match or contrast with the main fabric.
One piece of main fabric, 2.5 inches by 7inches for the pull tab.
** I use plastic tablecloth material so that the Bag is waterproof. I initially made them with pretty fabric but found that the wet toothbrush, sponge/flannel, made the bag damp
What you do:
Firstly, lay the main fabric face up and place the zipper face down at the top of one long edge. Then place your plastic fabric (face down) on top of the zipper and either pin or clip the three pieces together. Sew the zipper along the top, close to the teeth (using a zipper foot ideally). When you have done, you should have the zipper between the two fabrics like so:
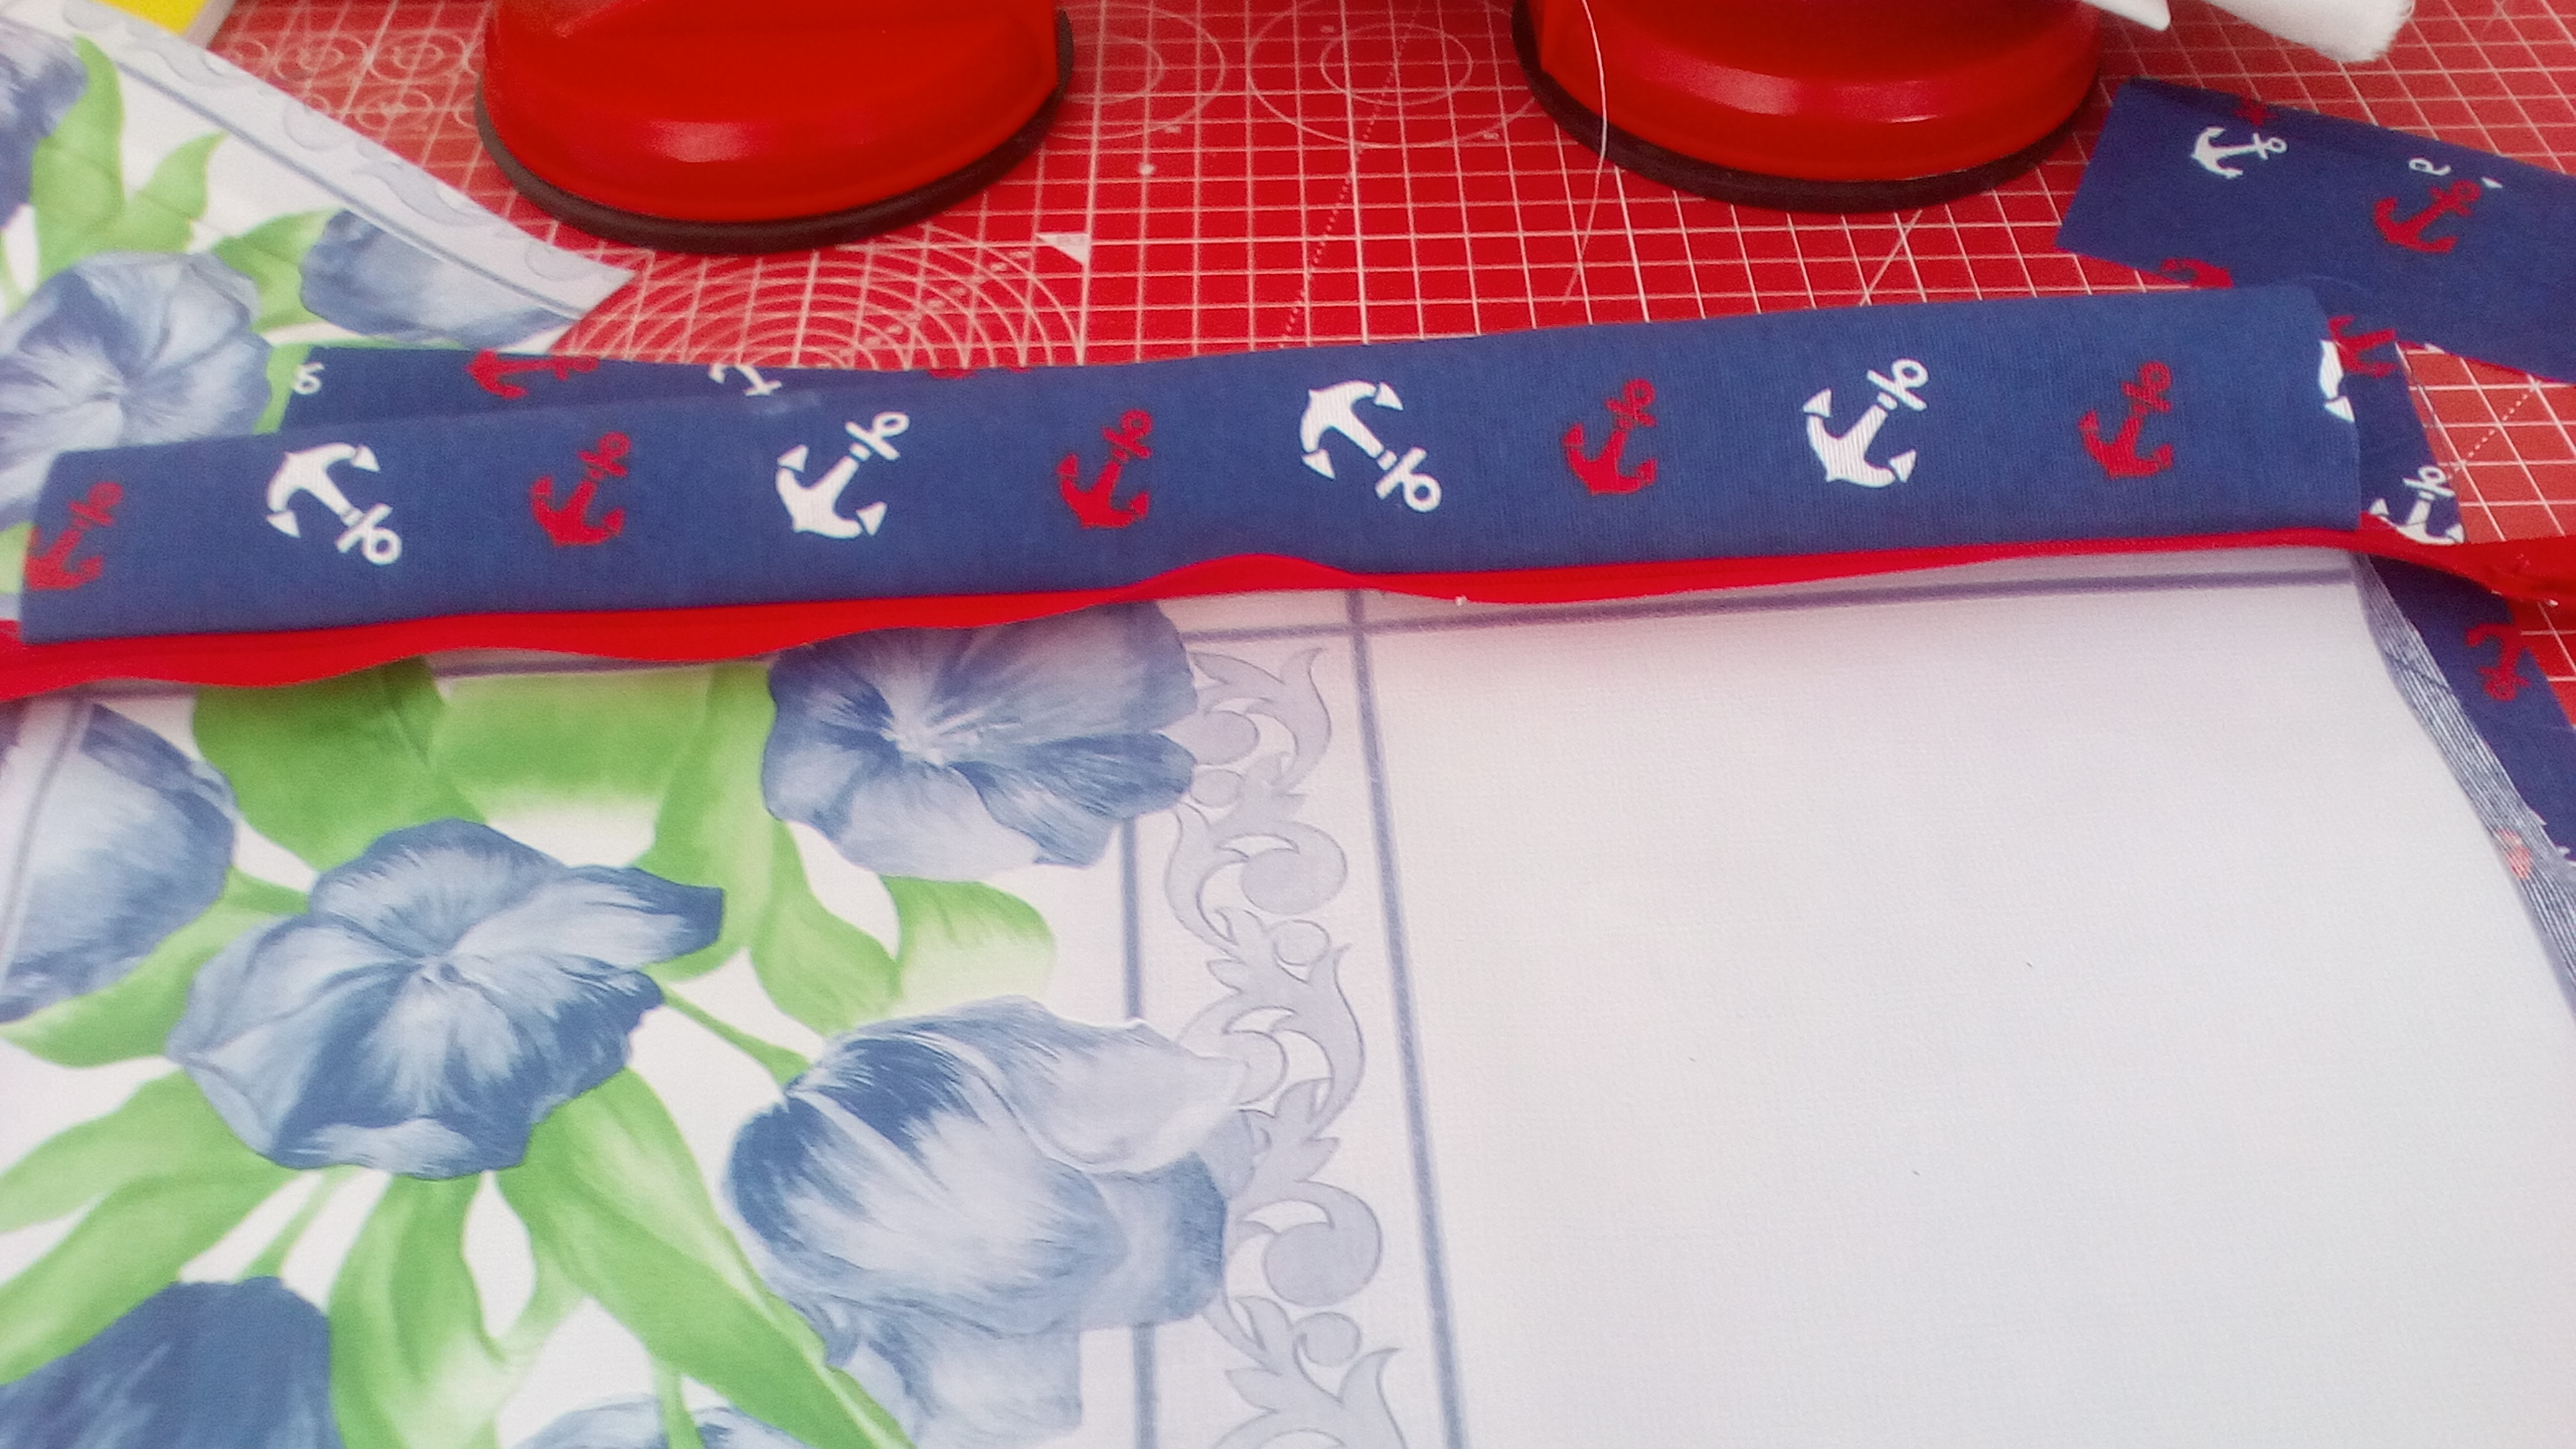
Notice that the zipper hangs over the ends of the fabric – this is fine and will be sorted when we sew the sides of the pouch.
Now take the other main fabric and, keeping the already sewn pieces out of the way, line it up along the other side of the zipper and then add the lining fabric and clip, or pin, and sew in the same way as before.
You should end up with the zipper between the four pieces of fabric with the cut edges inside.
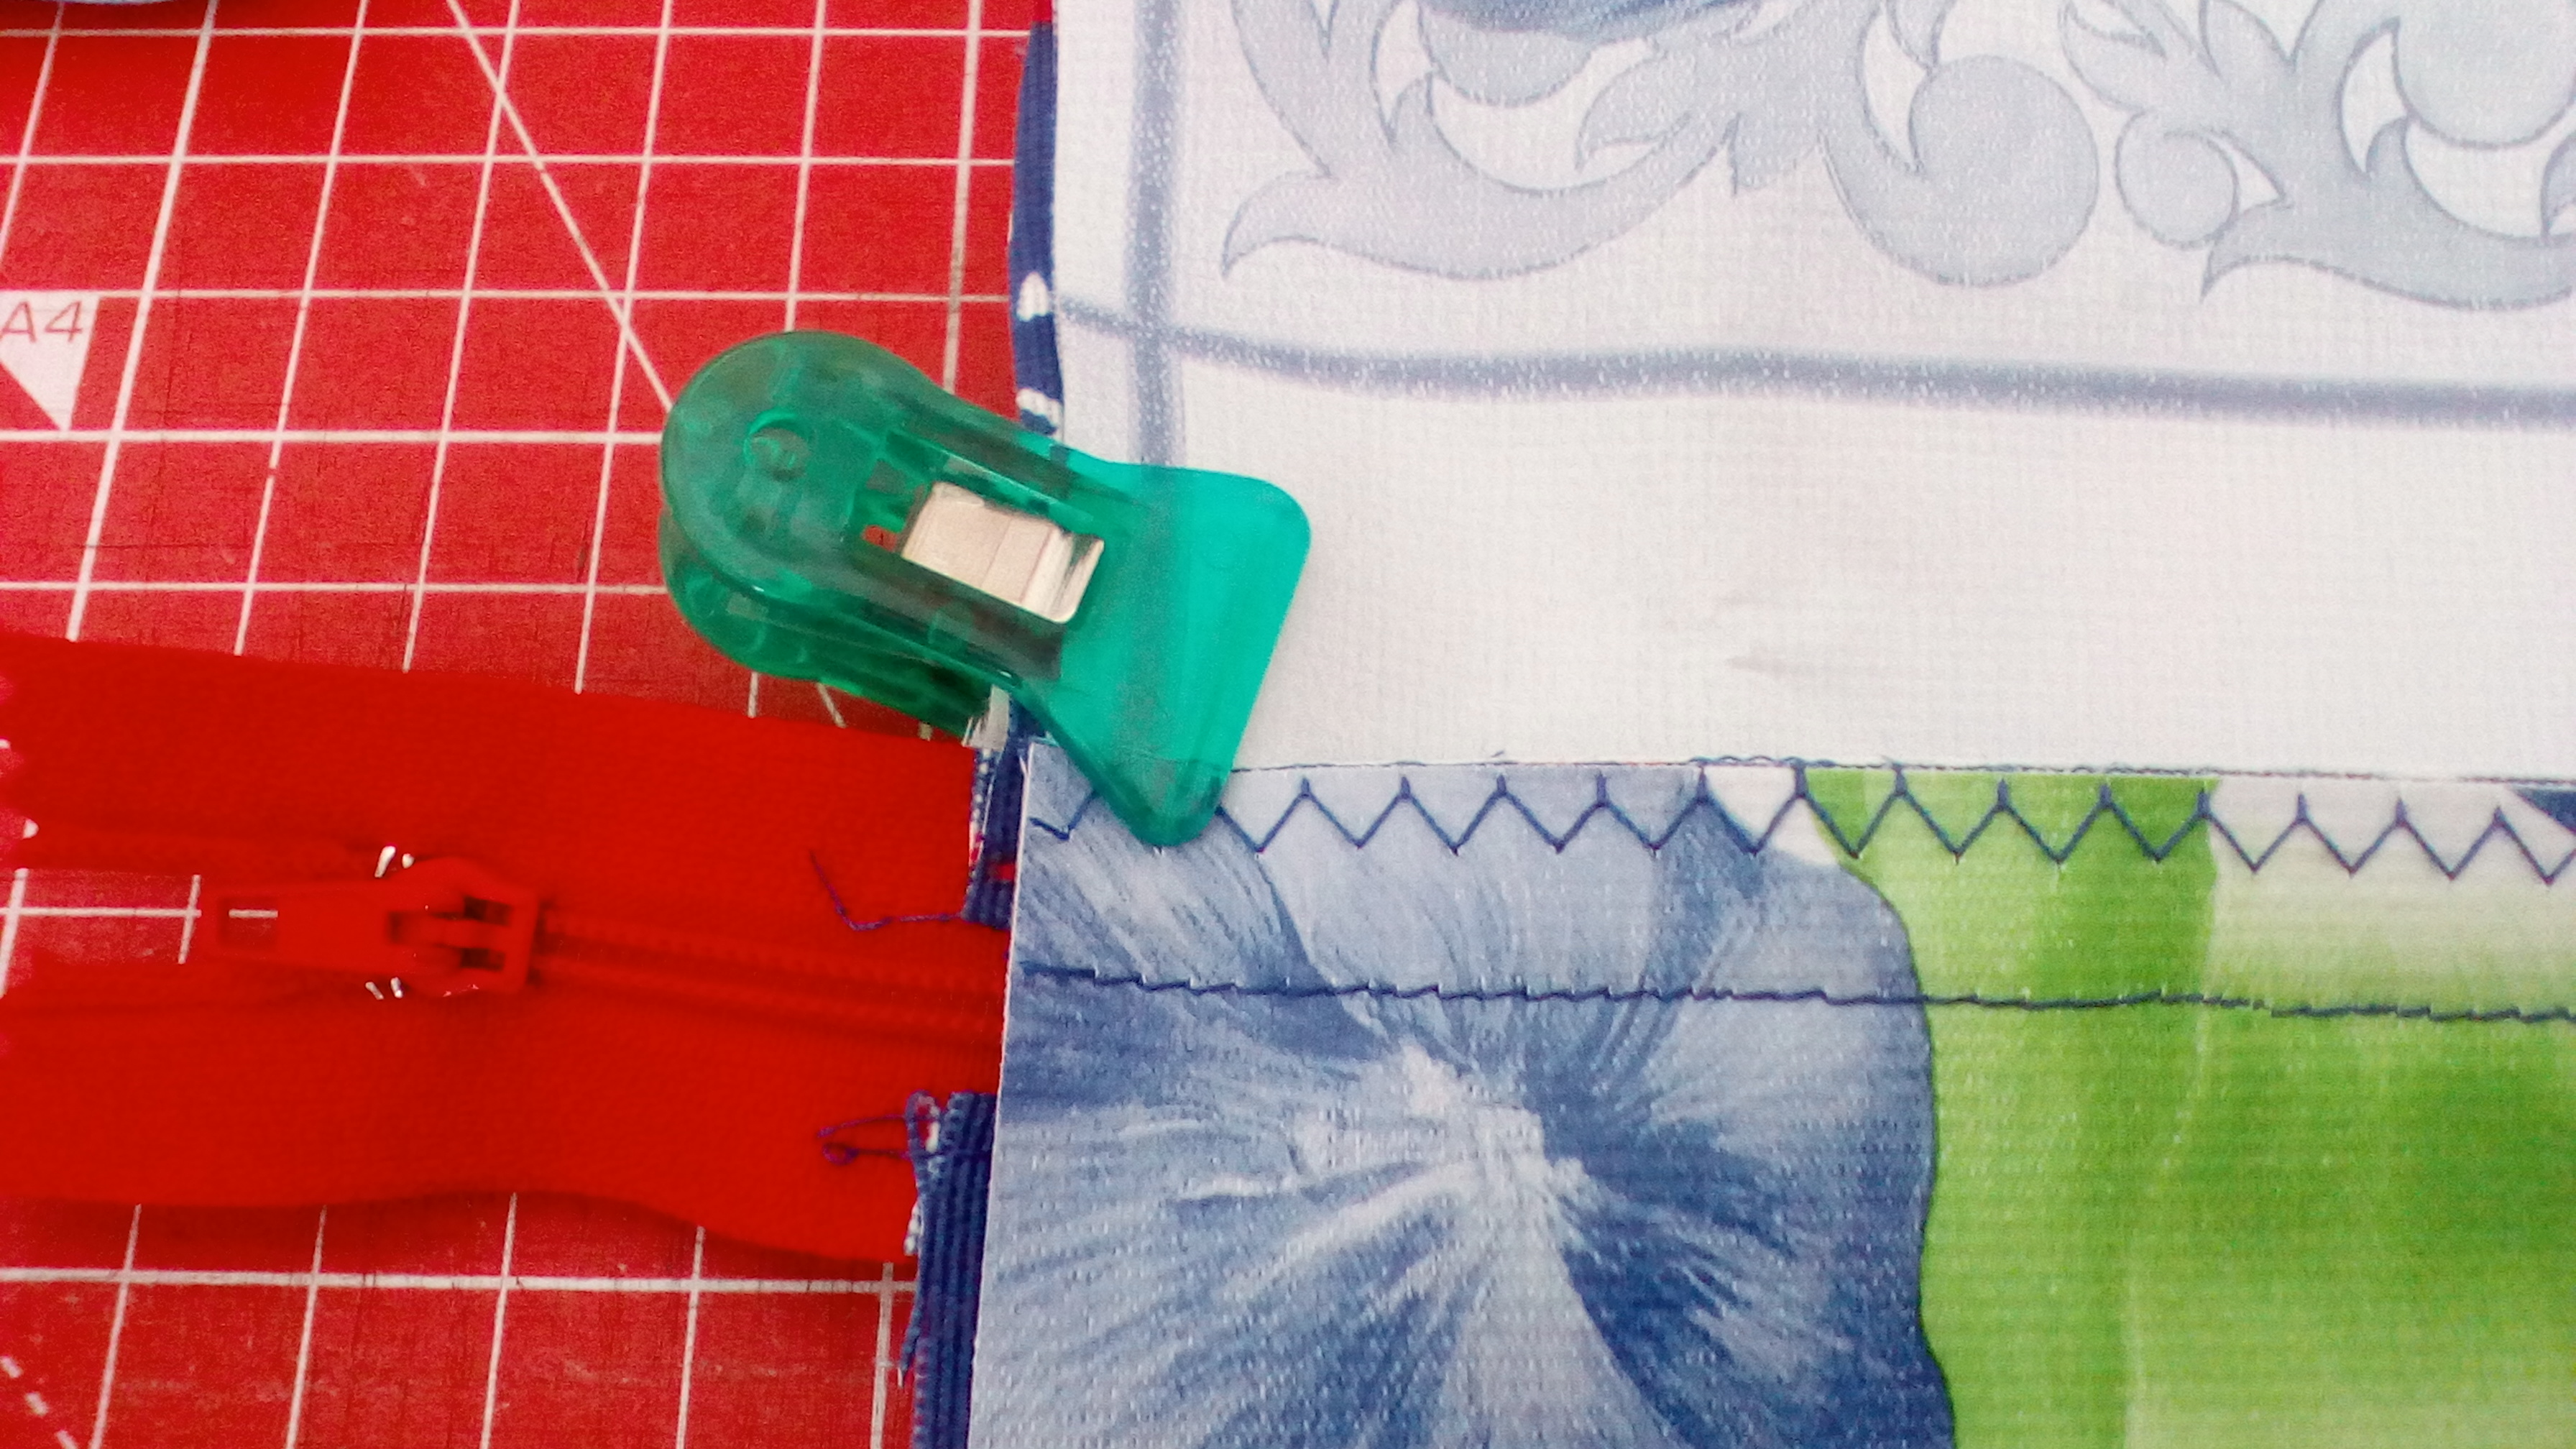
Open out and press the main fabric away from the zipper teeth and top sew close to the edge of the fold. Obviously, you will need to press down hard with your fingers on the plastic side otherwise you will end up with a sticky iron and holes in your lining!!!!!
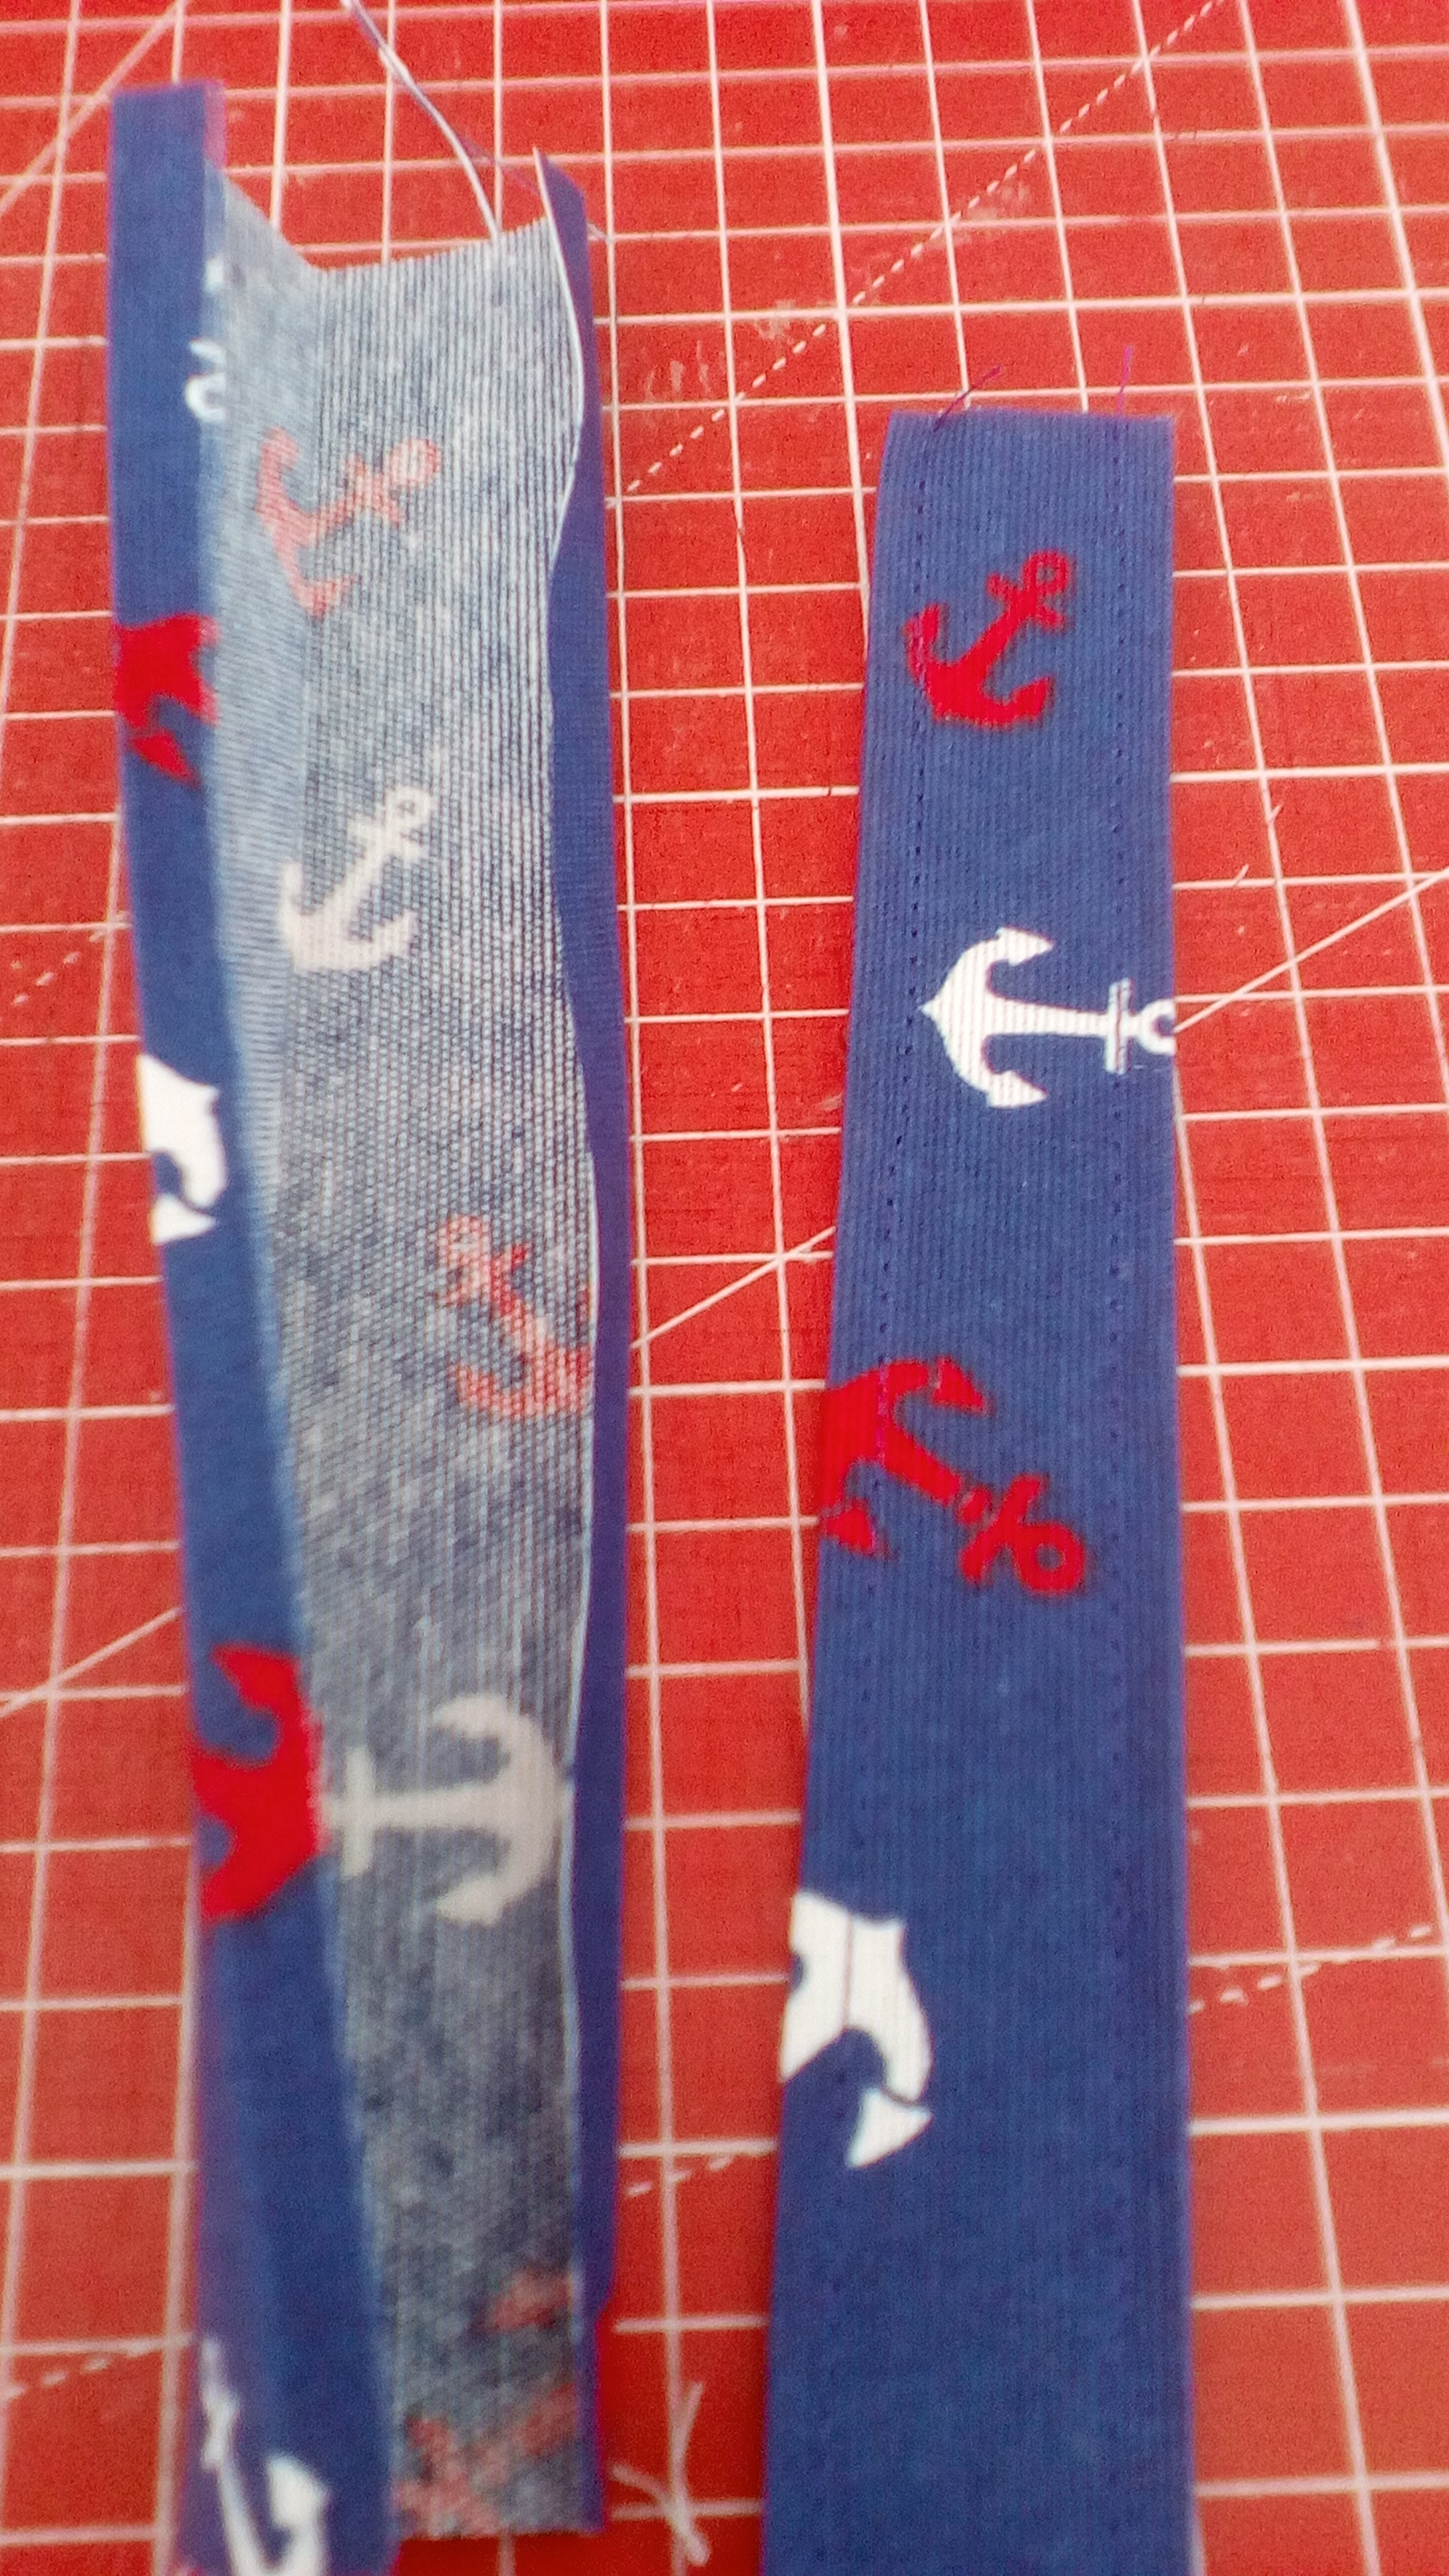
Next, you need to make your two pull tabs. Turn in 1/4inch along both long sides of the 2.5inch x 7inch fabric and then fold in half and sew along both long edges, as photo. Now fold the piece in half and cut into two.
Turn your pouch so that the main fabric faces and making sure that the four edges are lined up, sew along the bottom edge (opposite edge to the zip), using 1/2inch seam allowance. Then either zigzag the bottom edge, or use an overlocker, to neaten the edges. Neaten the two sides if necessary.
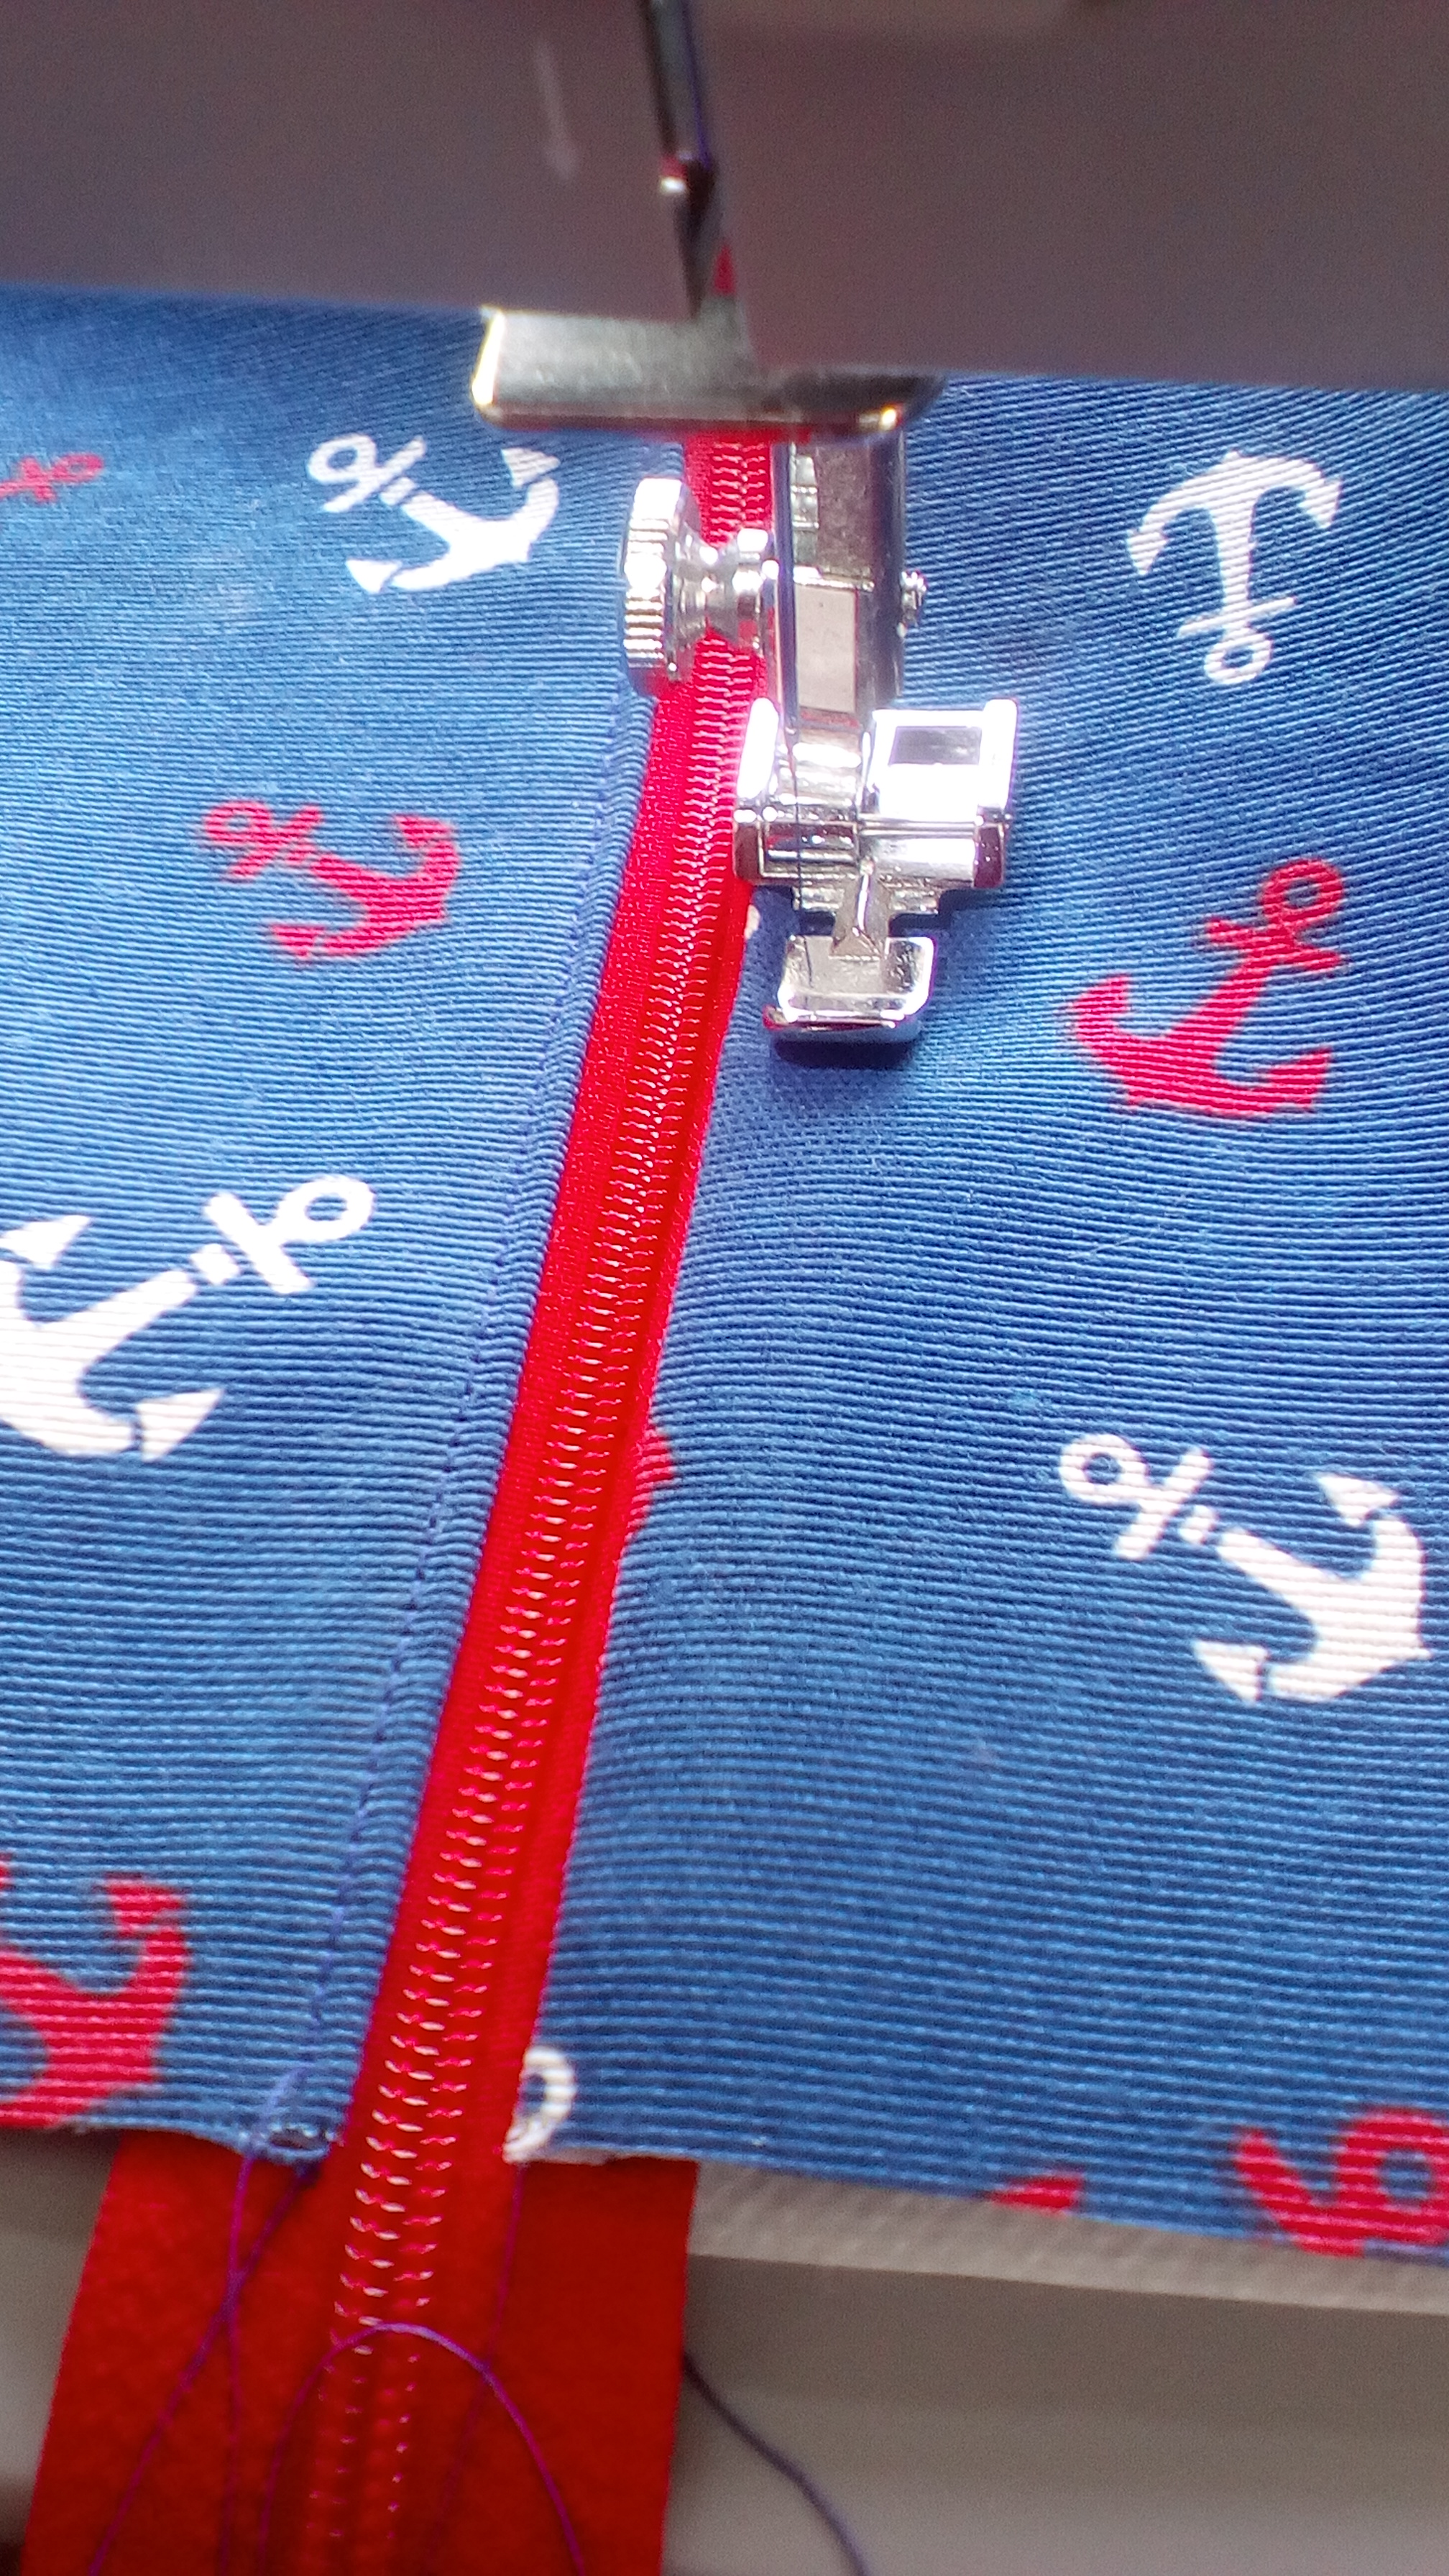
Open out the bottom seam and align it with the zipper. Starting with the non-opening end of the zipper, fold the tab in half and place the cut ends level with the edge of the fabric (photo) now sew along the side edge with a 1/2inch seam allowance, taking care when sewing over the teeth. It is advisable to double sew the zipper area so that the tab doesn’t come loose with wear.
It is a little tricky to sew the tab and the zipper at the other end. So, first pin the tab in place and the open the zipper so that the zipper pull is inside the pouch and no where near the end. Line up the centre of the bottom seam and tab with the centre of the zipper, slightly overlapping the zipper teeth. Sew the side edge the same as the first one, double sewing over the zipper. Do take care here!!
Trim the excess zipper at both ends, and to ensure that the teeth don’t break my needle I cut back the teeth a little. Then zigzag or overlock the side edges to neaten.
With a marker pen, mark your side edges for about two inches, from the bottom, and then open out the corner and line up the sewn seam with your marked line. Ideally, using a ‘Square Ruler Template’, mark a line 2inches from the corner point and 4inches long. (See photo).
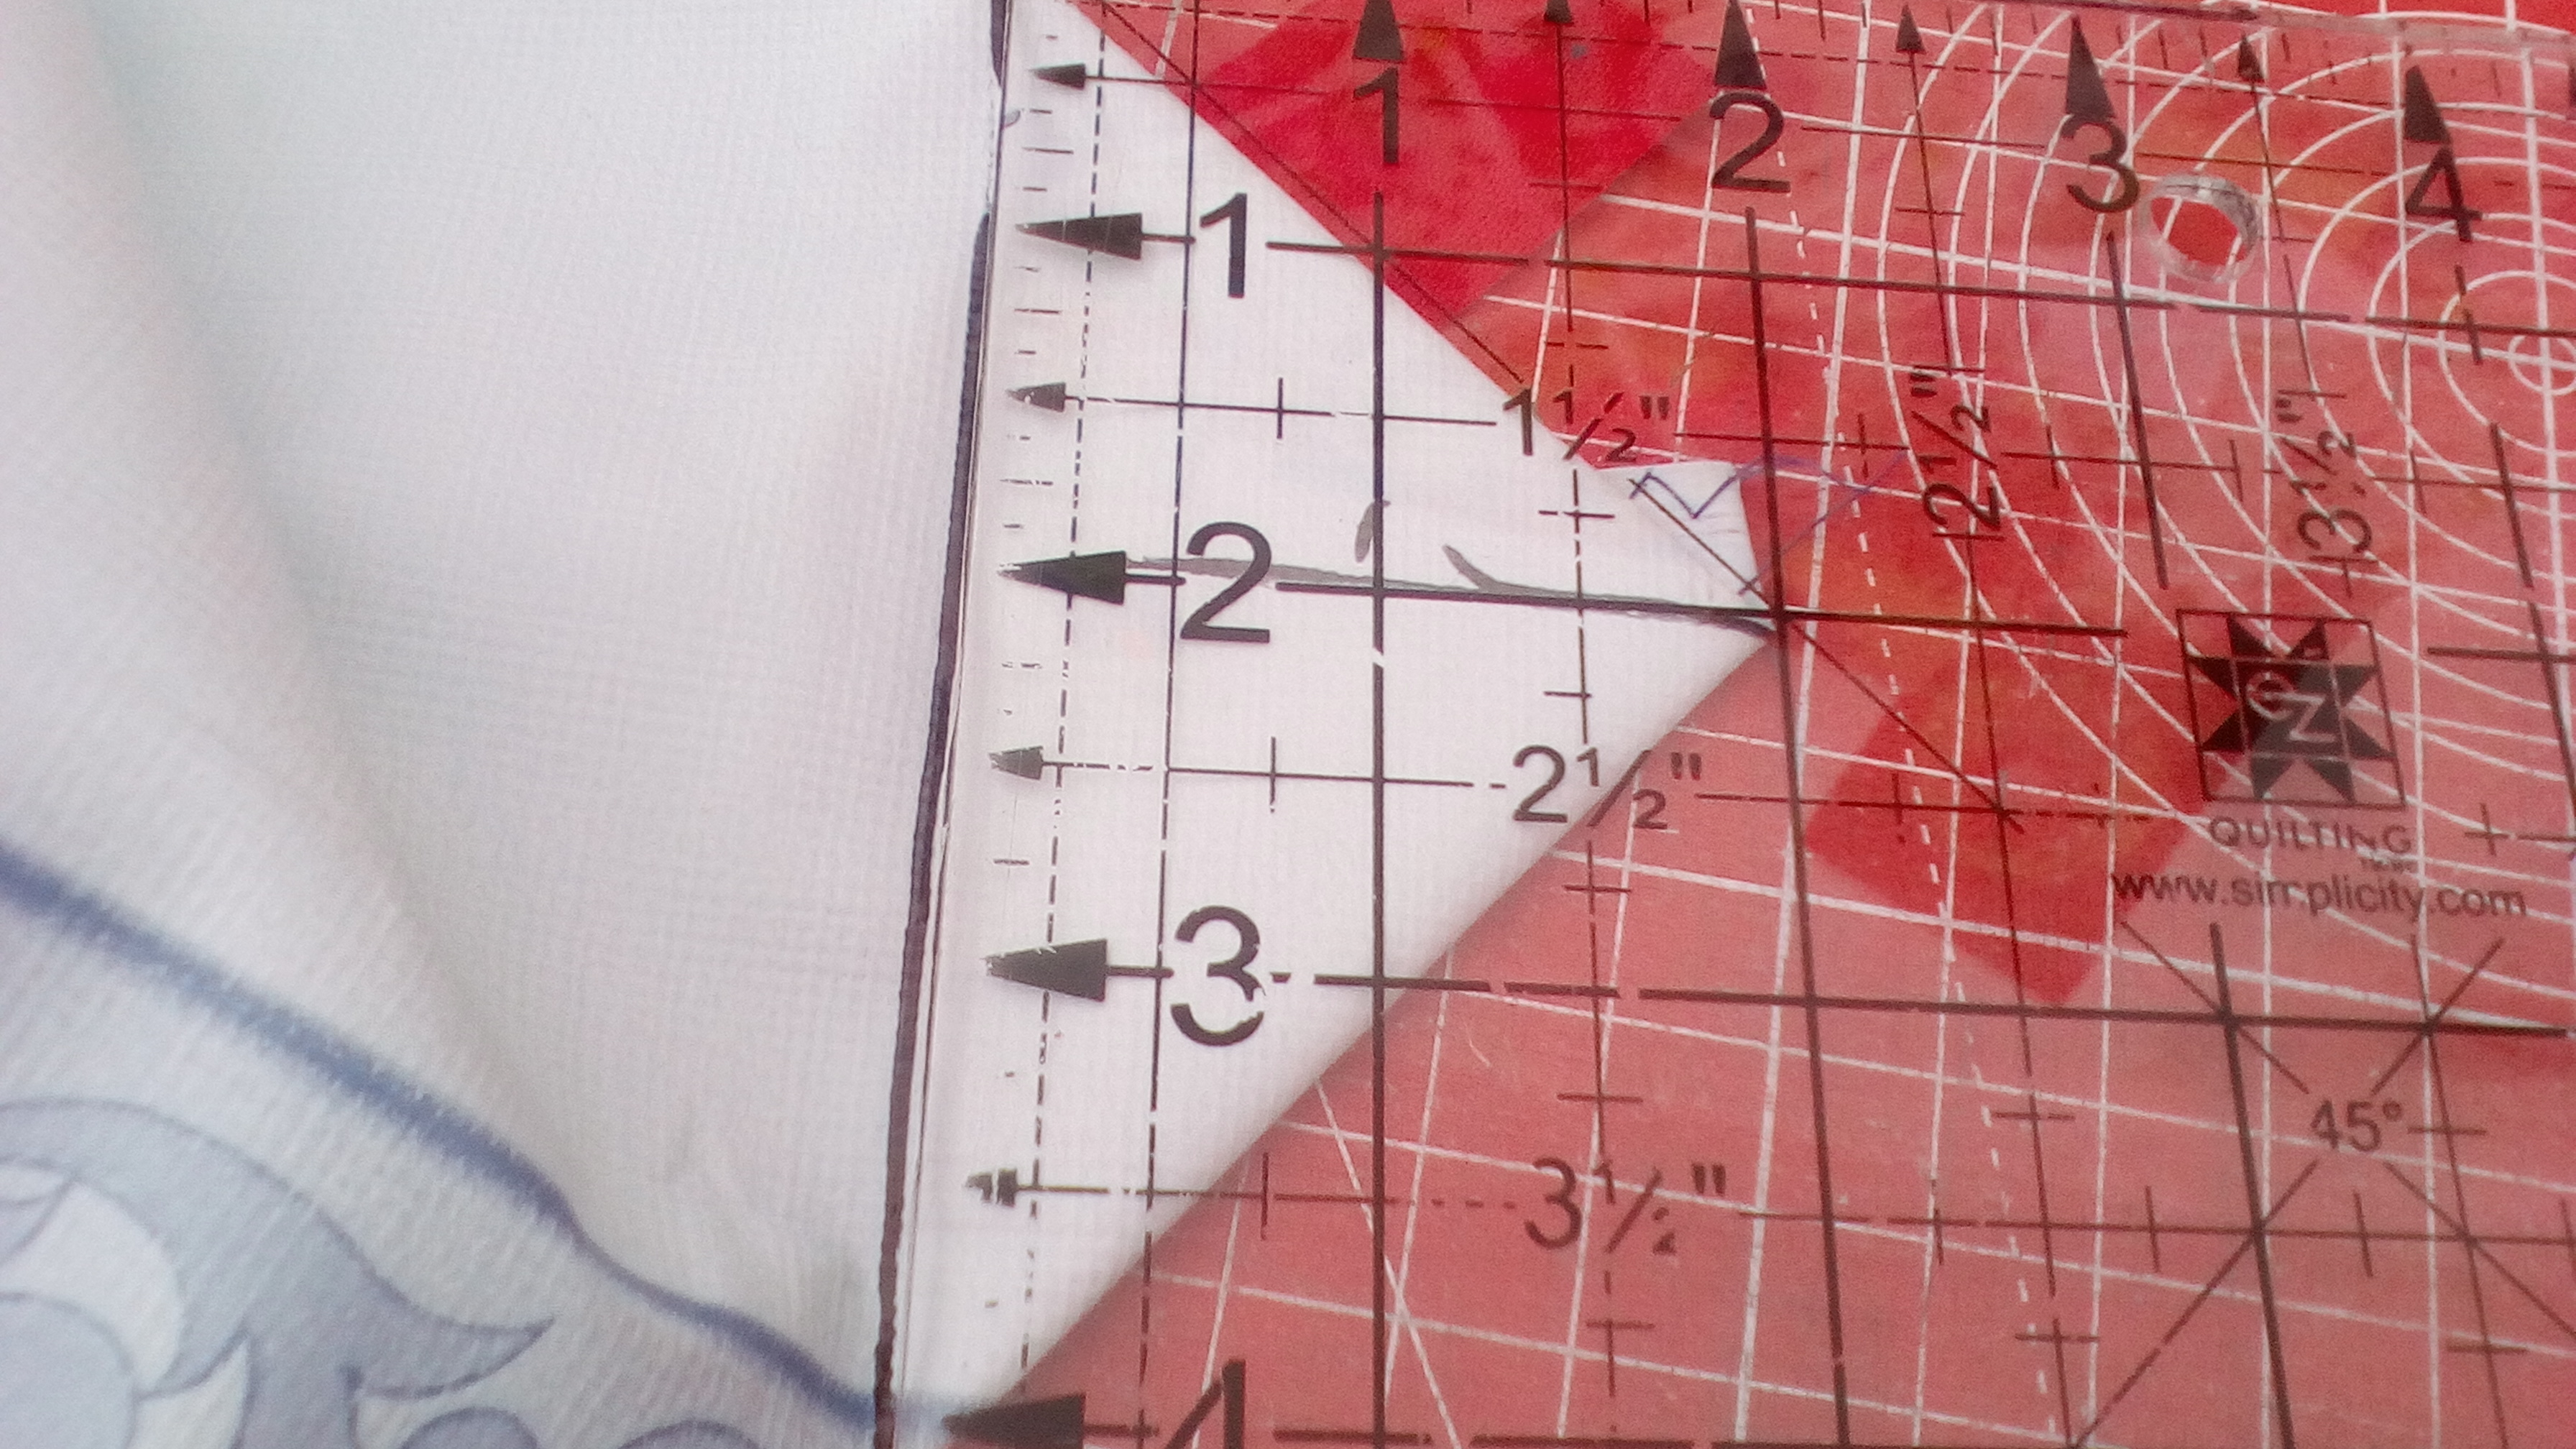
Sew along this line. Repeat on the other 3 corners. Cut off the excess corners and zigzag the edges to neaten.
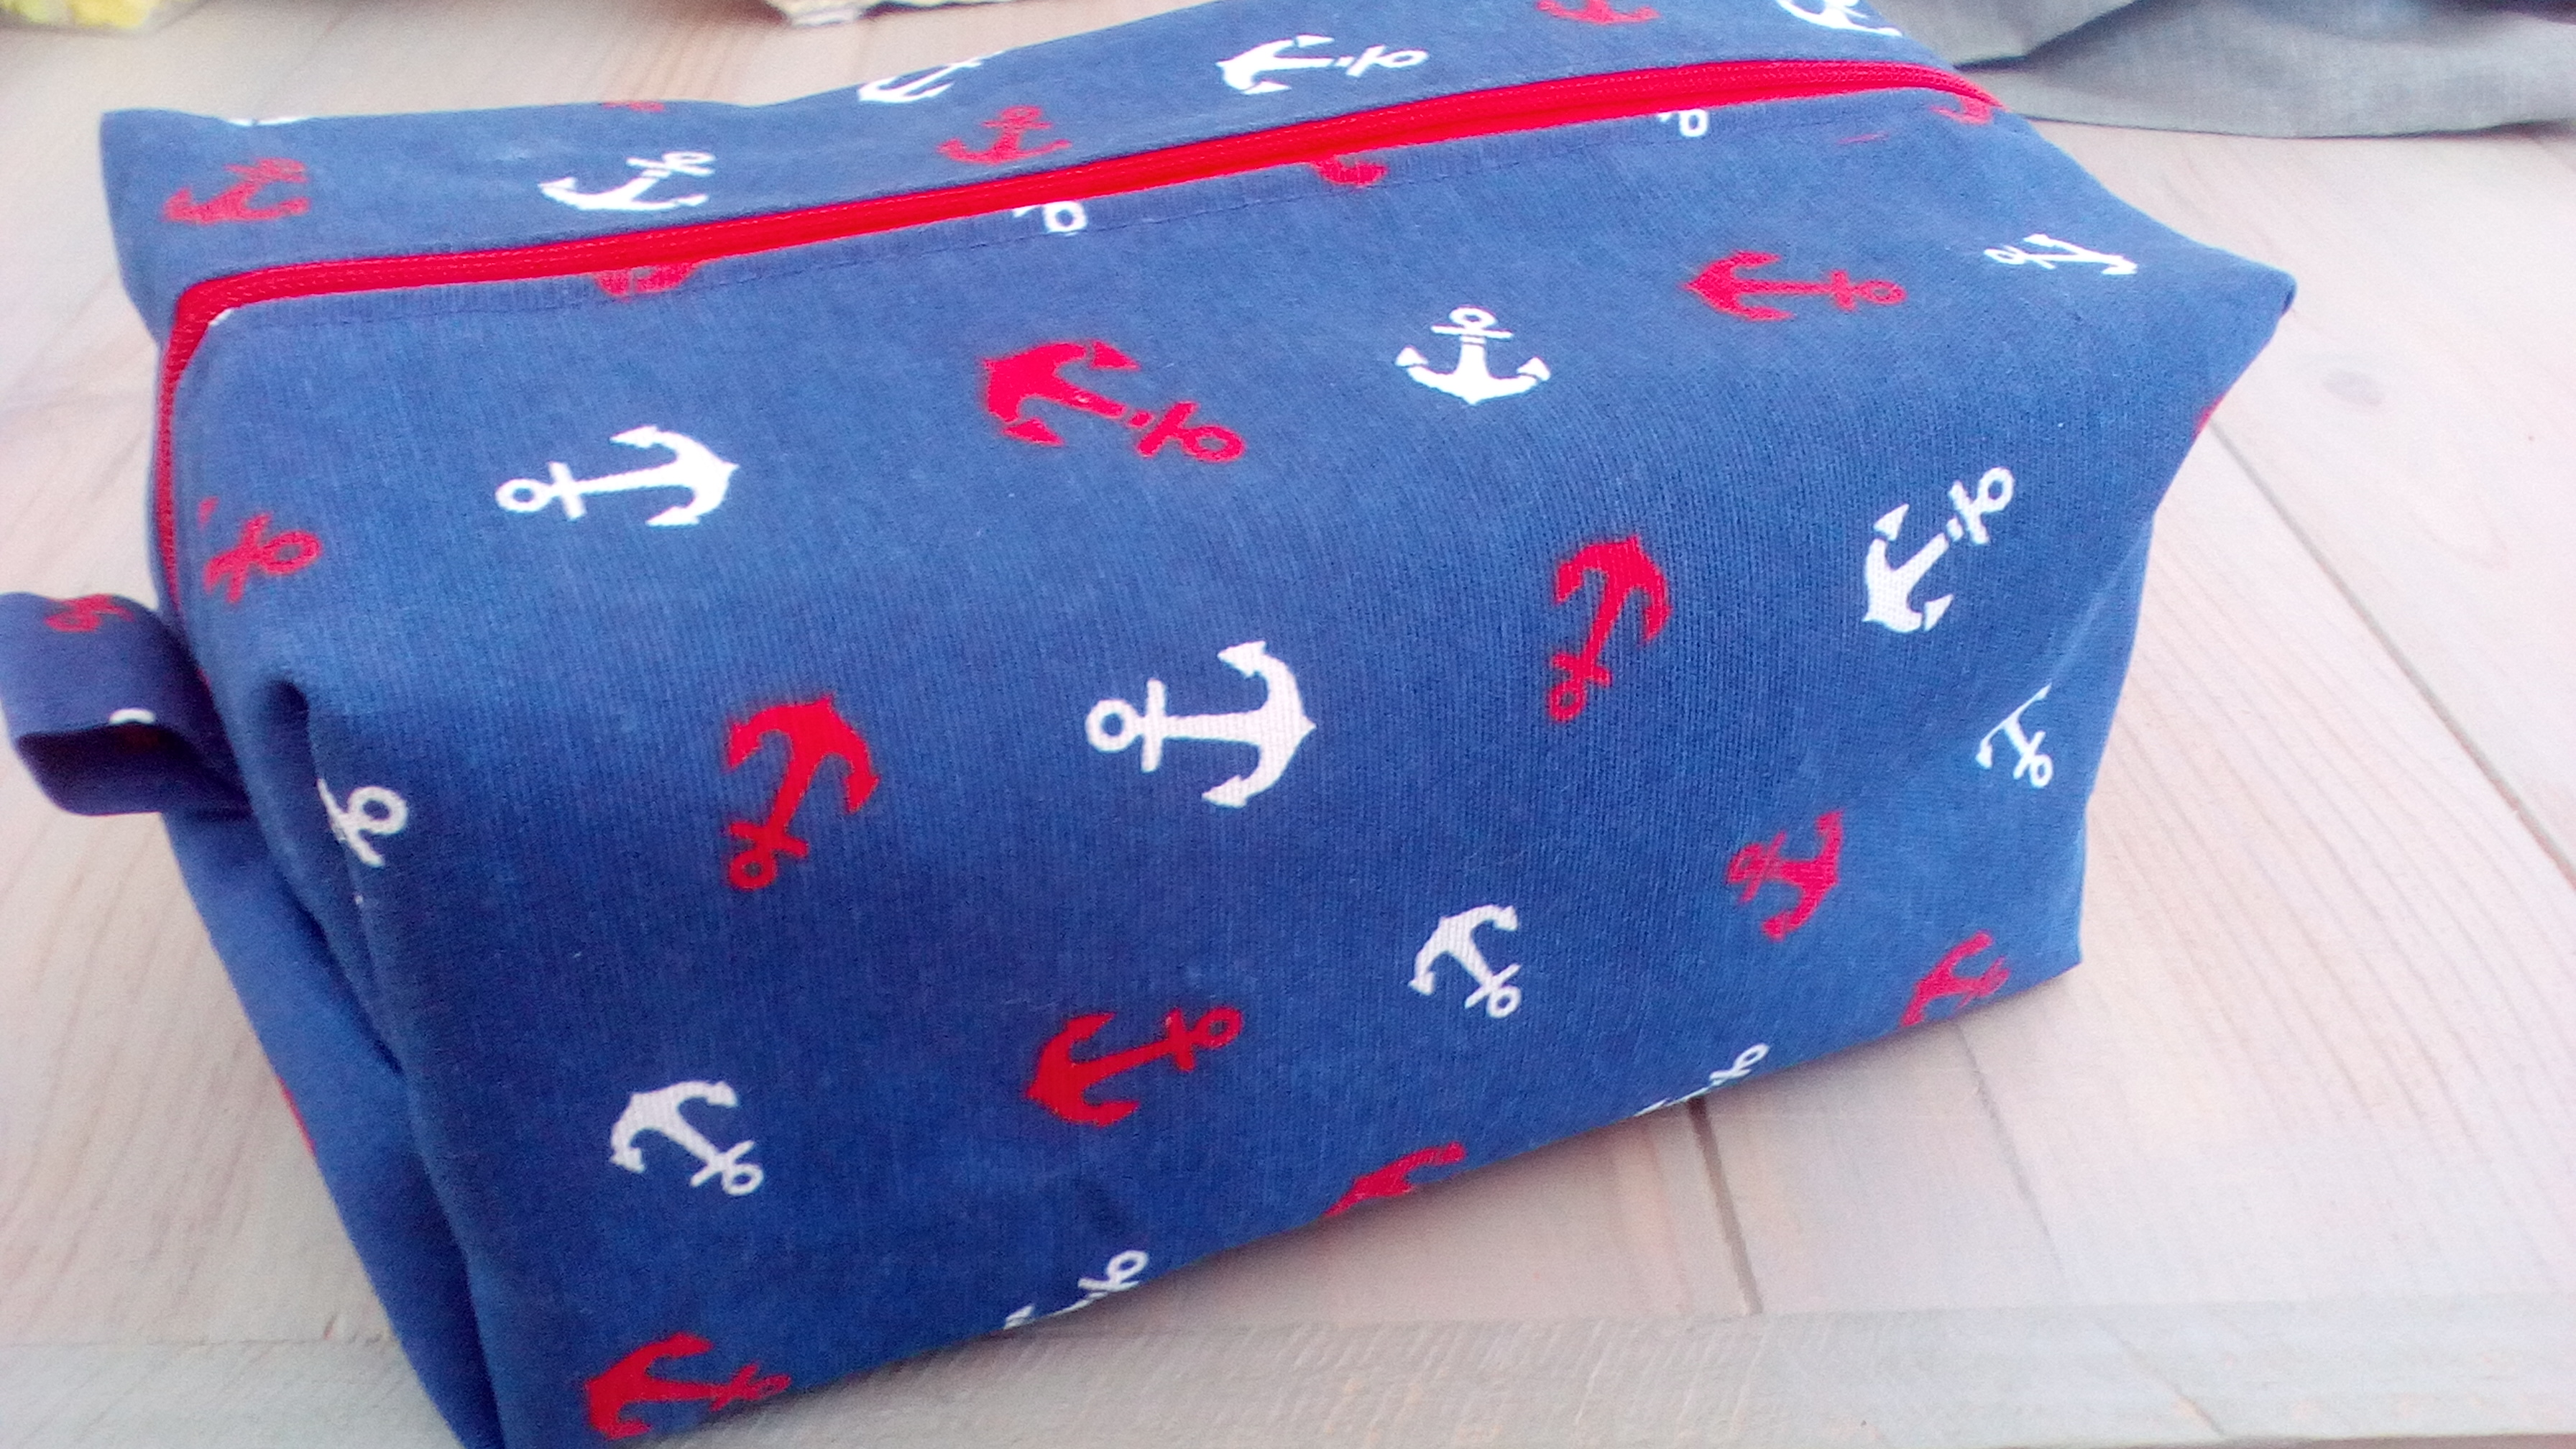
Turn the inside to the outside and there you have it – a lovely Toiletry Bag ready for your hols!


Responses