UKQU.co.uk put a call out to its members to participate in the 2020 Blog Hop with the theme of Garden Flowers but, as I’m not really a flowery person, I wondered what I could do to support this great idea.
Many of the bloggers who had joined the group were well on with their ‘block’ and, as exciting ideas were being shown in our blog area I decided that, as every quilt needs a border, I would have a go at writing something that would fit the bill!
First the size … I initially felt that blocks of 6½” x 4½” would be ideal. Then my mind began thinking of flowerpots, watering cans, fork and trowels, whether to applique, paper piece, embroider, a mix of one or two techniques … so many ideas .. but what to make?
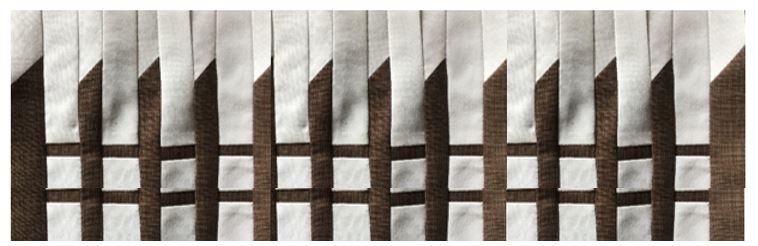
I finally decided on making a Picket Fence border and making a longer block – at least long enough to fit one of the Flower blocks at 12½”, so here goes. I hope you enjoy making these blocks as much as I did. The blocks really are much quicker to make than think!
Fabric Requirements : At least 4 border blocks can be made from one White fat quarter and 6 border blocks from one Brown fat quarter.
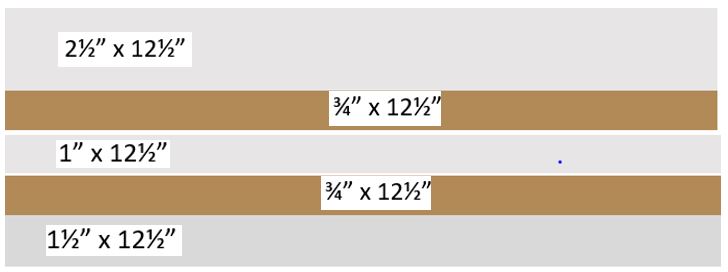
For each 12½” x 4½” border block
Cut 1 of each for the CROSS BEAM strip:
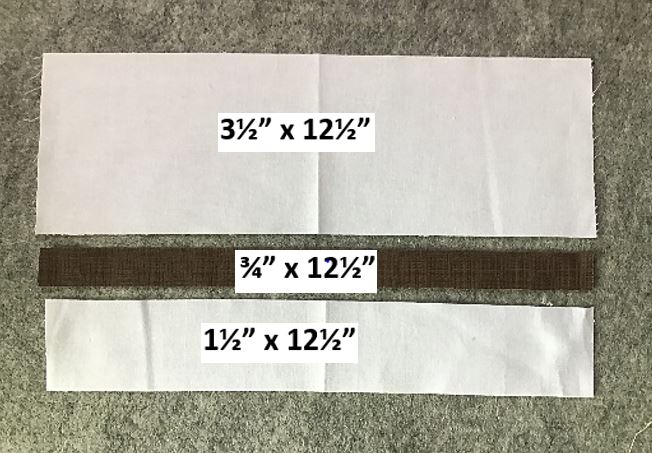
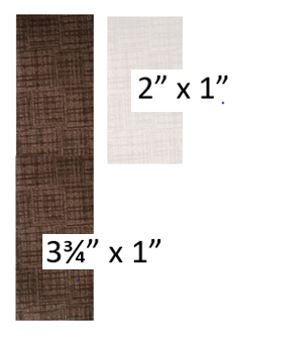
For the FENCE STAKES you need a 3¾” x 14” piece Brown fabric and 2” x 14” of White fabric
Cut 10 of each as below + 4 (all will become clear later in the blog).
Constructing the CROSS BEAM Strip
Sew the White 1½” x 12½” strip to the Brown ¾” strip using a ¼” seam.
PRESS the seam open towards the White strip– usually you would press towards the darker fabric but, as the Brown strip is very narrow, it makes a flatter seam and easier to sew to the next piece.
Sew the 3½” x 12½” strip using a ¼” seam and PRESS.
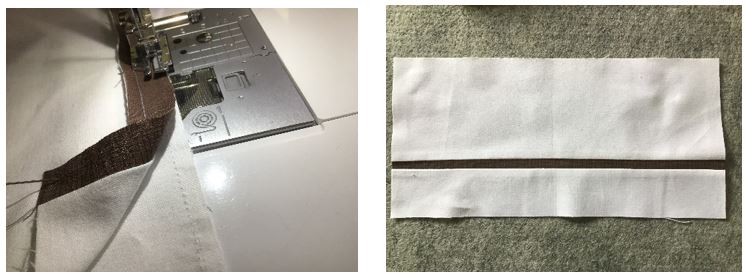
Cut into 10 – 1¼” wide CROSS BEAM strips and pop to one side for now.
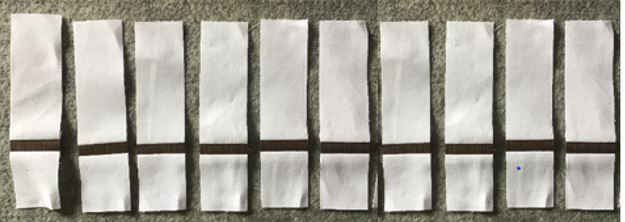
Constructing the FENCE STAKES:
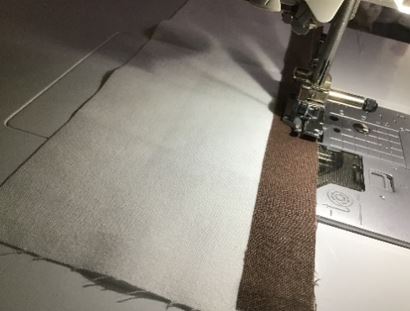
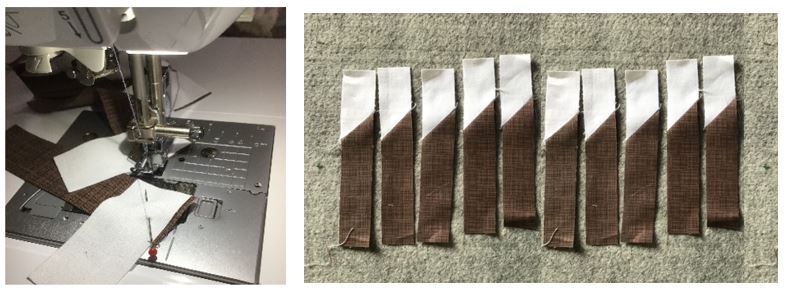
Using the 10 ~ 3¾” x 1” strips in Brown fabric and 10 ~ 2” x 1” strips in White fabric place the white strip vertical to the brown strip as shown below.
Mark a line diagonally from bottom left to top right and SEW across the marked line as below.
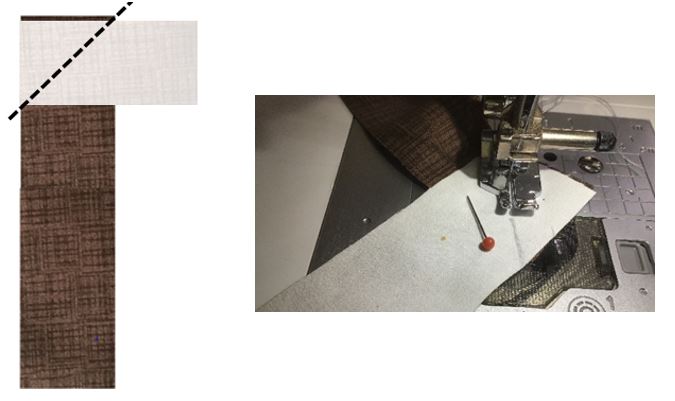
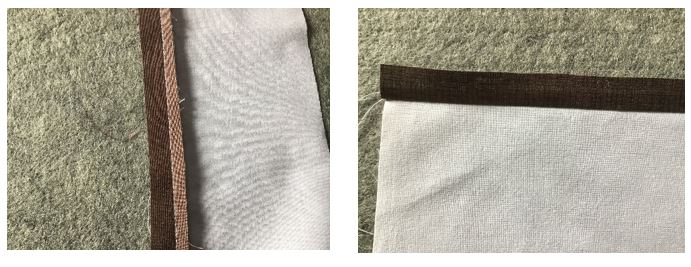
PRESS the seam open. You can either trim the seams to ¼” as shown below or leave as in the first pic.
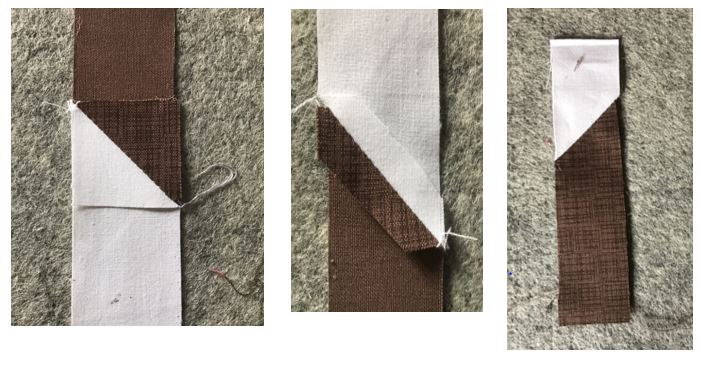
Repeat for the remaining (9 + 4) ‘fence stakes’.
Constructing the Picket Fence
Take one Fence Stake and one Cross Beam strip, line up at the bottom and sew using a ¼” seam. Don’t worry if the Cross Beam strip is slightly longer – you can trim this later.
PRESS and then add a second fence strip. Frequent PRESSING is recommended when sewing the ‘picket fence’ strips together.
Add a second Cross Beam strip using the cross beam to line up – this makes it easy to keep a straight line. Sew using a ¼” seam.
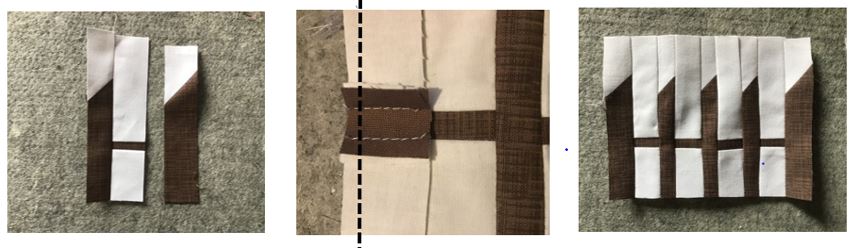
Repeat until you have used all 10 Fence stakes and Cross Beams … this should measure 12½” and your border block is finished.
All that’s left to do is make more blocks to suit the size of your quilt ….. So, if you have made a quilt with 4 ~ 12½” ‘flower’ blocks wide then you will need 4 Picket Fence Blocks for the top and bottom.
Remember I asked you to cut 4 extra Fence Stake strips? This is because you will need one to add at the very end of the border like below:
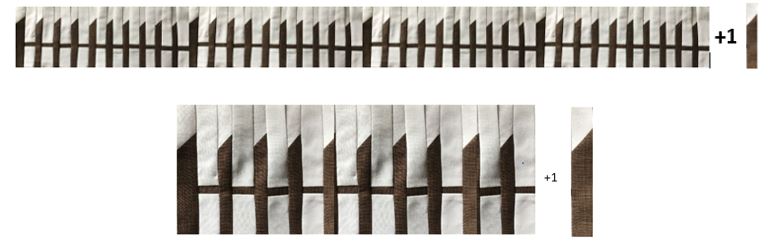

If you want to add two Cross Beams, then adapt the measurements slightly – below is an example of how you can do this and keep to the same 4½” x 12½” border block. The measurements for cutting into 10 strips and making the Fence Stakes is as the instructions above.
Whilst writing and produce this border block I had an inspiration for a different style of Garden Fence block.. so check out my second blog for the instructions. My third blog will be a mini Tulip block measuring 4½ x 4½” square for the Corners. Coming soon to a Blog Hop near you!
The pattern for the Picket fence can be found in the UKQU Merchandise online shop
Happy Sewing everyone
Carol L
Twitter @quiltsewgo


I love this clever idea. Would make such a striking border !
Thanks Keren.
Great block frame or to break up the many flower blocks! I am working on a blog with some other “non flowery” blocks; there’s only so many flowers I girl can make, lol.
Thanks Nina, good idea it, it could be used to frame a collection of blocks or or a row of flower blocks and a ‘fence’ row and repeat.
Great idea x
Thanks Sandra.