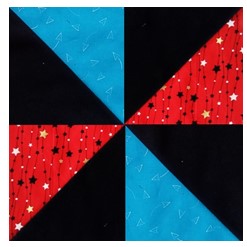
Block 6: Pinwheel
The Pinwheel block is made up of Half Square Triangles (HST). This might be a new technique for you to try and the great thing about doing just one block is that you can practice it without feeling daunted about having to make a full quilt.
Once you have mastered Half Square Triangles you will be able to make so many more blocks and designs. Later on we will be using the HST method to make more blocks.
There are several ways to make the HST. We are going to use just one method. In some patterns you might see a measurement such as ‘cut two 6⅞” x 6⅞” squares’ but, as a beginner, I usually cut to the nearest inch/half inch and trimmed as it allowed me some leeway if my 0.25” seams were not as accurate. I’ve also included a link to show how you can square up HSTs using different methods.
Click HERE for the pdf block pattern: Pinwheel.
Here is the link to the blog for ‘SQUARING UP HSTs’
https://ukqu.co.uk/blog/2022/10/20/squaring-up-half-square-triangles-hst/
UNFINISHED SIZE: 12.5” x 12.5”
ASSEMBLY INSTRUCTIONS
First let’s make the Half Square Triangles (HST)
https://thesewingloftblog.com/half-square-triangles-quilting-basics/
STEP 1
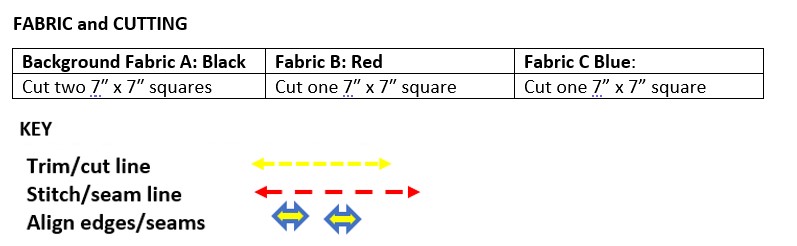
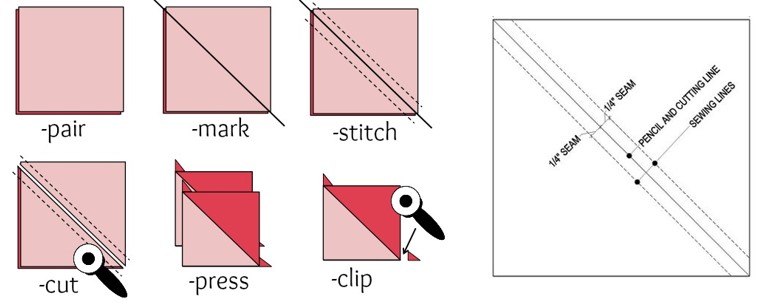
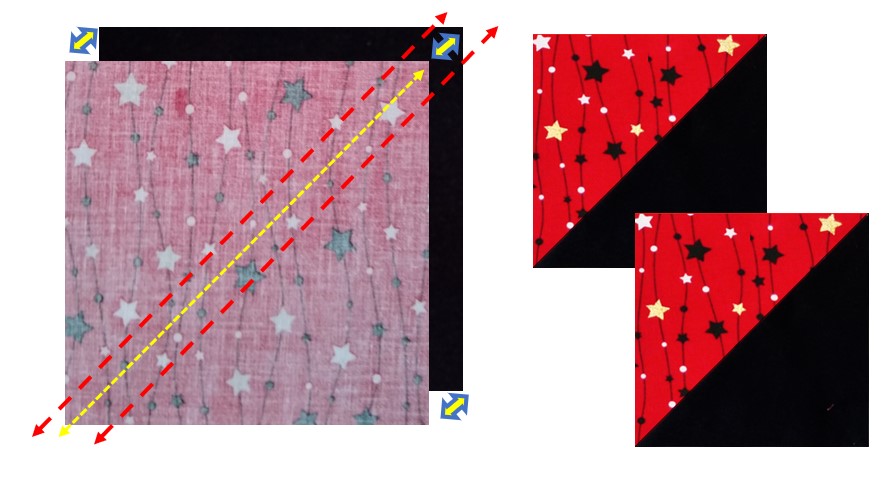
Place one Black 7” x 7” square and one Blue 7” x 7” square Right Side (RS) facing together. On the wrong side of the lighter fabric draw a diagonal line along the centre (yellow dash line). Next mark another line 0.25” (¼”) either side of the centre line – these will be your stitch lines (red dash lines). I used a soft lead pencil for mine.
Cut along the centre line and PRESS the seam towards the darker fabric.
STEP 2:
Repeat using the Red and Black 7” x 7” squares.
PRESS and TRIM/SQUARE UP each HST to 6.5 x 6.5” square. You now have 4 HSTs for your Pinwheel.
STEP 3:
Squaring up HSTs
There are several ways to square up HSTs.
There is a link to the blog explaining how to ‘Square Up’ HSTs above the Fabric and Cutting guide.
STEP 4:
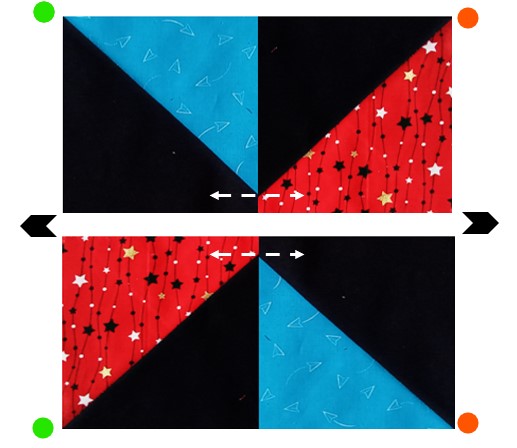
Place the HSTs as shown below.
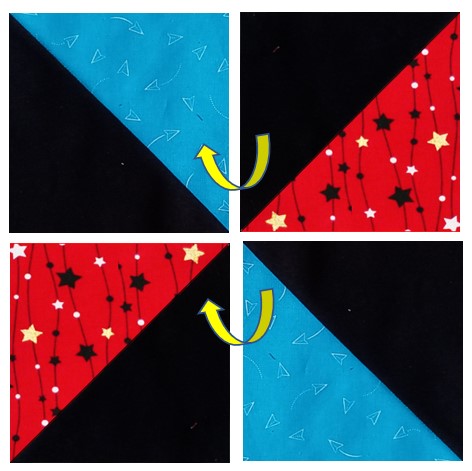
STEP 5:
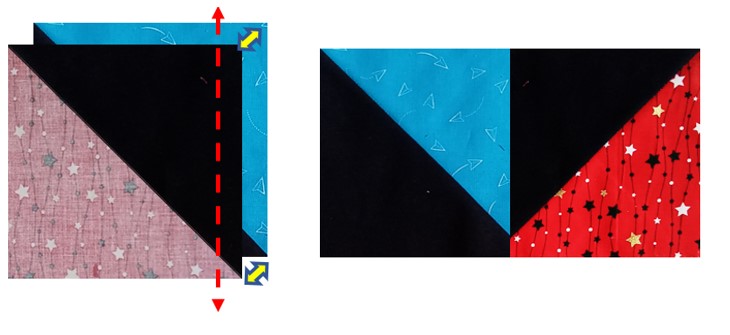
Top Row
Place the Red/Black HST with RS facing the Blue/Black HST and align the edges. Sew together using a 0.25” seam. PRESS open. The points should meet 0.25” from the bottom edge as shown in the pic.
STEP 6:
Bottom Row
Place the Blue/Black HST with RS facing the Red/Black HST and align the edges. Sew together using a 0.25” seam. PRESS open. The points should meet 0.25” from the top edge as shown in the pic.
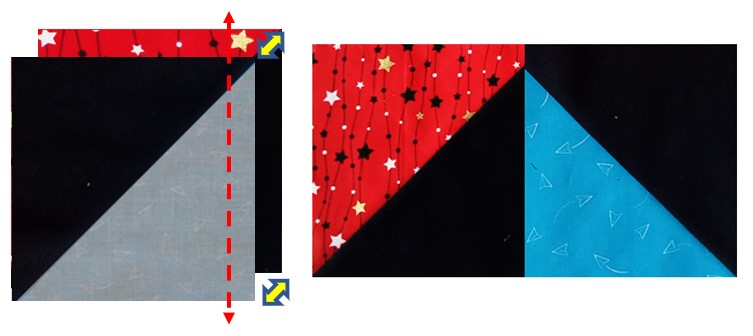
STEP 7:
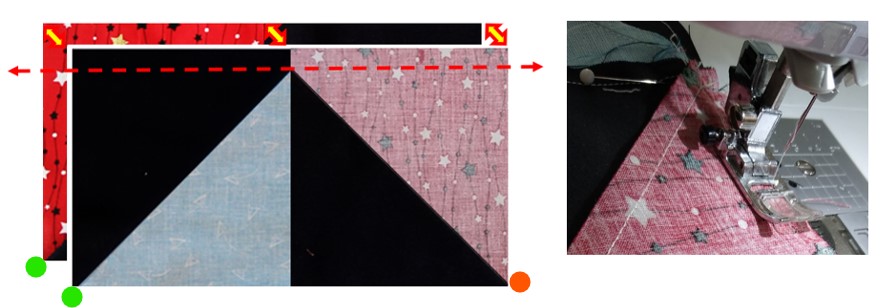
Flip the top row section of the block 180⁰ so the dots match as shown. PIN where the centre seam matches the ‘triangular’ points and at each side of the block.
Sew across the seam 0.25” away from the edge.
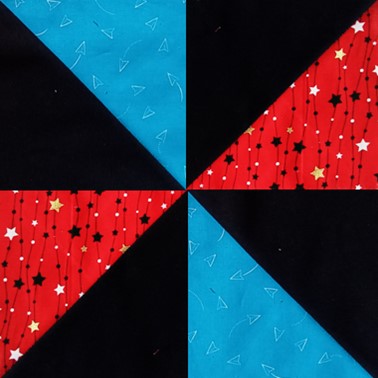
Voila, you’ve made your sixth block!

So, ready for the next one? Block 7: Hatchet
Coming soon: Block 8: Flying Geese, Block 9: Shoofly
The next few blocks will include some new techniques and more practice at making HSTs, including some bonus ones!

Carol Lightburn
Twitter: @quiltsewgo Instagram: quiltsewgo
Twitter: @ukquilters Instagram: uk_quilters_united
Responses