Patchworkers – listen to my tale of woe
About how I failed on my UFO!
Let me explain. It isn’t strictly a UFO – it is an ongoing project that keeps getting interrupted.
I don’t get much time to sew – even over lockdown my time has been limited – due to family commitments outside my home. I also interrupt myself and use my hobby as a nice way to give unique presents to my friends – a personalised cushion rarely goes amiss. However, my friends might be all cushioned out by now!
The ongoing project that I am talking about involved half square triangles (too many for my liking) made from carefully hoarded 5 inch squares bought early in my quilting life. I used a Moda Grunge and one of the Moda Shibori ranges. I think it was Shibori II but I am not sure – it was so long ago!
(As an aside, I would generally buy yardage now, rather than precuts, because I believe yardage works out cheaper. However, an advantage of precuts can be that you get a mix of the fabrics across a complete range. Also, you don’t have to do the cutting, so for those with limited mobility or strength issues precuts can be useful.)
Anyway, I digress. I had painstakingly created these HSTs. Now, I am not the most accurate piecer anyway, so I trimmed each of my HSTs after they were made. This was probably my first mistake, although this was minor, as I used two different tools to trim my blocks. In my defence, I did this in the name of writing another blog (see https://ukqu.co.uk/adventures-of-an-inexperienced-quilter-hst-rulers/ ).
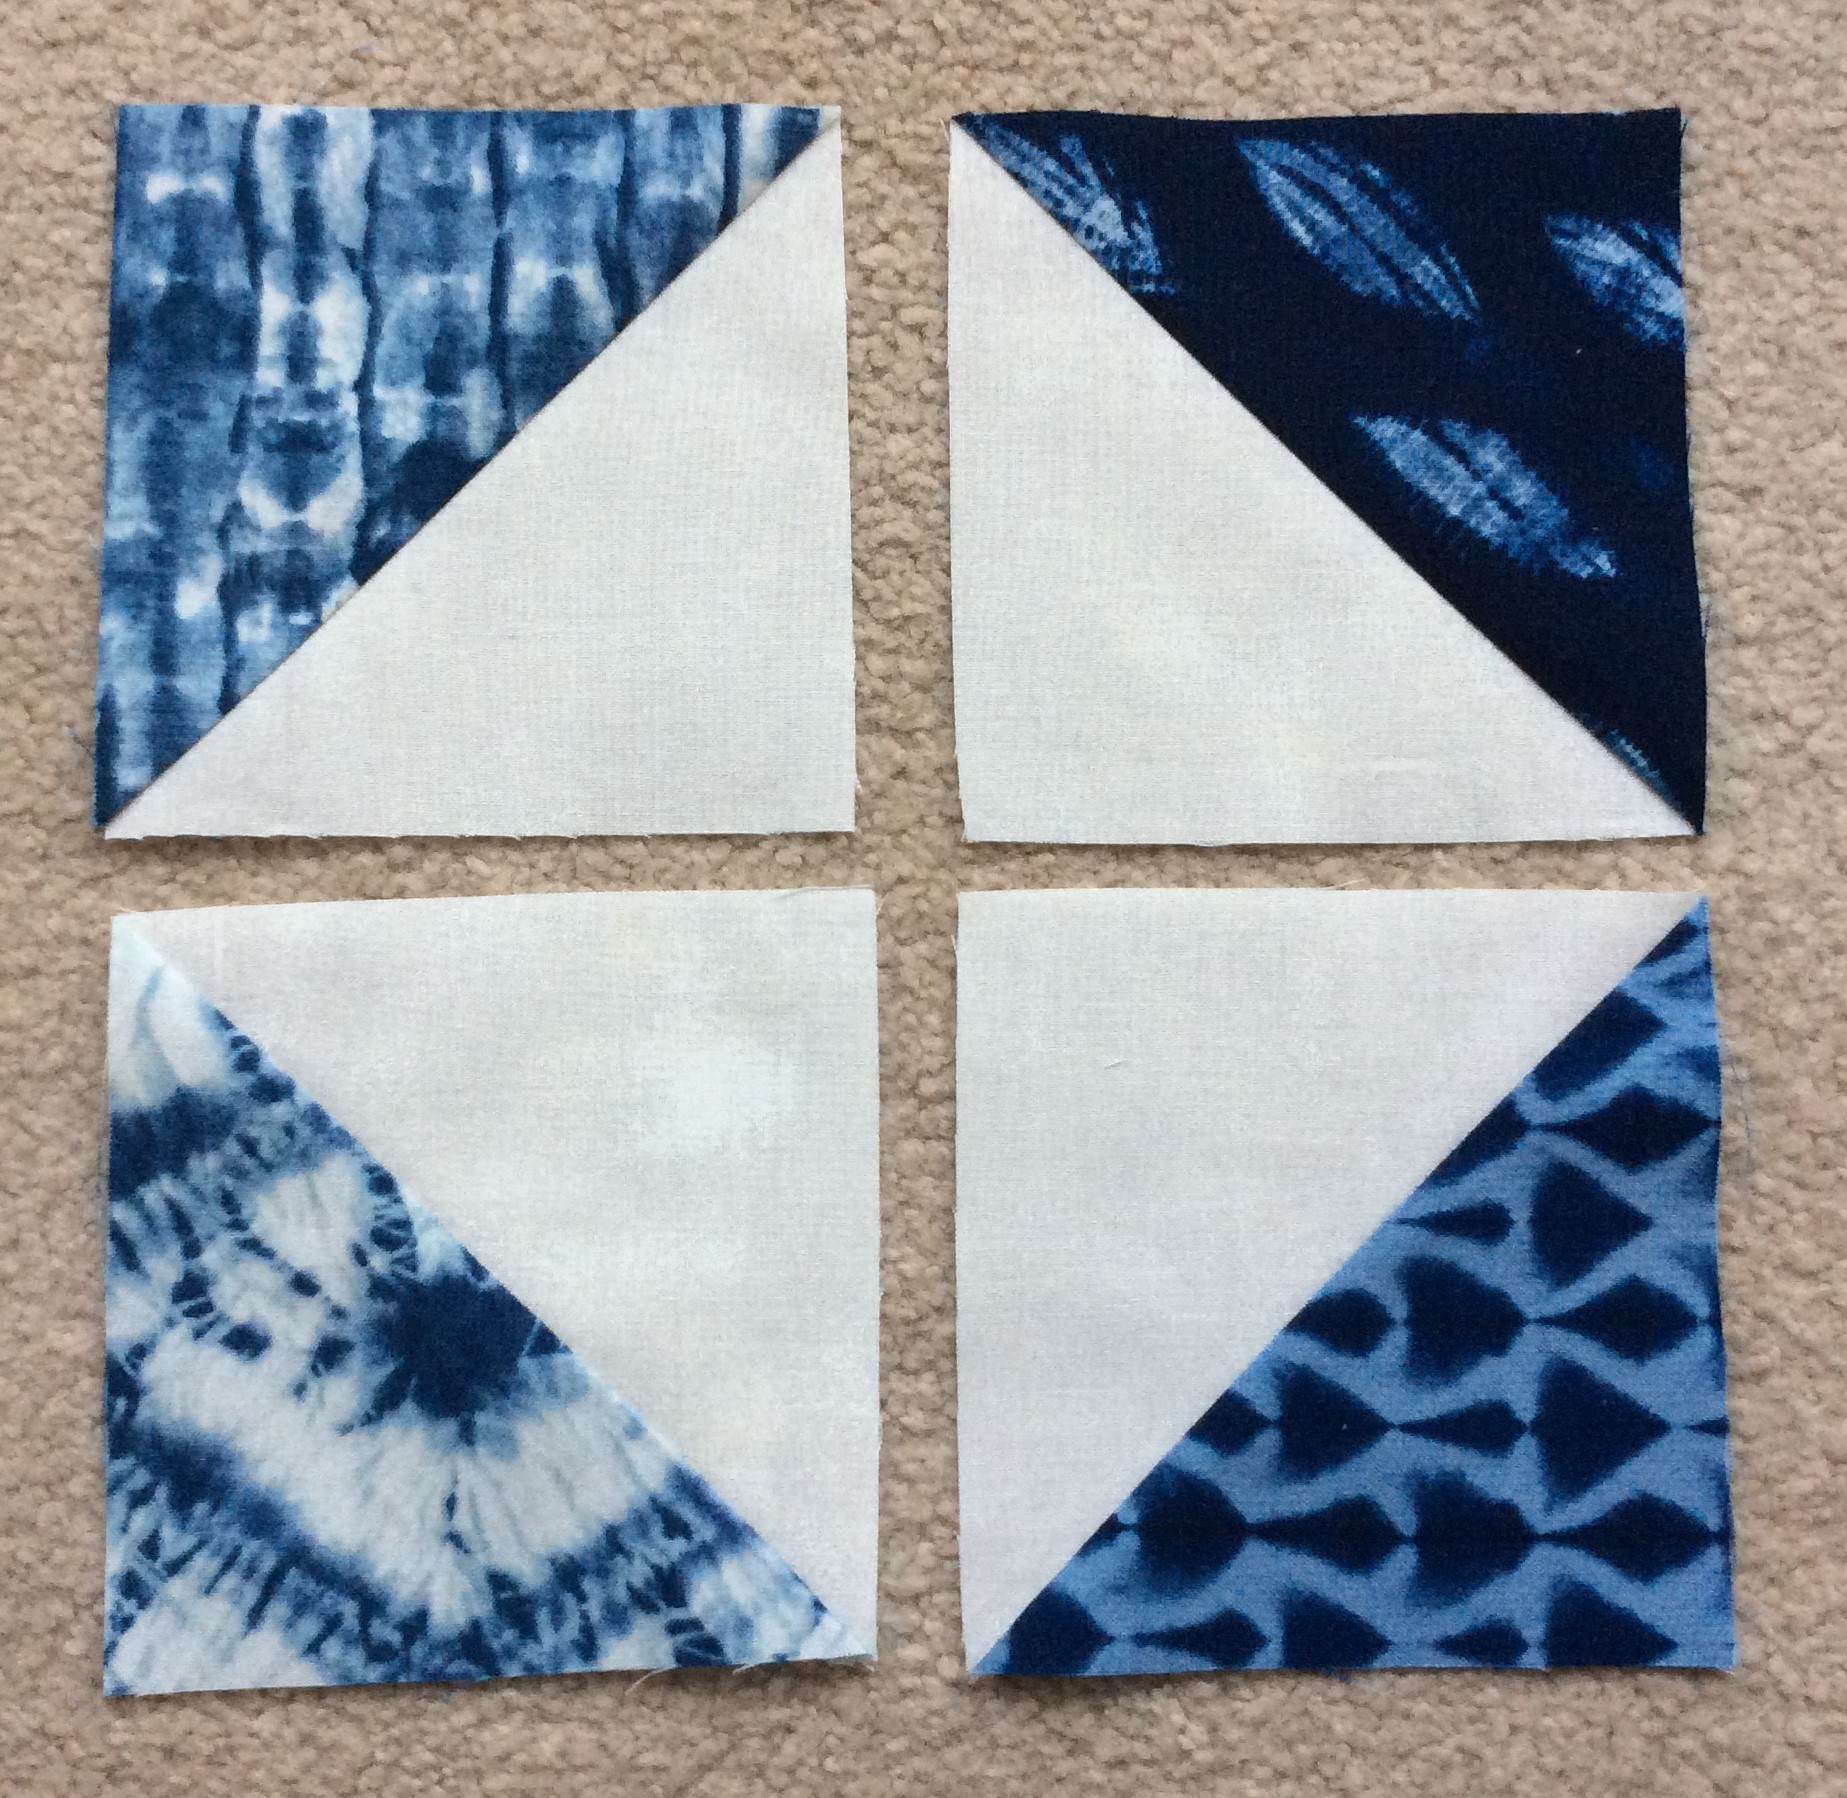
Examples of my HSTs
I remember reading a long time ago that a single project should ideally be completed on a single machine, given the slight differences that can occur in needle positions etc which can make a difference to the seam sizes. I am lucky enough to have two machines – a second hand, high end Janome and a very second hand, mechanical 1970s Bernina Minimatic 807. I generally use the Minimatic for piecing – it is a sweet little machine and, while heavy, is still easier than carrying my Janome 12000 around! I had used my Bernina to create all of the HSTs. Great – following the adage re the single machine so far.
The HSTs were then built into a 4×4 block. Again fine. I completed about 10 of these blocks relatively uninterrupted. I had some problems with the bulk of the seams, but otherwise they were going together well.
Then I had to put the project away – for months. That’s ok – sometimes that is the way life is.
In the meantime I did jobs for the family – turned trousers up for my Dad, turned curtains up for my daughter and so on. I used my Bernina for this, because the machine was available and they were only quick jobs. I also needed a personalised birthday present for a family member, so I did that too. Great – everything turned out really well.
Then I decided that I wanted to get on with the UFO – which was for me for a change! So, I got the completed blocks out, the remaining HSTs, and got on with it.
I did four 4×4 blocks in this session, over a couple of days, and then had to put it to one side again. That was ok – progress, I thought. I could even see the pile of HSTs dwindling…..
This is my intended layout – you can see 4 of my 4×4 blocks here.
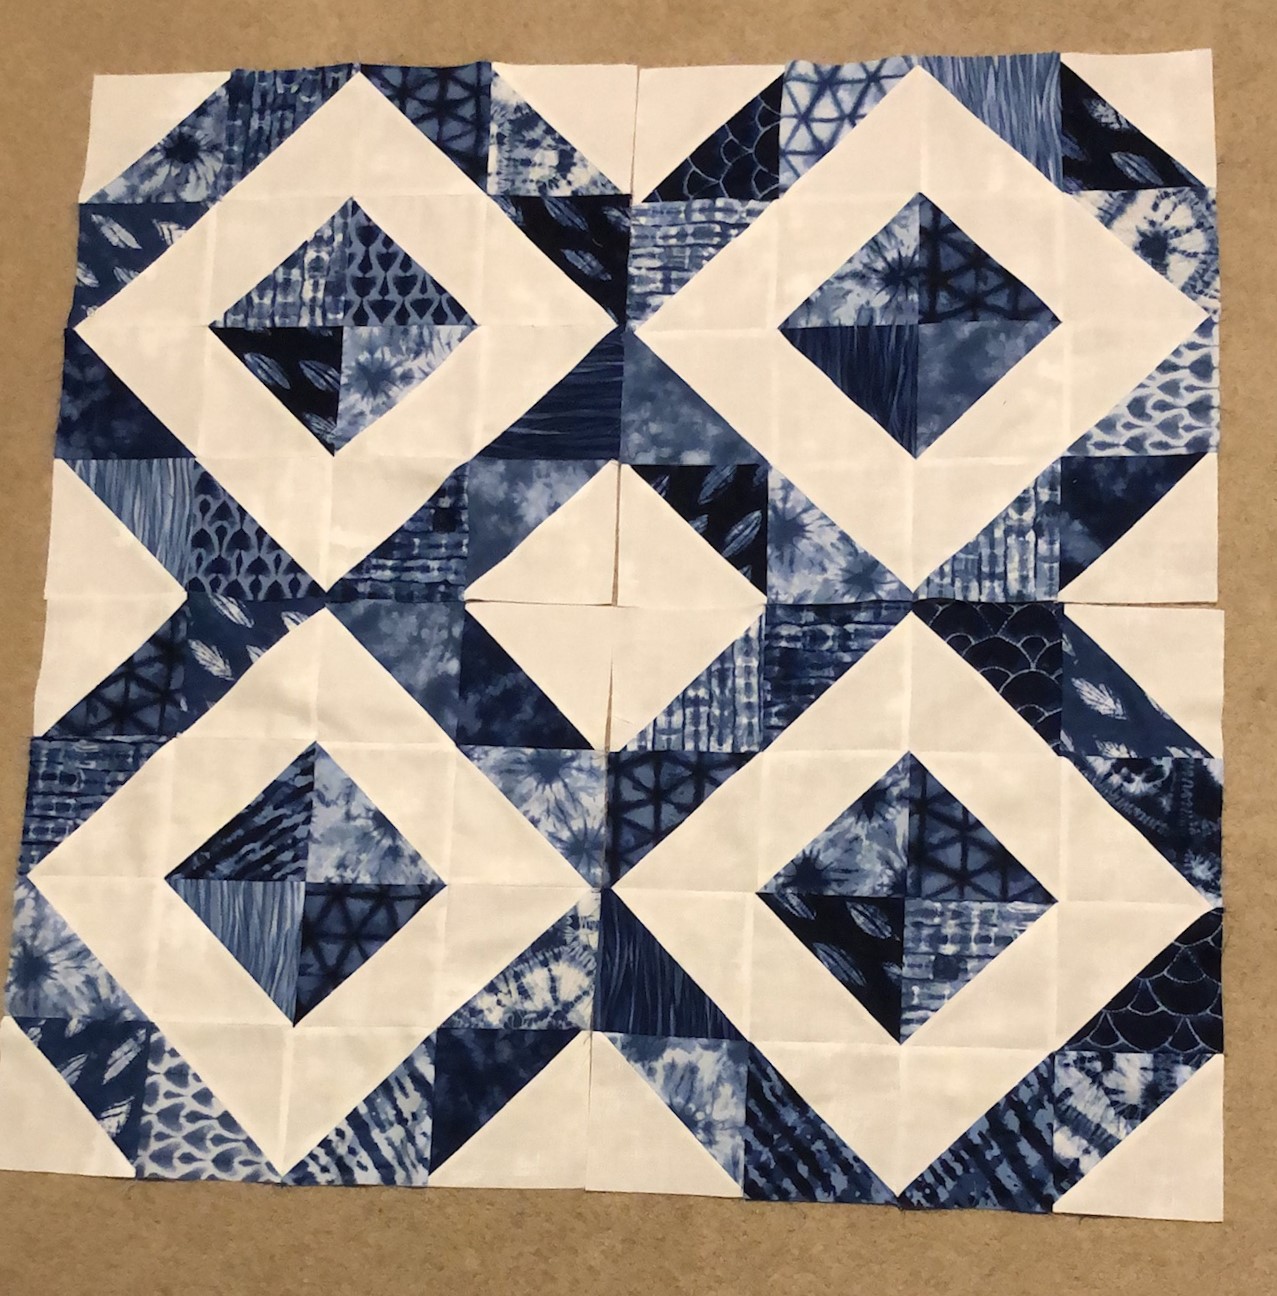
I moved my completed 4×4 HST blocks one day, in preparation for restarting the project yet again. As I piled the 4×4 blocks on top of one another, I realised that there seemed to be a discrepancy in the size of some of the finished blocks. It didn’t look like the sort of discrepancy that I could hide in a seam allowance. When I measured the blocks, the last set of blocks that I had created were significantly different to the originals!
I realised what had happened. If we go back to that adage “a single project should be completed on a single machine” – I had done that. However, the little jobs that intervened had necessitated moving my needle position. That was fine too. I believed that I had moved my needle back to the “piecing” position prior to restarting my piecing on this project. I had certainly moved it back – but I had not checked it, and clearly it was not back in the right place. Though it was only a little bit out, those small errors add up over multiple seams!
You might ask how I got away with it doing the birthday present, which was a pieced cushion. Simple – I did that all in one session so, while my seams might not have been a “perfect” ¼ inch, they were consistent across the project, so didn’t cause an issue.
Consistency – or the lack of it – was the problem here, rather than ¼ inch seams specifically. For some more complex blocks, an accurate ¼ inch seam is absolutely essential, otherwise the blocks just don’t work. In this case, a ¼ inch seam was less important than consistent seams across the whole project. As a result of not checking when I went back to my project, I am now ripping out at least 4 4×4 blocks. That is precious time that I could be using to sew!
The moral of this story dear readers? Check the size of your seams and block size on a regular basis, but particularly after you have done another job!
Back to unpicking seams……


Responses