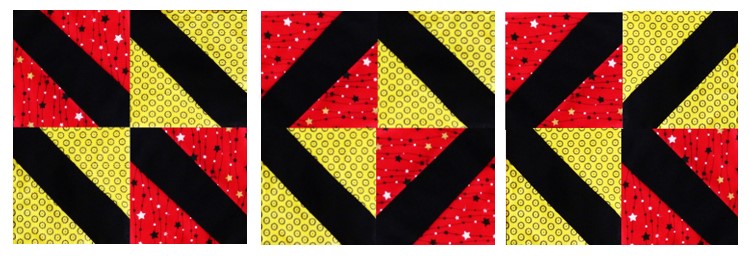
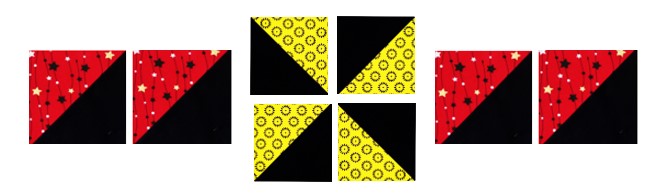
Block 7: Hatchet Block
This block is also known as Kansas Dugout, Indian Hatchet and Road to Tennessee and has been around since the 1820’s. It was often made by young girls as a starter block to practice their quilting. This block is made up using only squares to create ‘Connector Corners’. You can create different patterns depending on how you place each 6.5” unit. Here are three examples.
This is another first block in the making for me too.
Click HERE for the pdf block pattern: Hatchet.
There are no triangles used in this block although, if like me, you don’t want to waste fabric you can make some HSTs for another projects. I’ll show you how!
UNFINISHED SIZE 12.5” x 12.5” square
ASSEMBLY INSTRUCTIONS
STEP 1:
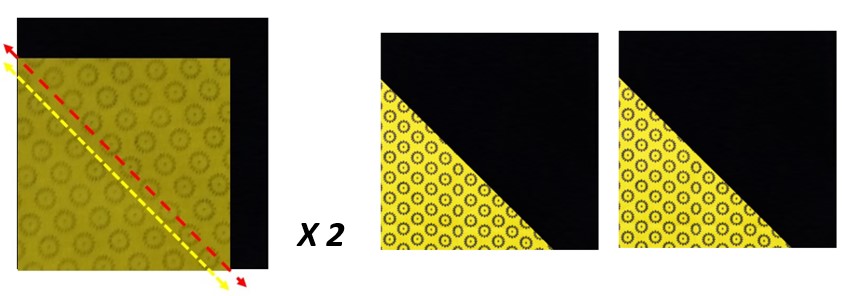
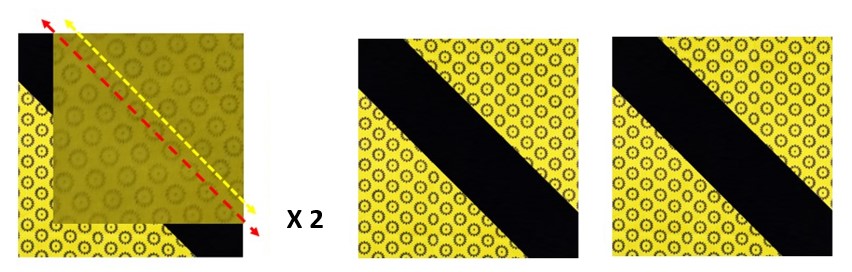
Draw a diagonal line, corner to corner, on the four Yellow 5” x 5” Squares.
Place the Black 6.5” x 6.5” square Right Side (RS) facing up. Place a Yellow 5” x 5” square RS facing the Black square in the bottom Left Hand (LH) corner.
If you want to make some bonus HSTs for other projects, scroll to the end of this blog before you sew/trim (optional).
Sew across the diagonal Centre line (red dash) and trim across the yellow dash line.
Repeat with the other Black and Yellow squares making 2 in all.
STEP 2:
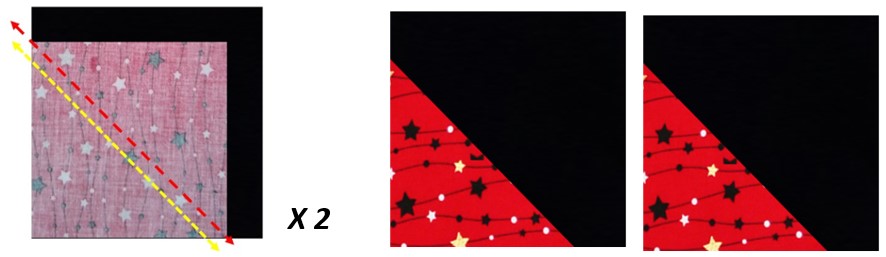
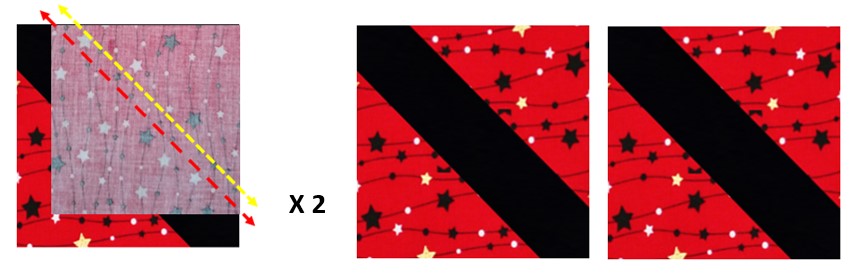
Repeat STEP 1 with the four Red 5” x 5” squares and the Black 6.5” x 6.5” squares.
STEP 3:
Place the Black/Yellow pieced unit you have just made with RS facing towards you. Now take another Yellow 5” square and align it to the top Right-Hand (RH) corner. Sew along the Centre line (red dash). Trim 0.25” away on the yellow dash line. PRESS open. Make 2 of these.
STEP 4:
Repeat STEP 3 with the Black/Red pieced units and make 2 of these.
STEP 5:
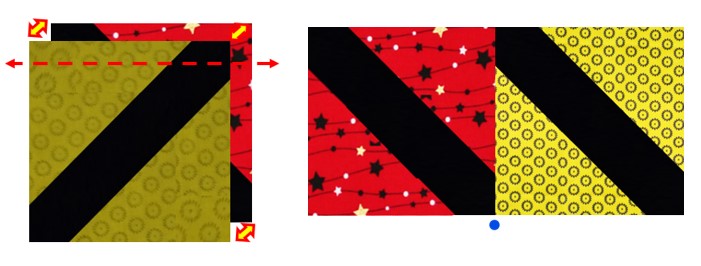
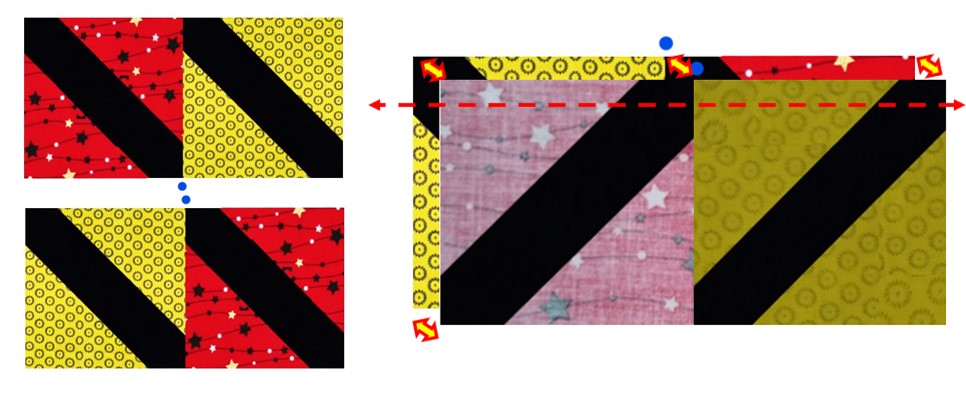
Top Row:
Place your Black/Red pieced unit RS facing towards you with the Black ‘centre stripe’ going from Top Left to Bottom Right as shown below. Now flip the Black/Yellow pieced unit so the Black stripe aligns at the Top Right to Bottom Left. PIN and sew a 0.25” seam from the edge.
STEP 6:
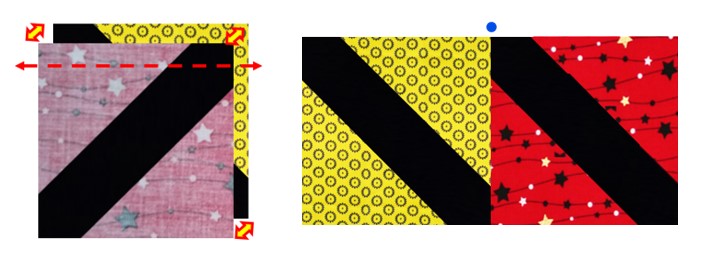
Bottom Row:
Place your Black/Yellow pieced unit RS facing towards you with the Black ‘centre stripe’ going from Top Left to Bottom Right as shown below. Now flip the Black/Red pieced unit so the Black stripe aligns at the Top Right to Bottom Left. PIN and sew a 0.25” seam from the edge.
STEP 7:
Lay out the Top and Bottom rows as shown.
With the Bottom Row facing towards you flip the Top Row 180⁰. Align and PIN where the blue dots are shown. Sew a seam 0.25” from the edge. PRESS open.
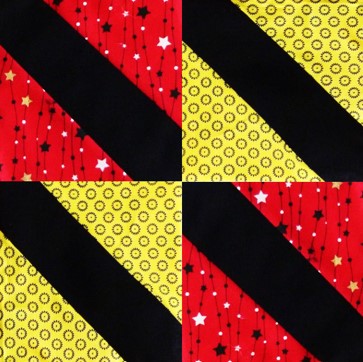
Voila, you’ve made your seventh block!

Still here? Ready for the next one? Block 8: Flying Geese
Coming soon: Block 9: Shoofly, Block 10: Poppy

Carol Lightburn
Twitter: @quiltsewgo Instagram: quiltsewgo
Twitter: @ukquilters Instagram: uk_quilters_united
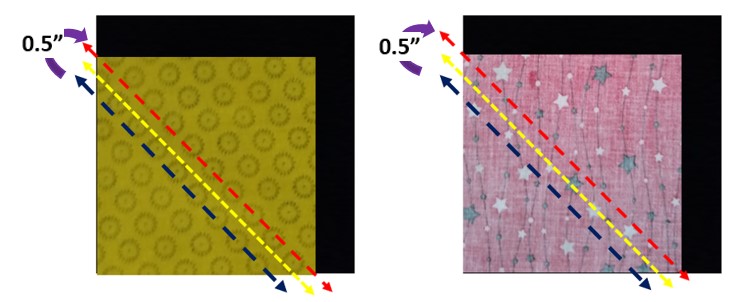
BONUS HALF SQUARE TRIANGLES (HST): Block 7
STEP 1:
Draw the Centre diagonal line, corner to corner, on the four Yellow and four Red 5” x 5” Squares – shown here as a red dashed line.
Draw another line 0.5” (½”) away from the Centre diagonal line – shown here as a blue dashed line.
Place the Black 6.5” x 6.5” square Right Side (RS) facing up. Place a Yellow 5” x 5” square RS facing the Black square in the bottom Left Hand (LH) corner. The blue dashed line should be towards the bottom.
Sew across the diagonal Centre line (red dash) and the blue dashed line. TRIM across the yellow dashed line.
Repeat with the other Black and Yellow squares to make 4 bonus HSTs.
STEP 2:
Repeat with the Black and Red squares to make 4 bonus HSTs.
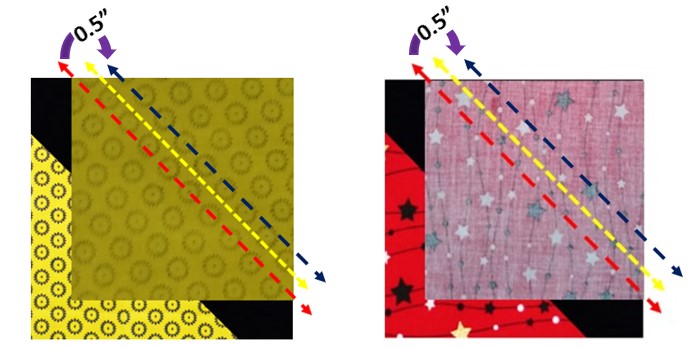
STEP 3:
Place the Black/Yellow pieced unit you have just made with RS facing towards you. Now take another Yellow 5” square and align it to the top Right-Hand (RH) corner making sure the blue dashed line is on the Right. Sew along the Centre line (red dash) and the blue dashed line. Trim 0.25” away on the yellow dashed line. PRESS open.
STEP 4:
Repeat with the other Black and Red squares to make 4 bonus HSTs.

Carol Lightburn: QuiltSewGo
Responses