In this third and final blog in the Finishing your QuiltSewGo Beginners’ Sampler Quilt series, PART 2 deals with;
• Preparing Your Backing Fabric
• Layering Your Quilt Sandwich
• and Quilting & Binding
You’re nearly there!
If you have decided to go with one of the QAYG methods, you may not have to piece your fabric, but if you are going with the ‘traditional’ way of finishing your Beginners’ Sampler quilt top you will need wadding and backing fabric that is at slightly larger than your quilt top.
There is a growing range of 54” and 60” wide fabrics that are great for finishing of your quilt top, but you might only have fabric that is 42/44” wide so you will need to piece it. This is not as difficult as you might think!
Before we go any further here are some useful websites to check out:
Click HERE for How to Piece a Quilt Backing to Finish Your Quilt By Lindsay Conner/Craftsy
Click HERE for the Ultimate Guide to Pieced Backings The Quilters Touch Blog
Click HERE for the pdf link PREPARE YOUR BACKING FABRIC;
This assumes you are using 42”/44” wide fabric! If you have wider fabric, you can just have a single backing fabric.
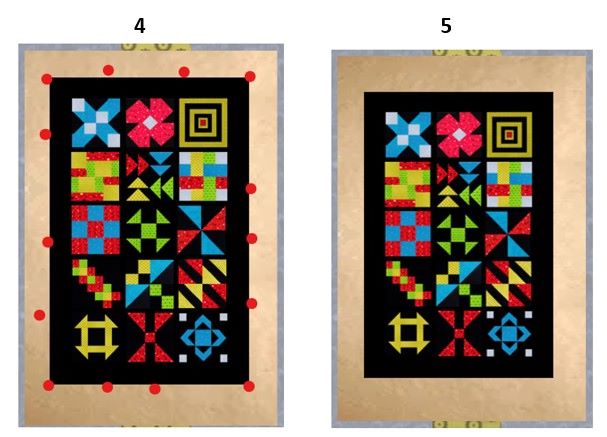
Check the width and length of your quilt top.
The general rule is to have the backing and wadding at least 4” wider at each side/top and bottom of the quilt top.
I generally allow about 3” if I’m only doing a light quilting technique. The reason for the additional fabric and wadding is to allow for movement of the quilt sandwich during quilting and the ‘denseness’ of the quilting stitches/design you make which could cause some shrinkage.
Save any fabric off-cuts as they can be used for scrappy quilts or cut into strips to use when making Log Cabin blocks; off-cuts of wadding can be used when making padded straps for bags, wallets, purses etc.
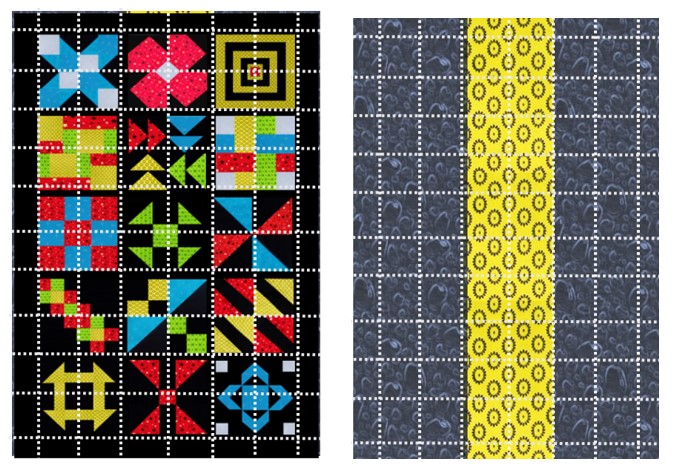
If your quilt top measures approx. 45” x 72” you will need your backing fabric and wadding to be approx. 52” wide x 78” long.
For beginners’ perhaps the easiest way to do this is to piece down the centre. Press your fabric to remove any creases.
Fold your fabric in half matching the selvedge at each side to keep it straight.
Cut your 42” x 78” wide fabric in half lengthways along the folded edge. A (6” or) 6.5” x 24” ruler is best for this.
This gives you 21” of fabric at each side. Allowing a seam of approx. 0.5” instead of the usual 0.25” you need approx. a 12” x 78” strip of fabric for the centre, or a pieced centre strip.
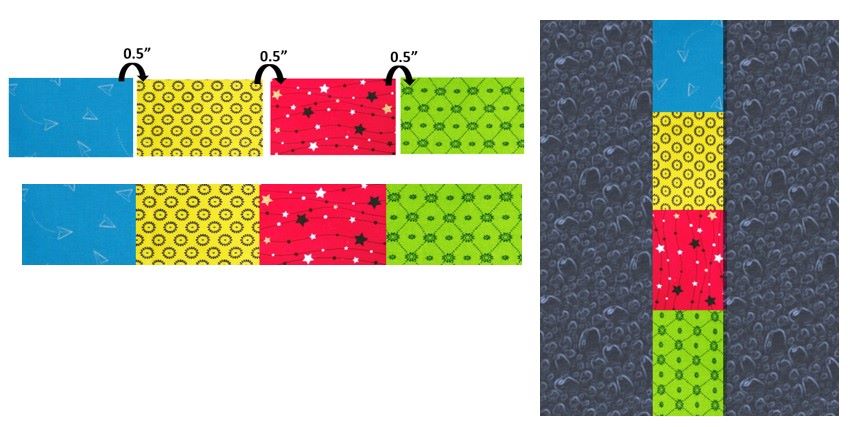
Here’s how you can make up the two different backings.
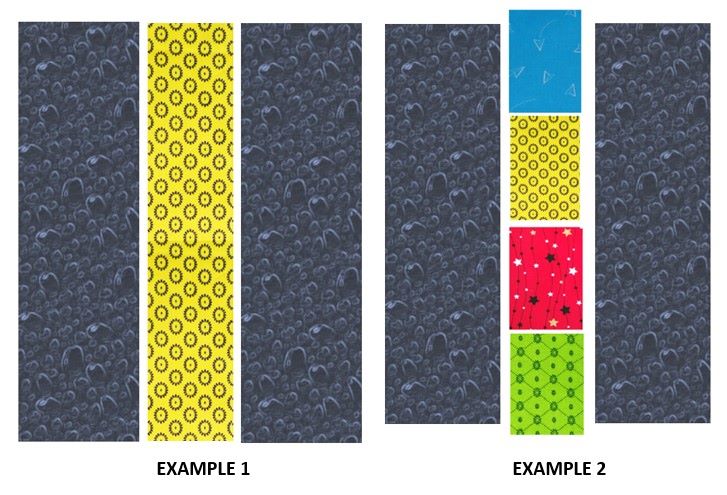
STEP 1:
EXAMPLE 1
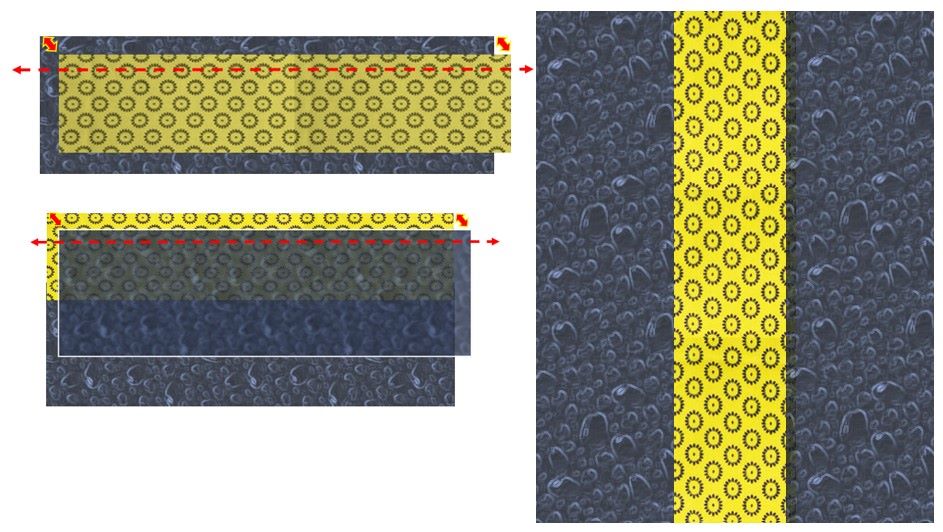
Place the Blue fabric with RS facing towards you. Align the Yellow fabric on the ‘cut’ edge. Pin or clip and sew a 0.5” seam away from the edge.
Press.
Flip this piece so the RS of the yellow fabric is at the top, facing towards you. Align and pin or clip the remaining blue strip along the edge. Sew a 0.5” seam away from the edge. Press.
STEP 2
EXAMPLE 2:
You need four pieces of fabric approx. 12” wide by 21” long. Sew your four pieces together using a 0.5” seam and Press. Don’t worry if it is slightly longer than the other pieces as you can always trim it after sewing it to your 21” x 78” backing strips. Follow STEP 1 to piece your backing fabric together.
Your backing piece is now ready. PRESS before layering with your wadding and quilt top.
Here is another website you might find useful. You will also find links to free quilt patterns too! Always a bonus!
FINISH YOUR QUILTS! How to – BORDERS, BACKING, BINDING, QUILTING – For ANY Quilt Top!! By Donna Jordan
https://www.youtube.com/watch?v=SE5CqpWaReA
THE QUILT SANDWICH – LAYERING
Click HERE for the free pdf.
You might have heard the term ‘quilt sandwich’, this refers to the layering of your quilt top, wadding and backing fabric.
WADDING – there are so many different waddings out there; some examples are100% polyester, 100” cotton, Bamboo mix, 80/20 Cotton/polyester to name but a few. You may already have a preferred choice from experience or recommendations from others. Your budget may be a factor in your choice too and I’m not here to recommend one product or supplier over another. Some quilters also use fleece instead of wadding and backing fabric and get on well with it.

I tend to buy by the bolt now and generally use 80/20 or Bamboo when they are on offer, but, when I started on my quilt journey, I used 100” polyester but I found it harder to quilt on my machine due the bulkiness and space needed.
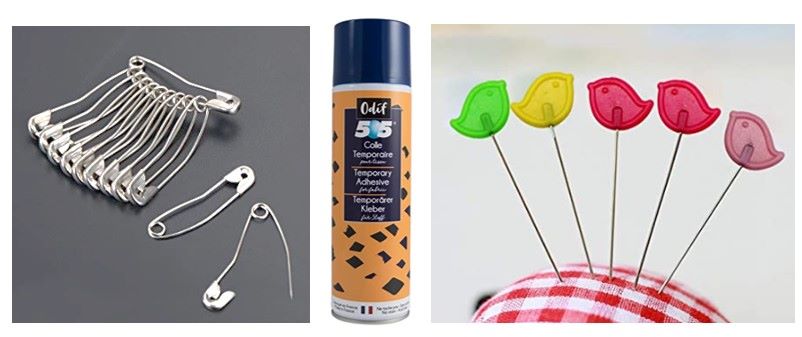
Whatever you choose to use you need it to be the same size as your backing fabric. You will also need to use pins, or a spray baste temporary adhesive for fabric. Here are some examples.
Check out these web links for some great tips. If you cannot access them from the pdf just type the links into your web browser.
FINISH YOUR QUILTS! How to – BORDERS, BACKING, BINDING, QUILTING – For ANY Quilt Top!! By Donna Jordan
https://www.youtube.com/watch?v=SE5CqpWaReA
Hand quilting basics: Layering by Carolyn Gibbs – Although it is for hand quilting you can use the same process for machine quilting too.
https://www.carolyngibbsquilts.co.uk/techniques/quilting/hand-quilting-basics-layering/
How I Layer My Quilts by GillyMac
https://www.gillymacdesigns.com/2021/05/how-i-layer-my-quilts/
Basting And Quilting for Beginners.
https://www.diaryofaquilter.com/basting-and-quilting-for-beginners/
LAYERING
Your wadding needs to be cut to the same size as your backing fabric: 52” x 78”.
You need a space big enough to lay it flat – the floor, a double bed (remove the duvet first).
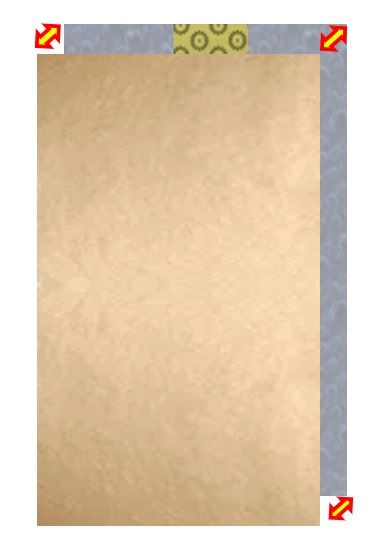
** Lay your BACKING FABRIC with the Wrong Side facing up. Smooth out any wrinkles but keep it SQUARE.
Lay your wadding on top, again keeping it square to the backing fabric and smoothing out any wrinkles.
Using temporary basting adhesive?
(2) Fold down a section of the wadding at the top and spray baste with the temporary adhesive. Flip it back over to the top smoothing out the wrinkles as you go.
(3) Fold up the wadding from the bottom and repeat in sections as in (2) until the backing/wadding sandwich is all done. It should now look like (1).
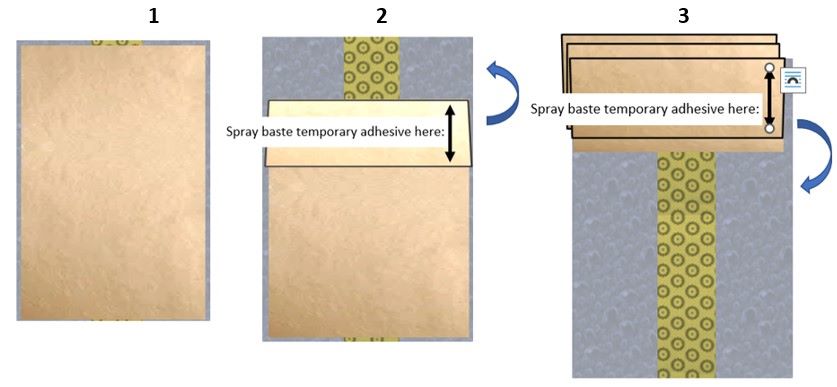
(4) Centre the Quilt Top on your backing fabric/wadding piece.
Mark dots or a line around the edge so you know where your basting area is. Fold down a section of the quilt top, spray the temporary adhesive onto the wadding and then flip the quilt top up, smoothing out the wrinkles as you go as in (2).
Fold up the quilt top in sections and repeat the steps as in (3).
You are now ready for quilting your quilt sandwich.
Using Pins?
Refer to the ** for LAYING out your backing fabric and wadding. Centre your quilt top then PIN well.
You are now ready for quilting your quilt sandwich.
QUILTING & BINDING
QUILTING YOUR QUILT TOP
Click HERE for the free pdf.
There are many different ways you can quilt your ‘quilt sandwich’ and these might be influenced by the size and make of your machine and your experience or confidence at quilting.
Some sewing machines can automatically adjust to the thickness of your material using, some will produce a better effect using a Walking Foot. The best thing to do is to search the internet to see what’s out there or ask a ‘quilty’ friend to show you what he/she does. You can use Free Motion Quilting (FMQ) or simple straight stitch lines. You can also hand stitch if you prefer.
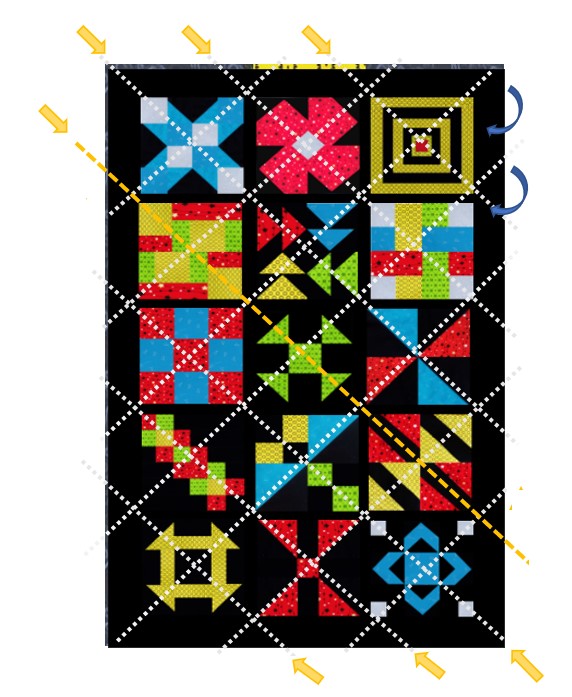
For this I’m going to show you only straight-line stitching. The stitching is exaggerated on the photos as I wanted to show you where to stitch and how it would look on both sides.
Check your wadding to see what it suggests for the quilting area e.g., 8 inches. This means that you should ‘quilt’ no more than 8” apart.
Make up a sample ‘quilt sandwich’ to try out your straight-line stitch first. Alter your stitch length and tension to suit your ‘quilt sandwich so there is no puckering. Make a note of what this is or take a photo just in case you have to break off what you are doing.
Once you are satisfied then you can start.
For this top I chose diagonal lines to show you. If you want to mark points along the stitch line, use an erasable pen or chalk. Starting at your widest point sew across from one edge to the other. Guide your quilt sandwich with your hands as you sew. You can roll it up from the top corner to fit in the ‘throat’ space for your machine. Work each row of quilting from that centre row out until you have reached the top corner. Each time you sew a row your quilt sandwich will have more weight to the left of you so take that in consideration when trying to get those lines even.
Then flip it round and sew the ‘bottom’ half in the same way you have done the top.
Here is the finished look from both sides although your stitching won’t be as pronounced.
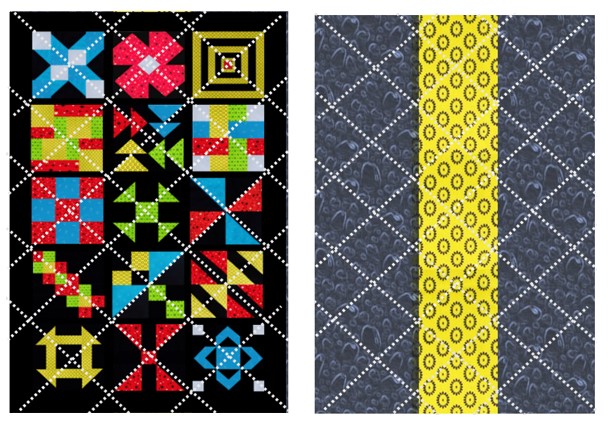
Here is an alternate look using a grid approach.
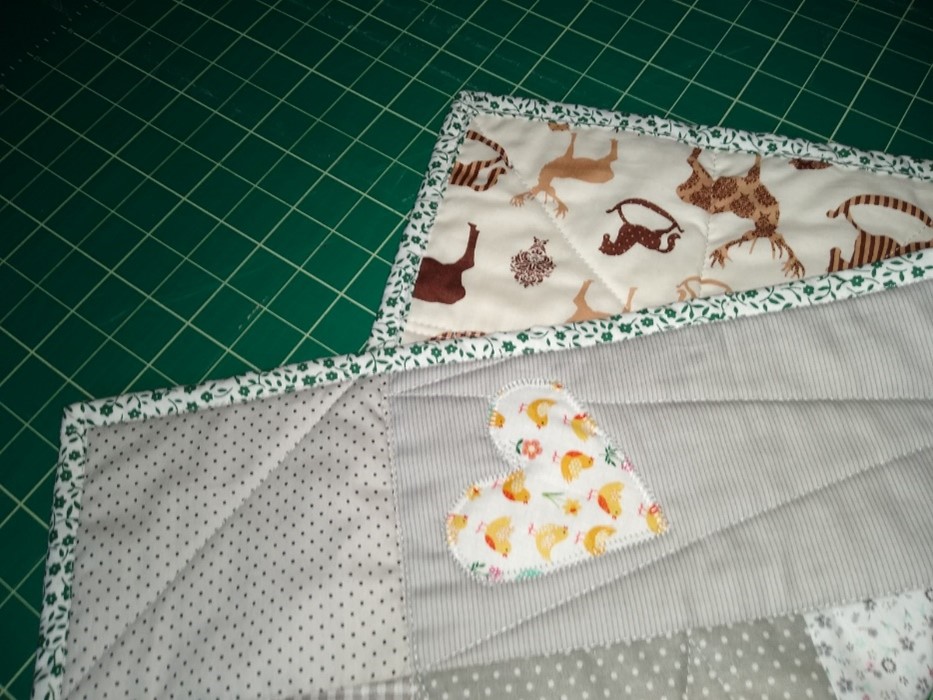
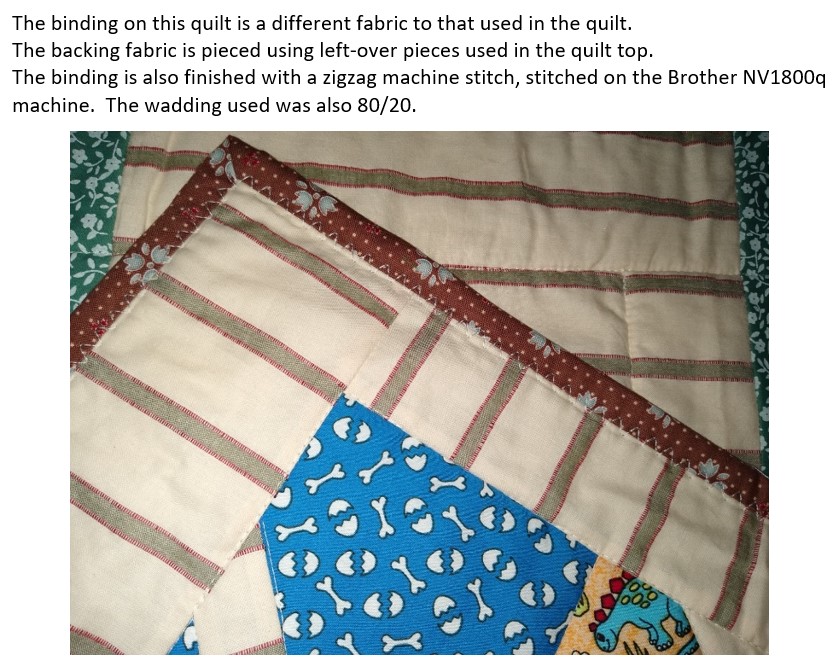
Here is an example of ‘RANDOM LINE’ quilting. This doesn’t follow any of the seams, it’s purpose is just to make sure there is some quilting within the recommended wadding ‘quilting area’. The heart applique was added after quilting.
It also has backing and binding that does not match the front. You can experiments as much as you like!
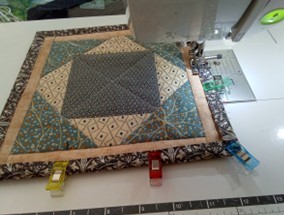
BINDING YOUR QUILT
This is the final bit to completing your QuiltSewGo Beginner’s Sampler Quilt and, as my blogging friend has already written a blog on how to bind, then it makes sense for you to follow this instead of repeating it here.
BINDING by Lyn Butler https://ukqu.co.uk/blog/2021/11/29/what-a-bind-2/
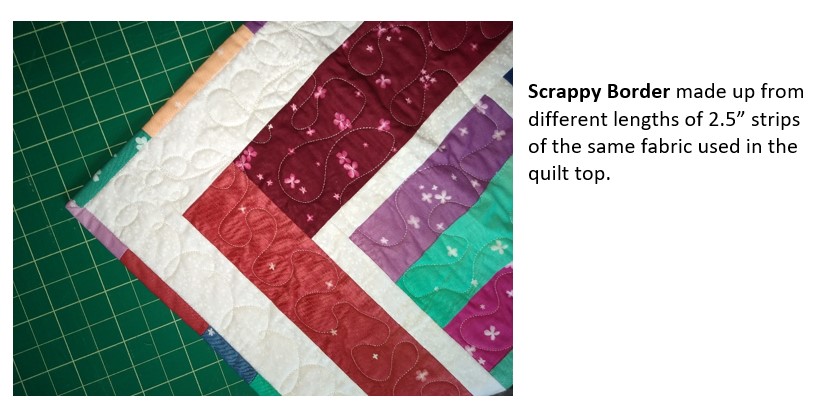
Your binding could be a solid (plain) fabric, a contrasting patterned fabric or made up of any left-over strips of the fabric used in your quilt top. The choice is yours.
If you want to finish your quilt top with a machine stitch instead of hand stitching as Lyn has shown in her blog then instead of sewing your binding on the right side, sew it on the wrong side. Fold it towards the front after stitching, PIN or CLIP around the binding to old it in place then machine sew instead of hand sewing in place.

Here is a useful crib sheet for Binding:
https://handiquilter.com/wp-content/uploads/2019/09/HQ-Sure-Seam-Binding-Tutorial.pdf
What a journey we’ve been on. I hope you have found this series useful and that the Block series have helped you to gain new skills and confidence. I’ve certainly learnt a lot from writing these blogs for you, not only in some of the information I’ve found in my research but how I have to think about how the blogs flow in a coherent and logical way when writing them. And it is also made me think about my own sewing and quilting, trying out new blocks and techniques as well as losing some of those relaxed habits we get into from time to time.
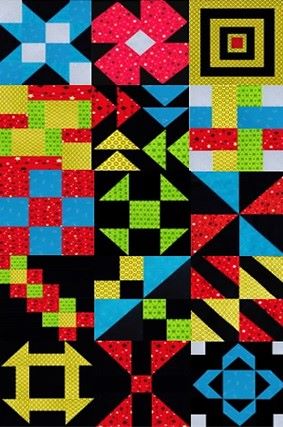
Do you know that you can now make at least 15 ‘single’ block quilts using the free pdfs. Here are some examples:


I’d love to see any of the blocks or full quilts you have made, you will find my Twitter and Instagram links below and an email address. Please feel free to share the links with friends and direct them to the website ukqu.co.uk as we all blog for free and want to share our love of quilting with you.
Carol Lightburn email: [email protected]
Twitter: @quiltsewgo Instagram: quiltsewgo
Twitter: @ukquilters Instagram: uk_quilters_united
What a GREAT tutorial!
Thank you Maggie.