We are almost at the end of making the blocks in this series and I hope you are enjoying it so far. A sampler quilt is a great way to expand your awareness of the number of blocks out there, and as the architect of this sampler, I wanted to make sure I used blocks that would use different techniques so you can develop yours. As your experience grows you will also be able to look at smaller/larger blocks and resize them to fit the size you want. You might not think that at the moment but, in time, you will be able to do it and perhaps, design your own blocks!
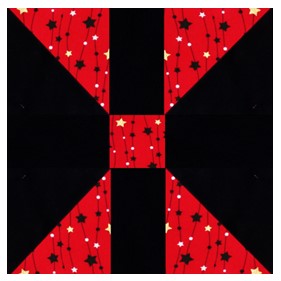
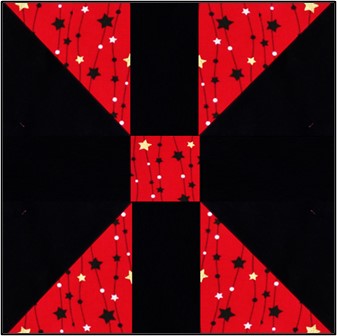
Block 13: Diamond Panes
Diamond Panes is made up of Half Square Triangles (HST), rectangles and a centre square. The original pattern was a 5” finished block so I have resized it for this sampler quilt. It’s very similar to a bow or spool block.
Click HERE for the pdf block pattern.
UNFINISHED SIZE: 12.5” x 12.5”
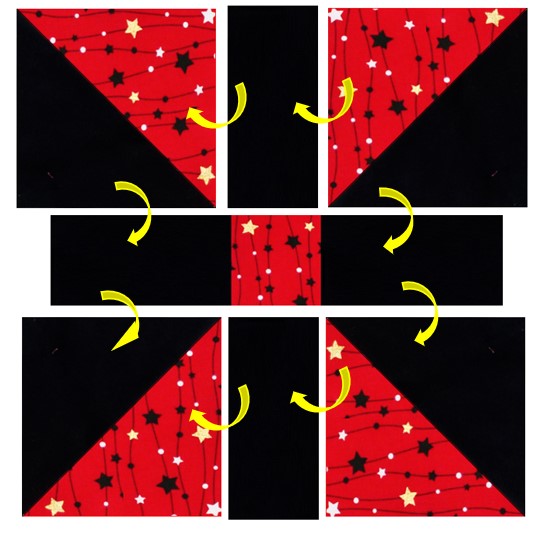
ASSEMBLY INSTRUCTIONS
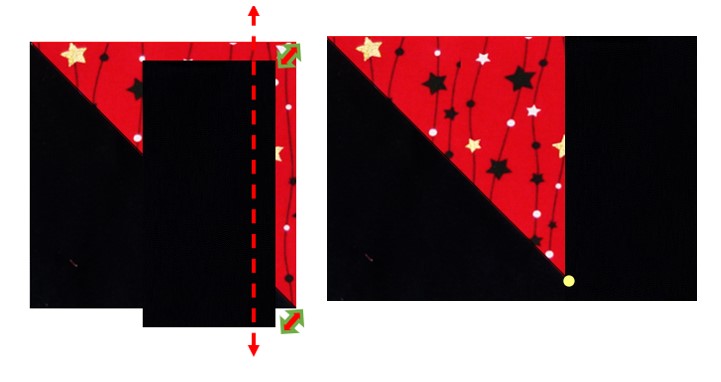
STEP 1:
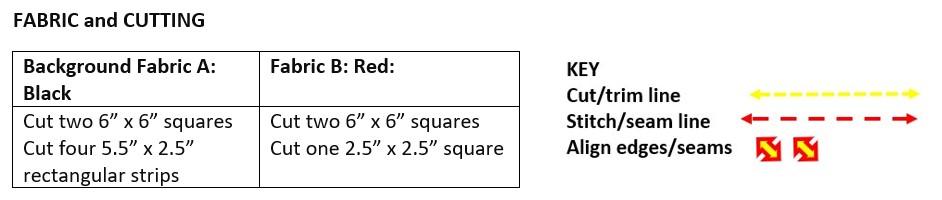
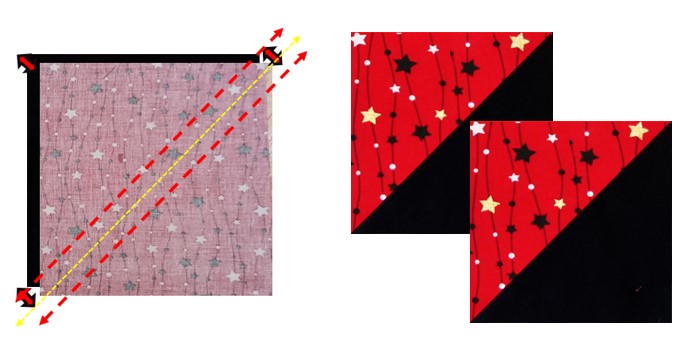
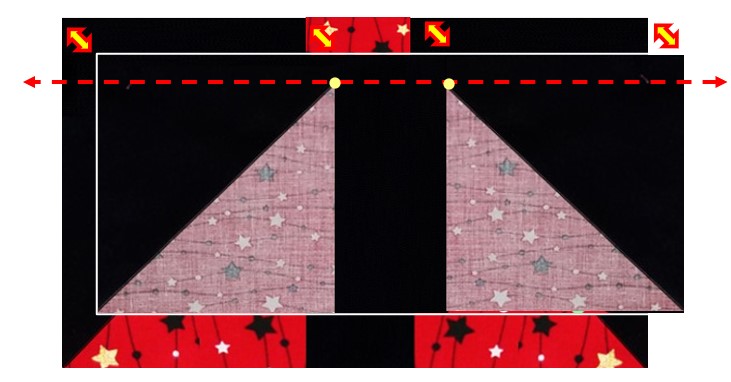
Make the HSTs draw a line corner to corner on the wrong side of two Red 6” x 6” squares. Mark another line 0.25” either side of the centre line.
With Right Sides (RS) facing each other, layer a Black 6” x 6” square and one Red 6” x 6” square and sew 0.25” from each side of the centre line (yellow dash).
Cut down the centre (yellow dash line) and PRESS open.
Square up and TRIM to 5.5”
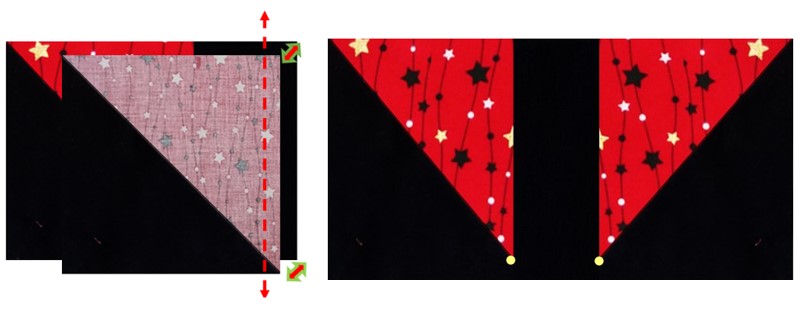
STEP 2:
Repeat with the remaining Black/Red squares. You will now have four HSTs.
STEP 3:
Assemble the centre row. Place the Red 2.5” x 2.5” square RS facing the Right Hand (RH) side of the Black 2.5” x 5.5” rectangular strip. Sew a seam 0.25” away from the edge. PRESS open.
STEP 4:
Now place a Black 2.5” x 5.5” rectangular strip to the RH side of the Black/Red strip. Sew a 0,25” seam from the edge. PRESS open.

STEP 5:
Lay out as shown so you can refer to it when you need to.
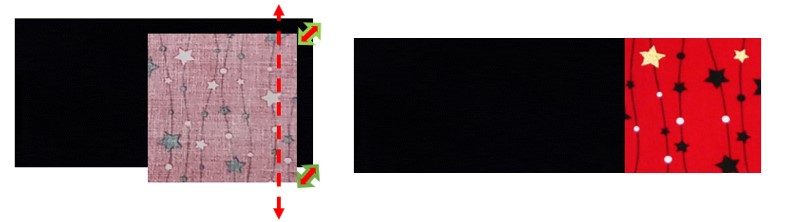
To make the top row, take one HST unit and align a Black 2.5” x 5.5” rectangular strip to the RH edge. Sew a 0.25” seam. PRESS open.
STEP 6:
Take another HST, making sure you place it a shown to the RH edge of the unit is STEP 5. Sew a 0.25” seam away from the edge. PRESS open.
STEP 7:
Constructing the bottom row is simple. Repeat STEP 5 and STEP 6 in the same way and flip it 180⁰.
PRESS.

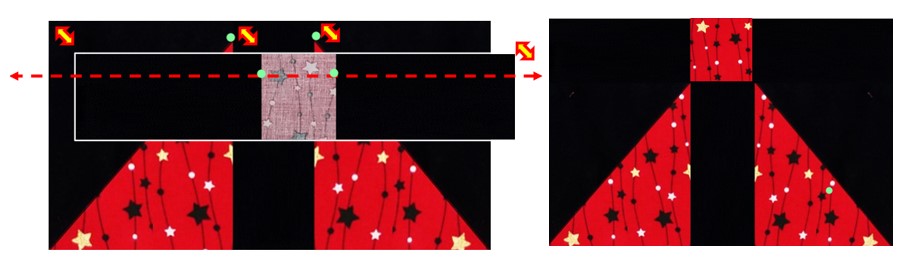
STEP 8:
Now to sew all three rows together! I find it easier to start with the bottom row.
Place the centre row RS facing the bottom row as shown below. Align and PIN and sew a 0.25” seam from the edge. PRESS open.
STEP 9:
Flip the top row 180⁰ towards the lower half of the block unit.
Align, PIN and sew a seam 0.25” from the edge.
PRESS open
Voila you’ve made your 13th block!

So, ready for the next one? Block 14: Idle Moments
Coming soon, the last one: Block 15: Mosaic Star
It’s getting nearer to the time to put all your blocks together to make your quilt top. Don’t worry if you’re not quite there yet, all the block patterns, the introduction and the finishing off blogs will still be available long after the series has finished on the ukqu.co.uk website. Do take time to look around at the other blogs out there too; there’s some great tips, fabric and product reviews and it’s worth clicking on the Quilting Blocks and Projects tab for lots more ideas and inspiration.

Carol Lightburn
Twitter: @quiltsewgo Instagram: quiltsewgo
Twitter: @ukquilters Instagram: uk_quilters_united
Responses