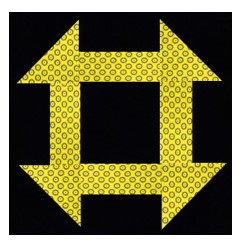
Block 11: Churn Dash
Churn dash block is a traditional block that has been around since the 1800’s. It is made up of rectangle strips, half square triangles (HST) and a centre square. I’ve chosen to use just two fabrics for this block, but you could use more if you wish. It is also known by lots of other names and can be used as a picture frame as I did in a recent fabric review – have a look here to see how I used it; there’s also a free pattern you can download from the blog.
https://ukqu.co.uk/blog/2022/08/02/british-waterways-fabric-collection-courtesy-of-craft-cotton-co/
Click HERE for the pdf block pattern.
UNFINISHED SIZE: 12.5” x 12.5” square.
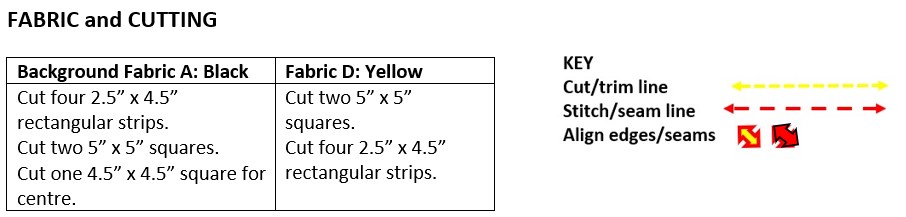
ASSEMBLY INSTRUCTIONS
STEP 1:
Place a Black 2.5” x 4.5” rectangular strip and a Yellow 2.5” x 4.5” rectangular Right Sides (RS) together. Sew a seam 0.25” away from the Right edge. PRESS open.
The background fabric (Black) will be on the outer edge of the block so if using directional fabric check that the fabric design will finish in the way you want it to before sewing your seam.
Make 4 of these.
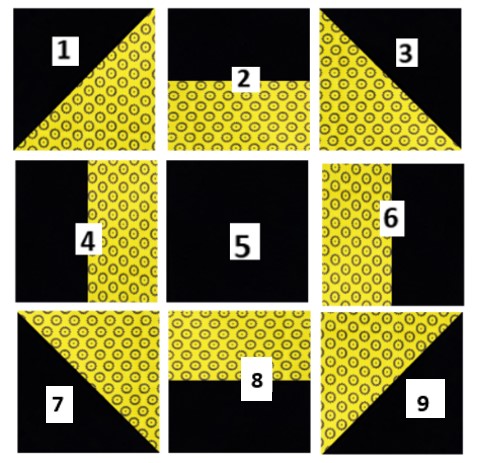
STEP 2:
Make the HSTs.
Place one Black 5” x 5” square and one Yellow 5” x 5” square Right Sides (RS) together. Mark as shown below and sew along the seam lines (Red dash). Cut down the centre line (Yellow dash). PRESS open.
Trim to 4.5” square.
Repeat with the remaining Black and Yellow square to make four in total.
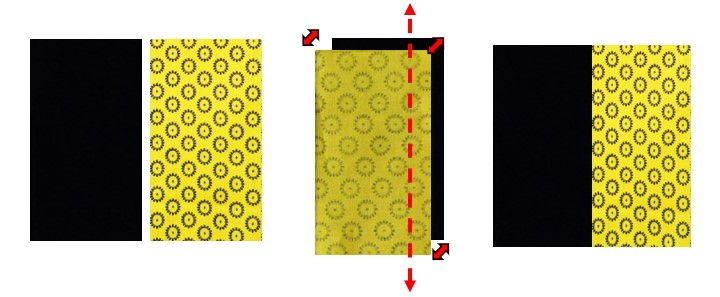
STEP 3:
Lay out the pieces as shown so you have a visual reminder of how the block looks.
STEP 4:
Sew the Top row units together. Place pieces 1 and 2 RS facing. Align and PIN and sew a 0.25” seam away from the Right edge. PRESS open.
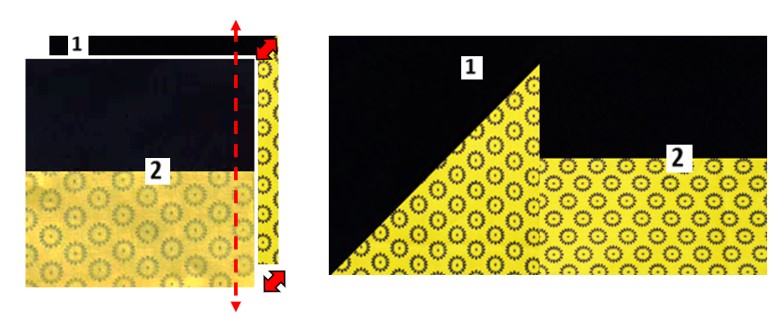
STEP 5:
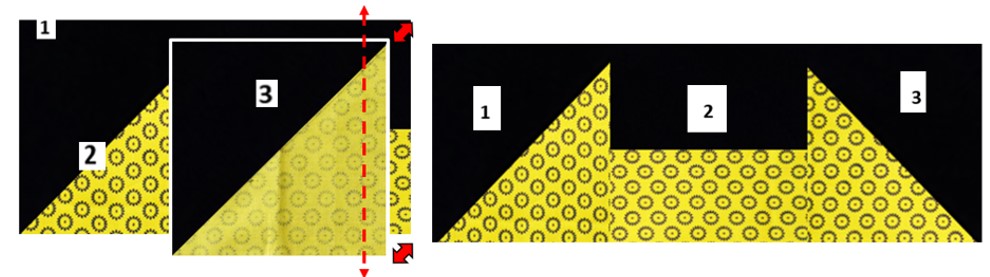
Place piece 3 at the Right-Hand side of piece 2 RS facing each other. Align and PIN. Sew a 0.25” seam at the Right edge. PRESS open.
STEP 6:
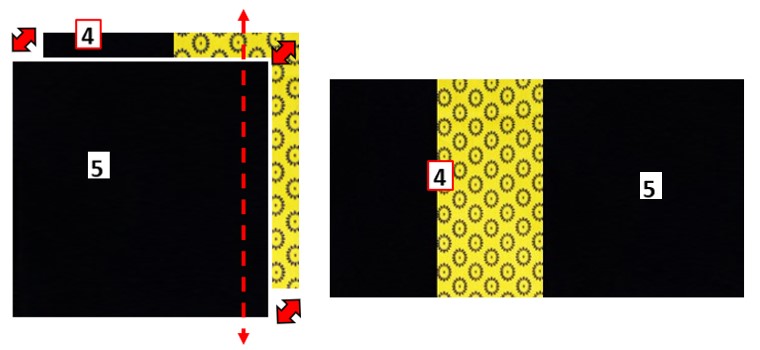
Middle row.
Place piece 4 and piece, RS facing each other. Align and PIN. Sew a 0.25” seam at the Right edge. PRESS open.
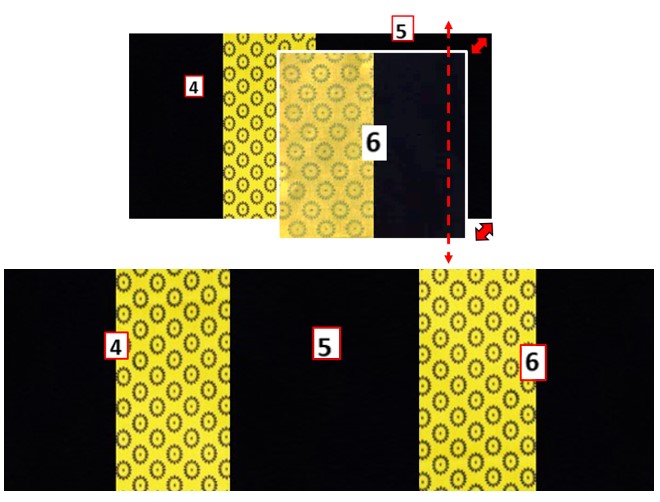
STEP 7:
Place piece 6 at the Right-Hand side of piece 5, RS facing each other. Align and PIN. Sew a 0.25” seam at the Right edge. PRESS open.
STEP 8:
Bottom row.
Place piece 8 at the Right-Hand side of piece 7, RS facing each other. Align and PIN. Sew a 0.25” seam at the Right edge. PRESS open.
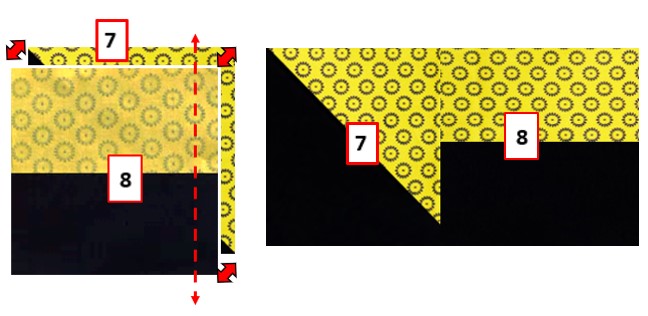
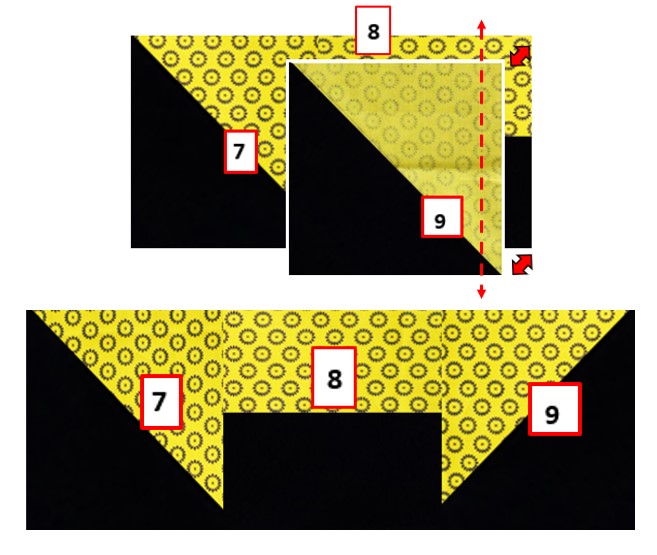
STEP 9:
Place piece 9 at the Right-Hand side of piece 8, RS facing each other. Align and PIN. Sew a 0.25” seam at the Right edge. PRESS open.
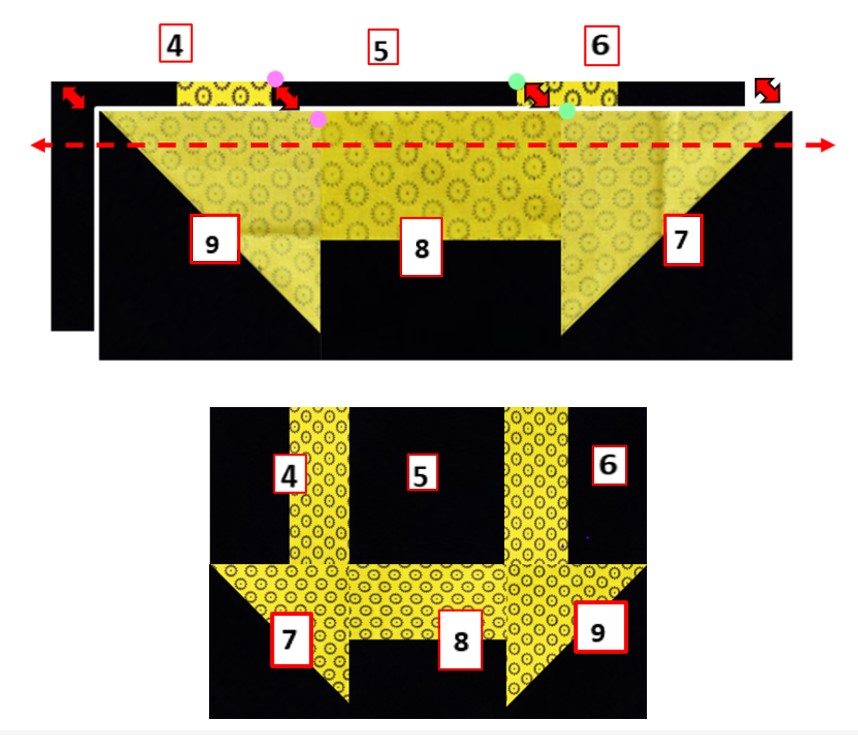
STEP 10:
Next – Sew all the units together starting with the middle and bottom row. Place the bottom row RS facing the middle row. Align and PIN making sure you match where the seams meet (pink and green dots). Sew the seam 0.25” away from the edge. PRESS open. Flip 180⁰ so pieces 7, 8 and 9 are at the bottom.
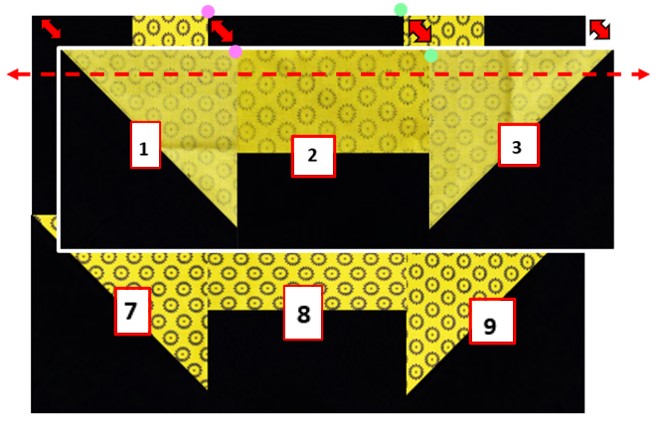
STEP 11
Take the top row and place it RS facing the middle/bottom row unit. Align and PIN where the seams match (pink and green dots). Sew a seam 0.25” away from the edge.
Voila, you’ve made your 11th block! Just four more blocks to go!

Are ready for the next one? Block 12: Sickle
Coming soon: Block 13: Diamond Panes, Block 14: Idle Moments

Carol Lightburn
Twitter: @quiltsewgo Instagram: quiltsewgo
Twitter: @ukquilters Instagram: uk_quilters_united
Here are some links to variations of the Churn Dash block, I really like the Abe Lincoln Quilt Block – it’s now on my ‘To Do’ list!
https://trkingmomoe.wordpress.com/2014/02/03/lovers-knot-block-sampler-quilt/
Responses