Welcome everyone, I hope by now you are gaining in confidence in using different skills and techniques in your quilt making and it doesn’t seem as daunting as you first thought. The remaining blocks in this series will use a variety of the techniques in the previous blocks you’ve made so you can see just how versatile and interchangeable they are. You’ll soon be able to look at a pattern and think, yes, I can make that! So, let’s go!
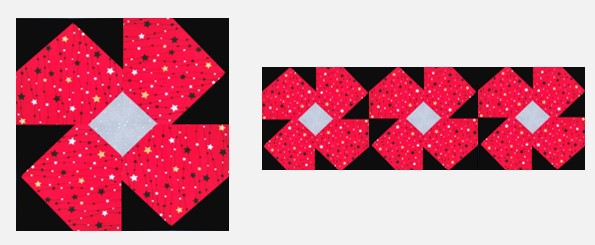
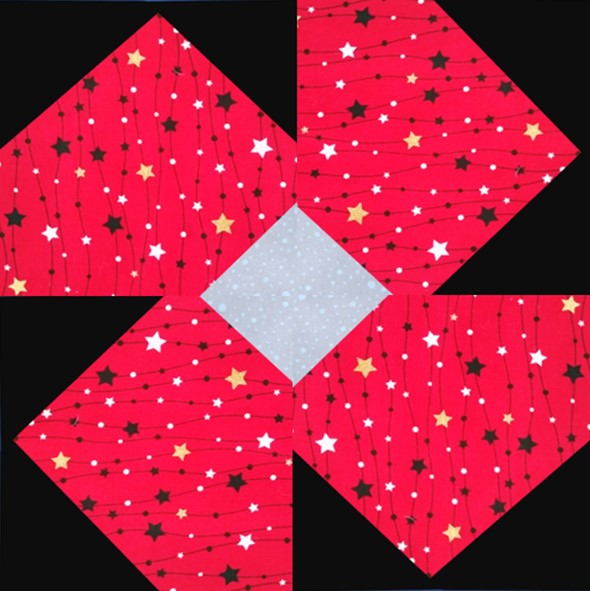
Block 10: Poppy
I’m not normally a fan of flower blocks but I do like this one, it’s so simple and quick to make and I found it at https://teresadownunder.com/ about a year ago.
This week you are using what’s known in the quilting world as the ‘snowball technique.’ It uses different size squares to achieve its effect of making a block look ‘round’ without using curved pieces.
Click HERE for the pdf block pattern.
UNFINISHED SIZE: 12.5” x 12.5”
ASSEMBLY INSTRUCTIONS
STEP 1:
Draw a diagonal line corner to corner on all eight Black 3.5” x 3.5” squares and the four Grey 2” x 2” squares on the wrong side of the fabric. This will become your seam line.
I use a sharpened soft lead pencil (4b or 6b), and, as it’s on the wrong side, when sewn over, it won’t show.
STEP 2: If you want to make some bonus Half Square Triangles SCROLL down to the end for the instructions on how to make them before you sew/trim anything!
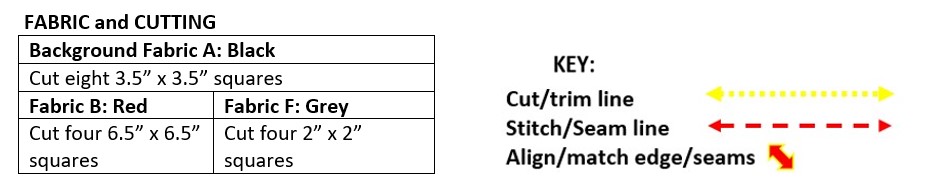
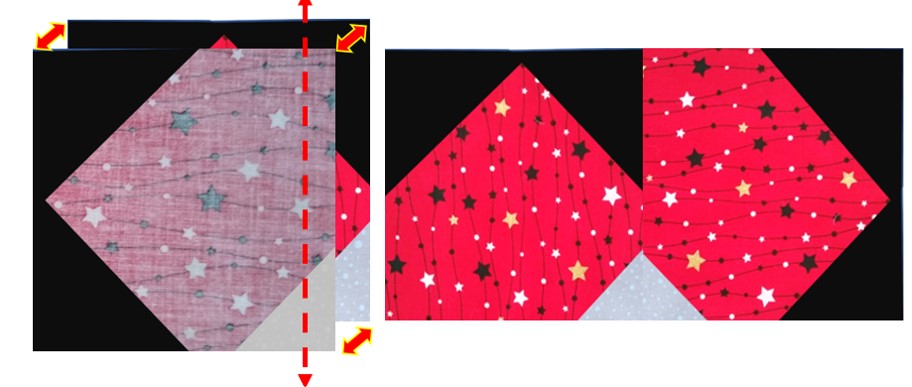
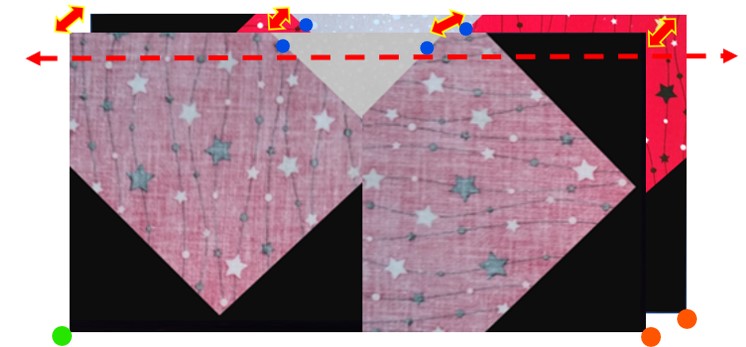
Take a look at the picture below.
Place a Black 3.5” x 3.5” square in the top Left-Hand corner of a Red 6.5” x 6.5” square so that the Right Sides (RS) are facing each other.
Now place a Grey 2” x 2” square in the bottom Right of the Red square, RS facing each other.
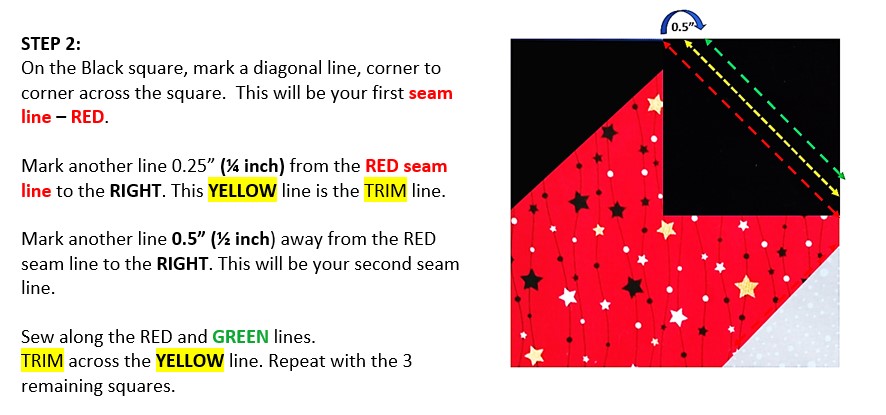
Sew along the marked seam line (red dash line) and trim 0.25” away (yellow dash line). PRESS open.
STEP 3:
Repeat with the remaining three Red squares to make four in total.
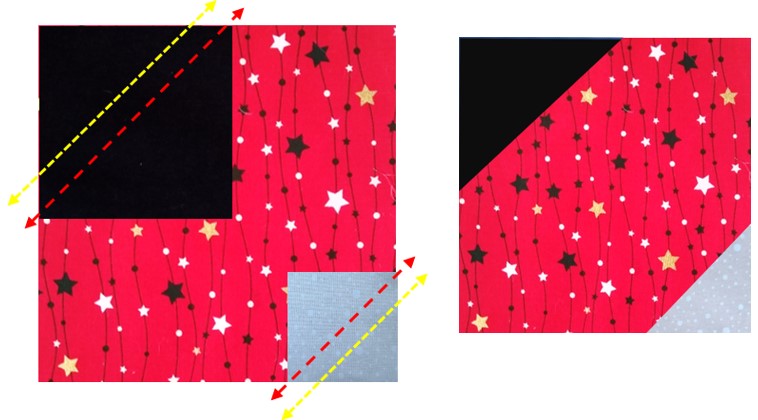
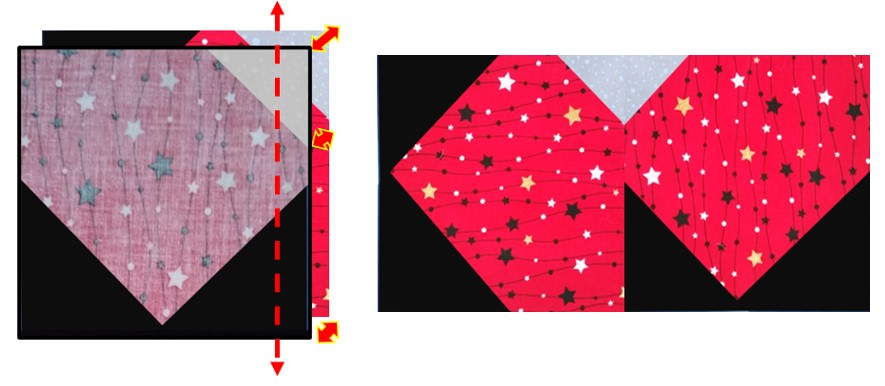
STEP 4:
Take another Black 3.5” x 3.5” square and place to the Right of the Red square as shown in the pic below. Sew along the marked seam line. PRESS open.
STEP 5: Repeat for the three remaining Red squares. PRESS open.
STEP 6:
Lay out the pieces as shown:
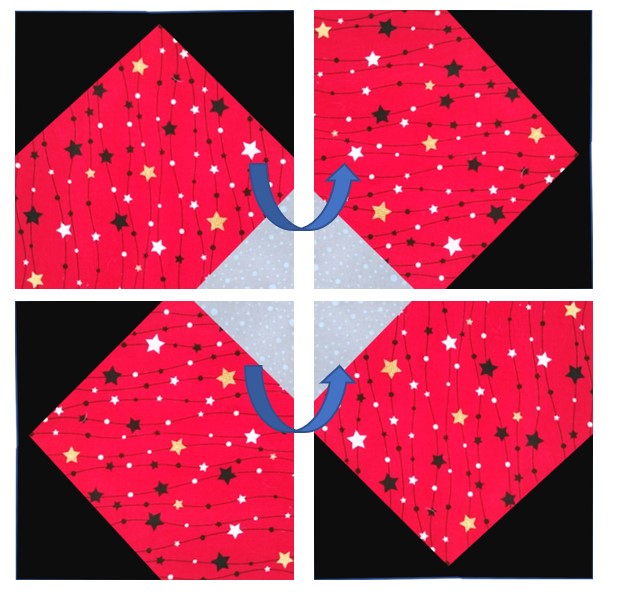
Flip the top Right Hand (RH) side unit 180⁰ to the left. Align and PIN across the seam line and sew using a 0.25” seam from the edge. PRESS open.
STEP 7:
Flip the bottom RH unit 180⁰ to the left. Align and PIN across the seam line and sew using a 0.25” seam from the edge. PRESS open.
STEP 8:
Flip the top unit 180⁰ so it lays RS facing against the bottom unit. Align and PIN carefully so you get an accurate match on the centre ‘grey’ square.
Sew 0.25” away from the edge. PRESS open.
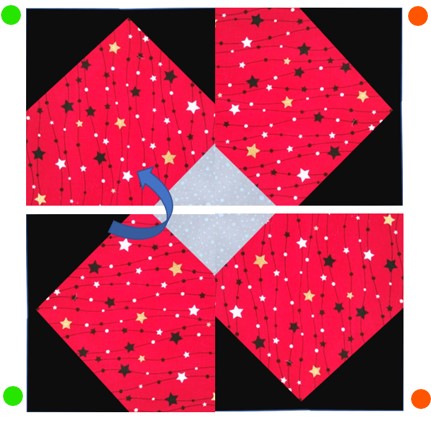
Voila, you’ve made your 10th block, just five more blocks to go!

So, ready for the next one? Block11: Churn Dash
Coming soon: Block 12: Sickle, Block 13: Diamond Panes
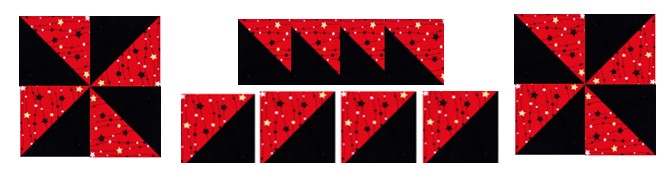
BONUS HALF SQUARE TRIANGLES – BLOCK 10
I like to make the most of the fabric I have and one way to do this is to utilise the ‘corner pieces’ that are trimmed off when using the ‘snowball technique’ whilst making blocks like this. If you don’t want to make bonus blocks then save these offcuts and add them to your scrap stash – it’s amazing how much you can actually make from all these fabric scraps – but that’s for another blog!
Red 6.5” square: Black: 3.5” squares: Grey: 2” square

PRESS, trim and Square-up these bonus HSTs to 2.5” x 2.5”
This makes 8 HSTs @2.5” square. The HSTs can be used for borders or for making smaller 4.5” unfinished Pinwheel blocks.
If you have missed any of the previous blocks and Introduction you can find them all here:
https://ukqu.co.uk/blocks-of-the-month/quiltsewgo-beginners-sampler/

Carol Lightburn
Twitter: @quiltsewgo Instagram: quiltsewgo
Twitter: @ukquilters Instagram: uk_quilters_united
Responses