We are almost at the end of the QuiltSewGo Beginners’ Sampler series, just the last two blocks to go now and then on with the ‘finishing off’ – sashing, borders, layering, quilting and binding. You might have heard the term ‘Quilt As You Go’ (QAYG) and want to try this method or you might not feel ready to do the layering and quilting yet so, at the end of the instructions, I will add some links to some websites that can explain it to try later. No reason to reinvent the wheel right?
So, on with this weeks block, it’s one of my favourites too!
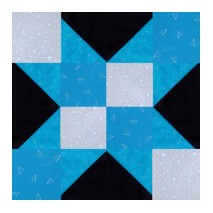
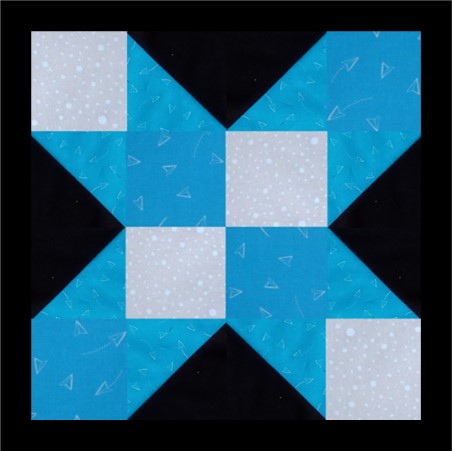
Block 14: Idle Moments
Idle Moments is made up of squares and Half Square Triangles (HST). I was really surprised to find out that this block is around 85 years old and was written about in:
Quilt Notes: Nancy Cabot’s debuted it in the Chicago Tribune on June 4, 1937, in her column. Want to know more?
http://www.earlywomenmasters.net/quilts/i/idle_moments/index.html
http://www.earlywomenmasters.net/quilts/c/cubelattice/index.html
Click HERE for the pdf block pattern.
UNFINISHED SIZE 12.5″ x 12.5″ square.
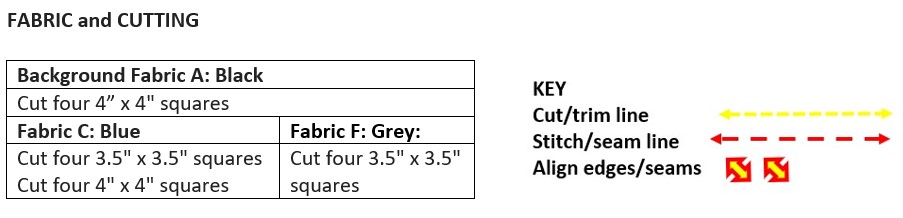
ASSEMBLY INSTRUCTIONS
STEP 1:
Sew a Blue and Grey 3.5” x 3.5” square together using a 0.25” seam.
Repeat to make 2 of these.
PRESS open.
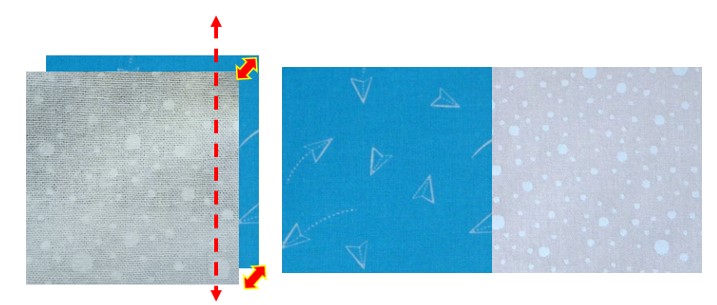
STEP 2:
Now sew them together using a 0.25” seam to make a 4-patch unit.
STEP 3:
To make the HSTs.
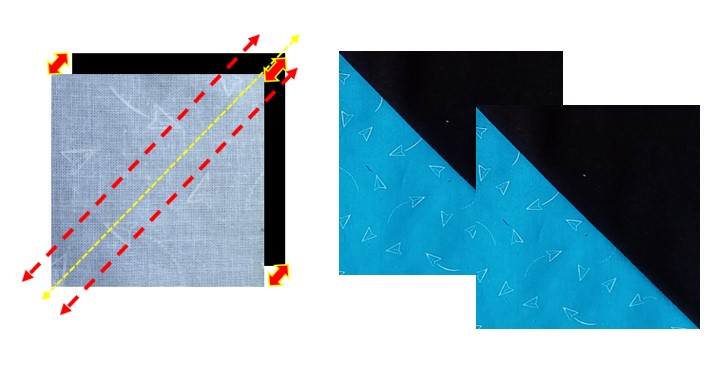
Place one Black and one Blue 4” x 4” square, RS facing each other.
Draw a diagonal line from corner to corner on the wrong side of all blue 4” x 4” squares.
Stitch 0.25” on either side of the draw line.
Cut on the draw line.
PRESS towards the darker fabric.
Repeat to make a total of eight blue and black HST pieces.
Trim and square up all the HSTs to 3.5” square.
STEP 4:
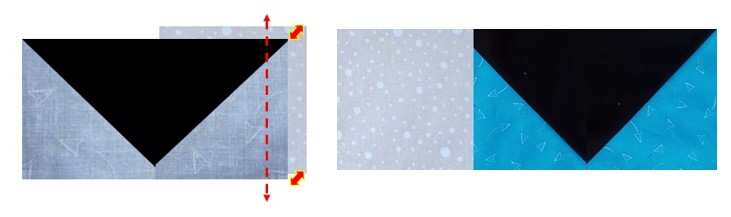
Make the HST Units (these will look like Flying Geese Units when sewn together).
Take two Blue/Black HSTs pieces and place them RS facing each other as shown below. Sew a 0.25” seam away from the Right-Hand edge. PRESS open.

STEP 5:
Repeat STEP 4 to make four HST units in all. PRESS open. They should measure 6.5” x 3.5”.

STEP 6:
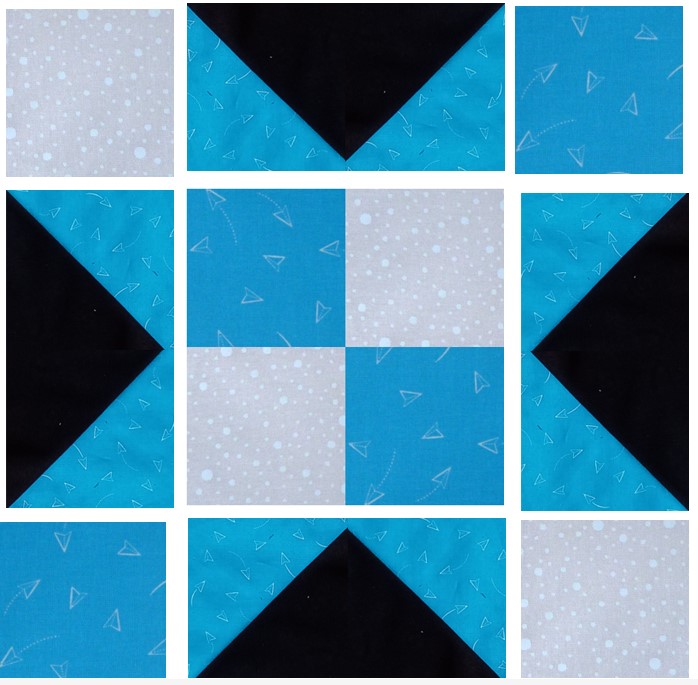
Lay out the blocks as shown so you have something to refer to when sewing it together.
STEP 7:
Top Row
Take a Grey 3.5” x 3.5” square place it Right-Side (RS) facing up. Now take a HST Unit and align and PIN at the Right-Hand side of the Grey square with the RS facing down. Sew a 0.25” seam and PRESS open.
STEP 8:
Take one Blue 3.5” x 3.5” square, place it RS facing the RH edge of the Grey/HST unit as shown.
Sew a seam 0.25” from the edge and PRESS open.
The Top Row in now done!
STEP 9:
Bottom Row
Follow STEPS 7 and 8 and make this is the same way as the Top Row. PRESS open then flip it 180⁰ so that the Grey square is in the bottom RH corner.

STEP 10:
Middle Row
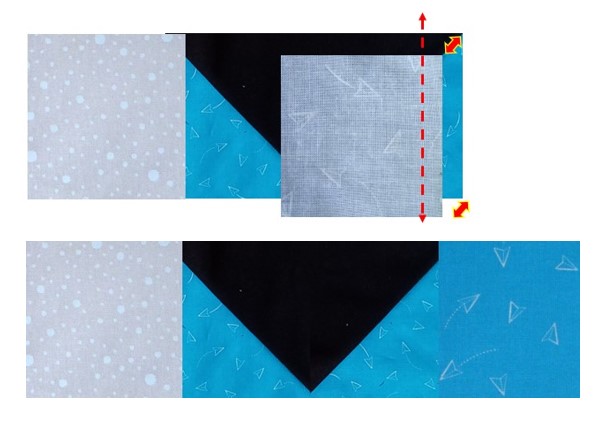
Take your 4-patch unit and make sure the top Grey square is on the Right facing up.
Now place a HST unit as shown; the blue part of the HST will be aligned on the RH edge of the 4-patch.
PIN and sew a seam 0.25” away from the edge.
PRESS open.
Flip this 180⁰ so the HST unit is on the Left-Hand side.
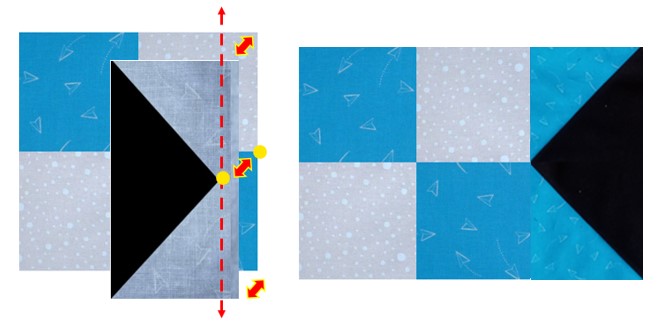
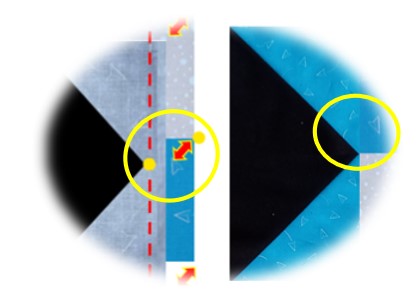
If your seams and piecing are accurate your seam should be just slightly above the point where the YELLOW dots meet to give a crisp point.
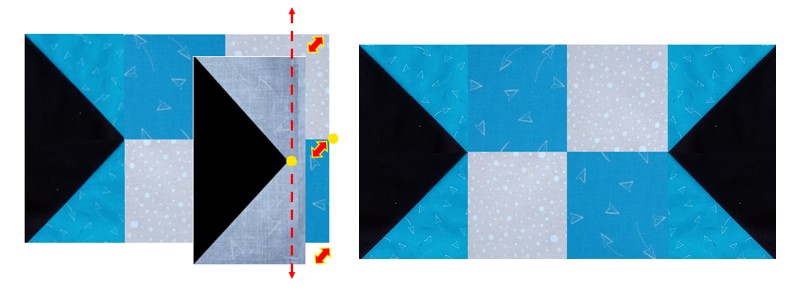
STEP 11:
Take another HST unit and place as shown; the blue part of the HST will be aligned on the RH edge of the 4-patch.
PIN and sew a seam 0.25” away from the edge.
PRESS open.
The Middle Row is now done!
STEP 12:
Sewing it all together!
Place the Middle Row with RS facing up. Take the Bottom Row and place it facing the middle row making sure the Grey square is on the LH side. Align and PIN where the seams match each other (blue, yellow, green dots). Sew a seam 0.25” from the edge. PRESS open and FLIP 180⁰ as shown.
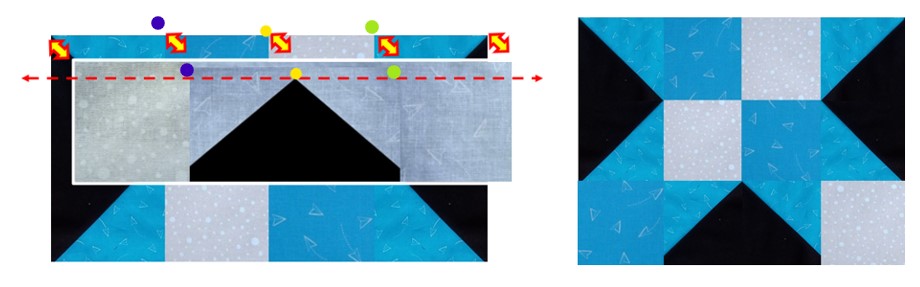
STEP 13:
With the Middle Row RS facing up take the Top Row and place it facing the middle row making sure the Grey square is on the LH side. Align and PIN where the seams match each other (blue, yellow, green dots).
Sew a seam 0.25” from the edge. PRESS open.

Voila, you’ve made your 14th block!
I love this blocks. I’ve added some sashing to this one just so you can see the finished effect.

Final block next week! Block 15: Mosaic Star
Coming soon:
Finishing off: Sashing and Borders, Layering, Quilting and Binding
‘Quilting’ can seem quite daunting to the new quilter as you want your finished quilt to look it’s best after all the work you have put into it. There are some many websites out there so do look around and find one that suits you. The links below are ones I found after recently trying a similar method of finishing off a quilt top. Choosing a method might depend on the throat size of your machine, whether you feel confident at doing ‘free motion quilting’ (FMQ) or just want to use the ‘Stitch in the Ditch’ method. So if you want to read ahead try these links:
How To Quilt As You Go: Without Sashing, By Monica Poole
https://www.youtube.com/watch?v=EFkwnOPMRF4&list=PLzkrYvcX8n-27c4F8eb1Srs5e_c7HwLQS&index=3
How To Quilt As You Go: My 1 to 3 Method (No Sashing pt 2)
https://www.youtube.com/watch?v=gCtLRUsTMRo&list=PLzkrYvcX8n-27c4F8eb1Srs5e_c7HwLQS&index=4

Carol Lightburn
Twitter: @quiltsewgo Instagram: quiltsewgo
Twitter: @ukquilters Instagram: uk_quilters_united
Responses