The final week for the quilt blocks but if you have missed any of the others why not head over to https://ukqu.co.uk/blocks-of-the-month/quiltsewgo-beginners-sampler/ and you will find all the blocks and the Introduction listed here. Each block has a link to a free pdf pattern to download too; plus some have links to other blogs on the UKQU.co.uk website to support you in your craft.
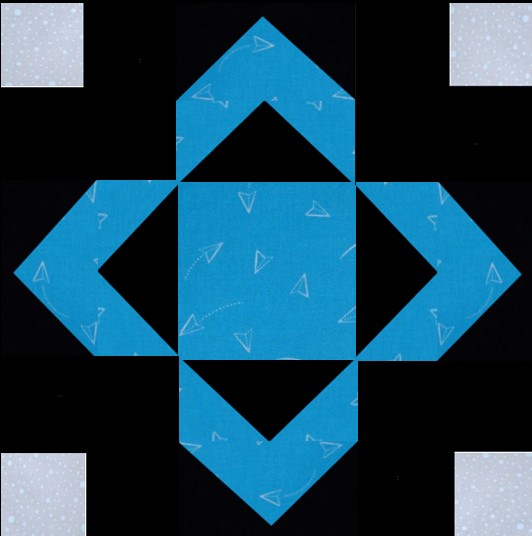
Block 15: Mosaic Star
There are so many versions of this block, so I chose a modern version of it taken from www.piecenquilt.com 30 days of Sewing Quilt blocks 2015.
Remember the Flying Geese units you made in Block 8, well, here is another opportunity to practice making them, but smaller!

Click HERE for the pdf pattern
UNFINISHED SIZE: 12.5” x 12.5” square
ASSEMBLING THE BLOCK:
Making the Corner Units
STEP 1:
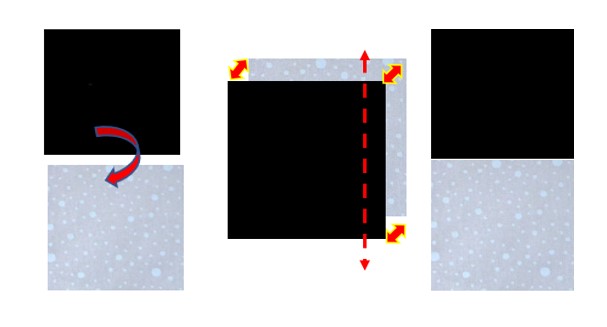
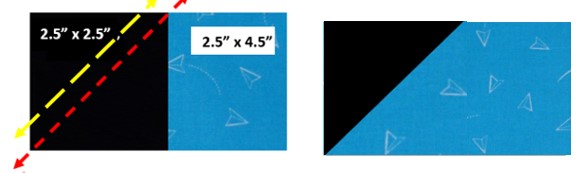
Place one 2.5” x 2.5” Grey square and one 2.5” x 2.5” Black square Right Sides (RS) together.
Sew a seam 0.25” from the edge.
PRESS open.
Repeat to make four of Grey/Black units.
STEP 2:
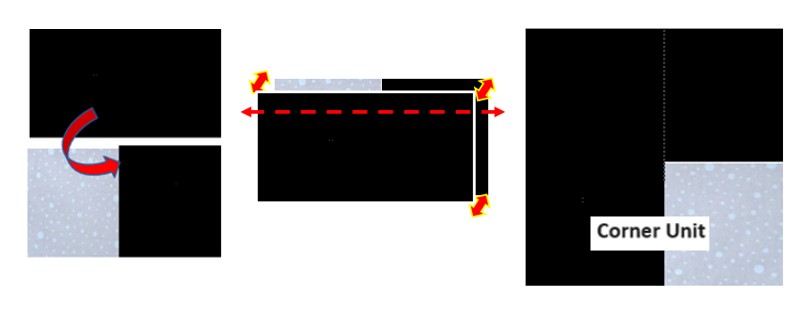
Making sure the Grey/Black unit is placed with the Grey square on the Left. Flip one 2.5” x 4.5” Black rectangular strip Right-Side RS facing each other. Sew a 0.25” seam away from the edge.
PRESS open.
Repeat to make four of these.
They should measure 4.5” x 4.5” square.
Make Flying Geese (FG) Units
STEP 3:
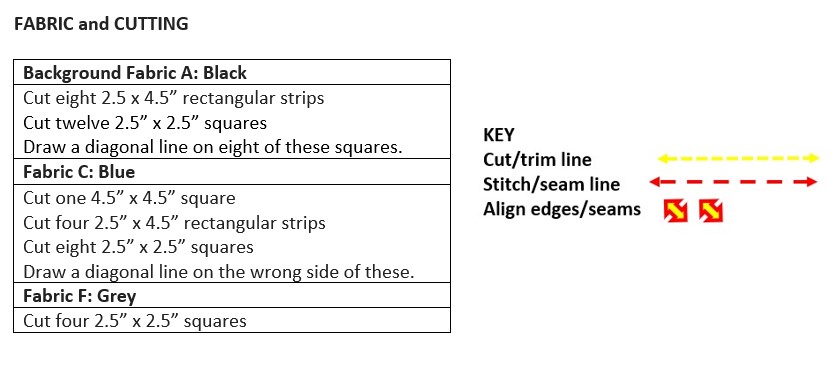
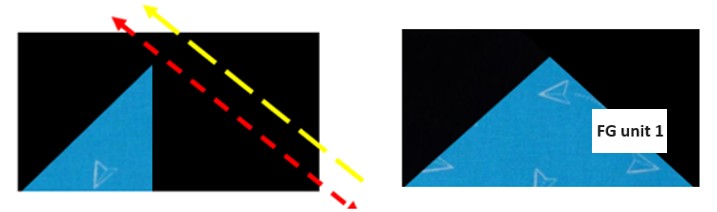
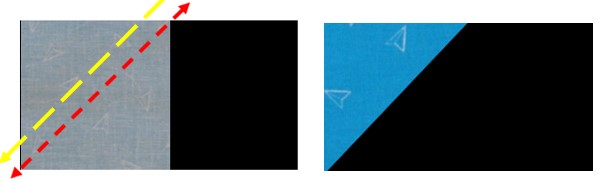
Mark a diagonal line across the centre of 8 Black 2.5” x 2.5” squares and 8 Blue 2.5” x 2.5” squares. You can do this with either a sharp 5b/6b pencil or a chalk pencil.
Make FG Unit 1
STEP 4:
Place one Black 2.5” square on the top left corner of a Blue 2.5” x 4.5” rectangular strip.
Sew along the diagonal line.
Trim 0.25” (¼”} away from the stitch line.
PRESS toward the darker fabric.
STEP 5:
Place one Black 2.5” square on the top right corner of the same Blue 2.5” x 4.5” rectangular strip.
Sew along the diagonal line.
Trim 0.25” away from the stitch line.
PRESS toward the darker fabric.
Repeat to make a total of four of these FG units.
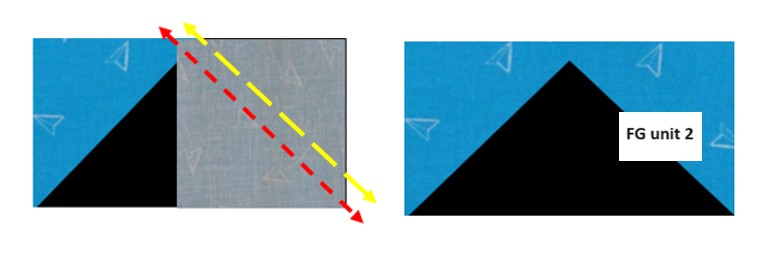
Make FG Unit 2
STEP 6:
Place one Blue 2.5” square on the top left corner of one Black 2.5” x 4.5” strip.
Sew along the diagonal line.
Trim 0.25” away from the stitch line.
PRESS toward the darker fabric.
STEP 7:
Now place one Blue 2.5” square on the top right corner of the same Black 2.5” x 4.5” strip.
Sew along the diagonal line.
Trim 0.25” away from the stitch line.
PRESS toward the darker fabric.
Repeat to make four of these FG units.
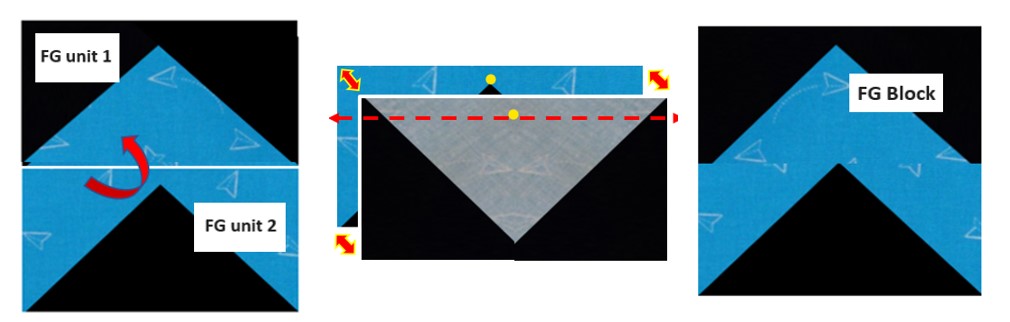
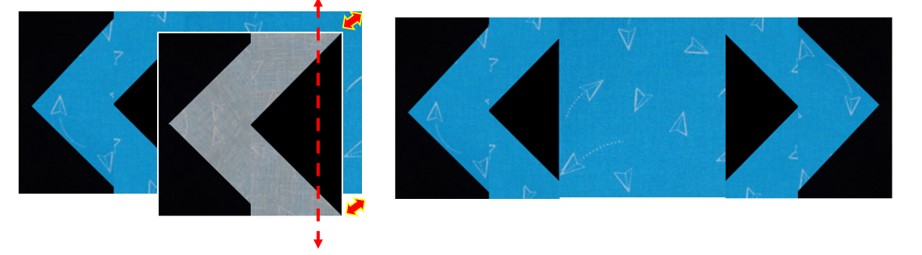
STEP 8:
Sew the two FG units together using a 0.25” seam as shown. Flip FG unit 1 with the point downwards and facing RS together with FG unit 2. Your seam line should intersect where the point is on FG2.
PRESS the centre seam open. Repeat to make a total of four of these FG Blocks. Don’t worry if they look a bit odd as once you add the corner pieces all will be well! It looks like a chevron doesn’t it?
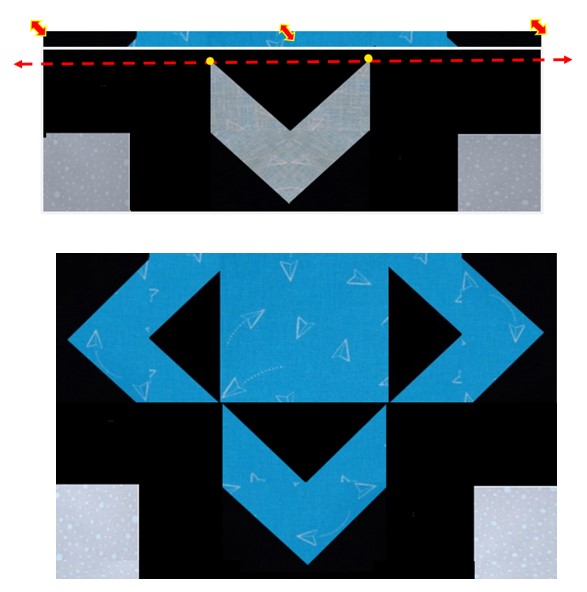
STEP 9:
Lay out the blocks as below, it’s good to have a picture in your mind of what the block will look like when finished.
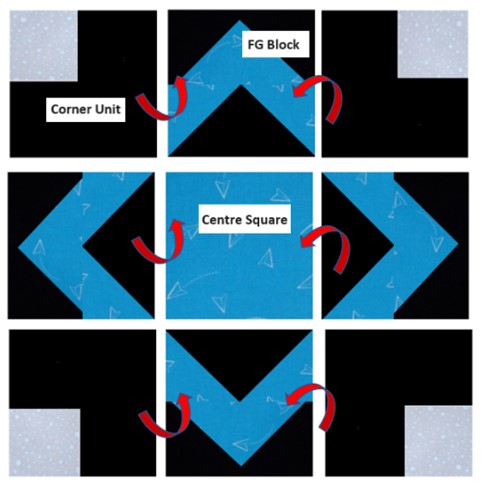
STEP 10:
Top Row
Place a Corner unit RS facing you with the Grey square top Left. Align the FG block as shown and sew a seam 0.25” away from the RH edge
PRESS open.
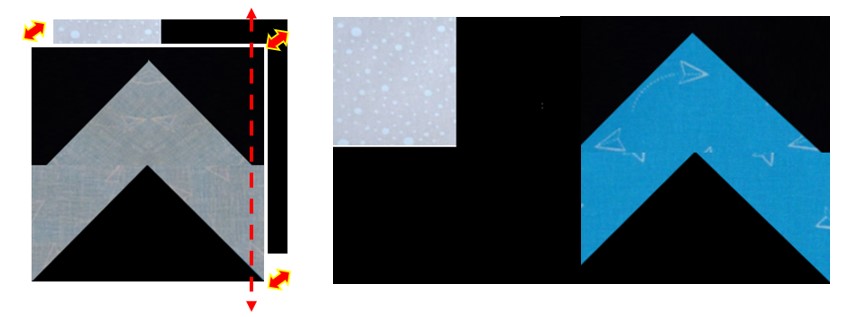
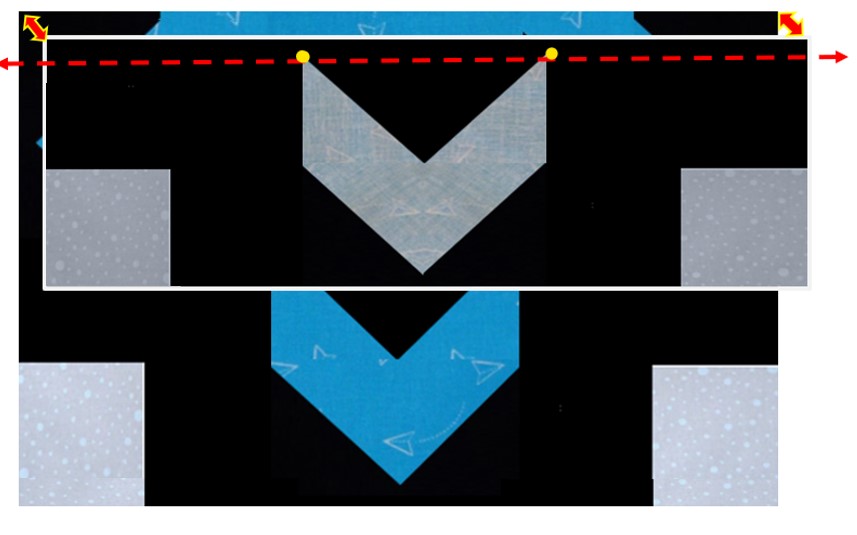
STEP 11:
Place a Corner unit/FG block piece RS facing you. Align the Corner Unit with the Grey square on the Top Left and sew a seam 0.25” away from the RH edge.
PRESS open. Top row is now done.
STEP 12:
Bottom Row
Repeat STEP 10 and STEP 11 then flip 180⁰ so the Grey ‘squares’ are at the bottom L/R corners. Done!

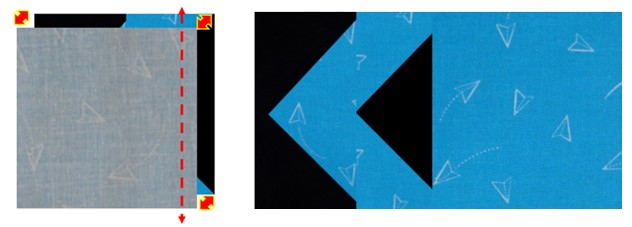
STEP 13:
Middle Row
Place one FG block RS facing up and the ‘points’ to the Left. Align and PIN the 4.5” x 4.5” Blue square and sew a seam 0.25” from the RH edge. PRESS open.
STEP 14:
Next, place the FG block/Centre square with RS facing up. Take another FG block and flip it so the ‘point’ is facing left. Align and PIN then sew a seam 0.25” away from the RH edge. PRESS open.
Middle row done!
STEP 15:
Sew all the three rows together: Top/Middle
Place the Middle Row with RS facing you. Now take the Top Row and flip it so the FG ‘point’ is at the bottom (RS facing each other).
Align, PIN and sew a seam 0.25” away from the edge.
PRESS open.
Flip it again so that the Top Row becomes the Bottom row!
STEP 16:
Place the remaining row as shown. Align and PIN. Sew a seam 0.25” from the edge. PRESS open.
Voila, you’ve made your fifteenth and final block!

Well, that’s the FINAL block in the QuiltSewGo Beginners’ Samper Quilt series. I hope you have enjoyed making the blocks and feel that you now have more confidence to tackle any quilt block you fancy making.
There are so many other blocks out there that you can make using shaped templates too, some of which I’ve never used. These include Drunkards Path, Orange Peel, Dresden Plates, Tumbler, Winding Ways, Joseph’s Coat, Double Wedding Ring to name but a few. Perhaps my next sampler quilt should use some of these templates and/or techniques!
So, what’s next? In a few weeks’ time I will post the blog for Finishing your Sampler Quilt, this will give you some breathing time to finish off your blocks.
Coming soon: Finishing your Quilt: Sashing, Borders, Layering, Quilting and Binding

Carol Lightburn
Twitter: @quiltsewgo Instagram: quiltsewgo
Twitter: @ukquilters Instagram: uk_quilters_united

Hi Chris, I planning to have the sashing and finishing completed by next weekend (12 March). There are several different ways to finish off a quilt and I’m conscious of the different levels of skills and confidence that we all have so I want to make it as accessible as I can.
Thank you for your comments about the clear instructions, it’s really nice to have some feedback. I hope you have enjoyed this series.
I’ve enjoyed making this, thank you for the clear instructions. When will the sashing and finishing be available please?